Did you encounter the “Failed to connect to a Windows service” issue? Did you fix it successfully? This post offers you 5 solutions to solve the failed to connect to a Windows service Windows 10 problem. In addition, you can visit MiniTool to find more Windows solutions and tips.
Issue: Failed to Connect to a Windows Service
You may have received this error message Failed to connect to a Windows service, especially after a system update. In many instances, this error can be caused by various reasons, such as the System Event Notification Service, Windows Event Log service error, Windows Font Cache service error and so on.
It affects a wide range of services and their functionality. Do you know how to fix this issue? If not, don’t worry, in this post, we will present you five measures to solve the Windows service start failure. Before following these instructions, it is recommended to back up your important files to keep your data safe.
Back up Files with MiniTool ShadowMaker Beforehand
Before taking measures to solve the Windows could not connect to the System Event Notification Service problem, you should backup files or your computer to keep data and PC safe. Here, we recommend MiniTool ShadowMaker.
The best backup software – MiniTool ShadowMaker is quite popular because of its various powerful functions. It can help users backup system, important files and folders, the whole disk, and selected partitions. With a copy of the backup, you can restore your data when something goes wrong, like a system crash, hard drive failure, or more. It can also help you synchronize your files and folders to different destinations.
With so many ease-to-use functions, you can trust MiniTool ShadowMaker to keep the data on your computer safe and secure before taking measures to fix the problem unable to connect to a Windows service. Get MiniTool ShadowMaker Trial from the following button or click here to get an advanced one.
MiniTool ShadowMaker TrialClick to Download100%Clean & Safe
Next, we will show how to use MiniTool ShadowMaker to back up your files.
Step 1: Install the software, launch it and click Keep Trial.
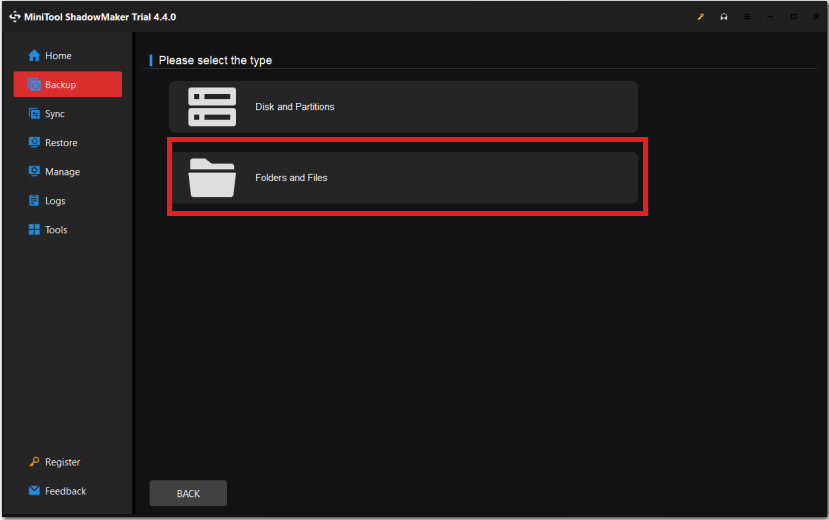
Step 2: Enter its main interface > click Backup > SOURCE > Folders and Files.
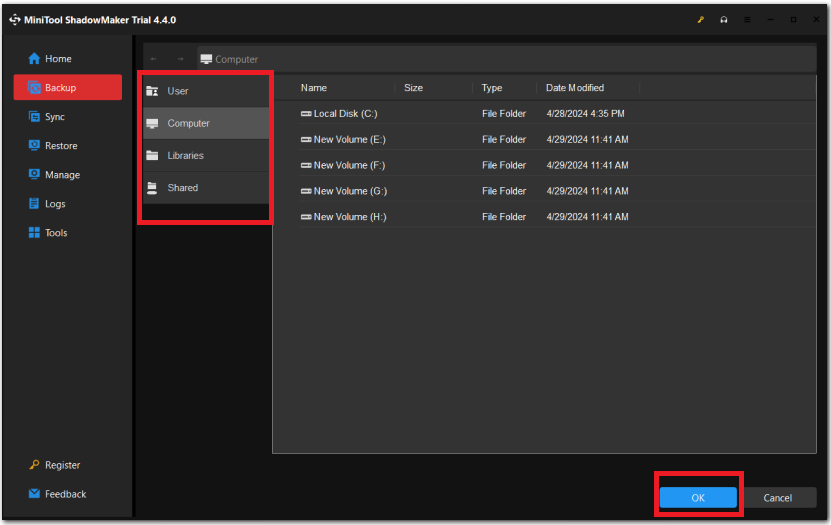
Step 3: Select what you want to back up, and click OK.
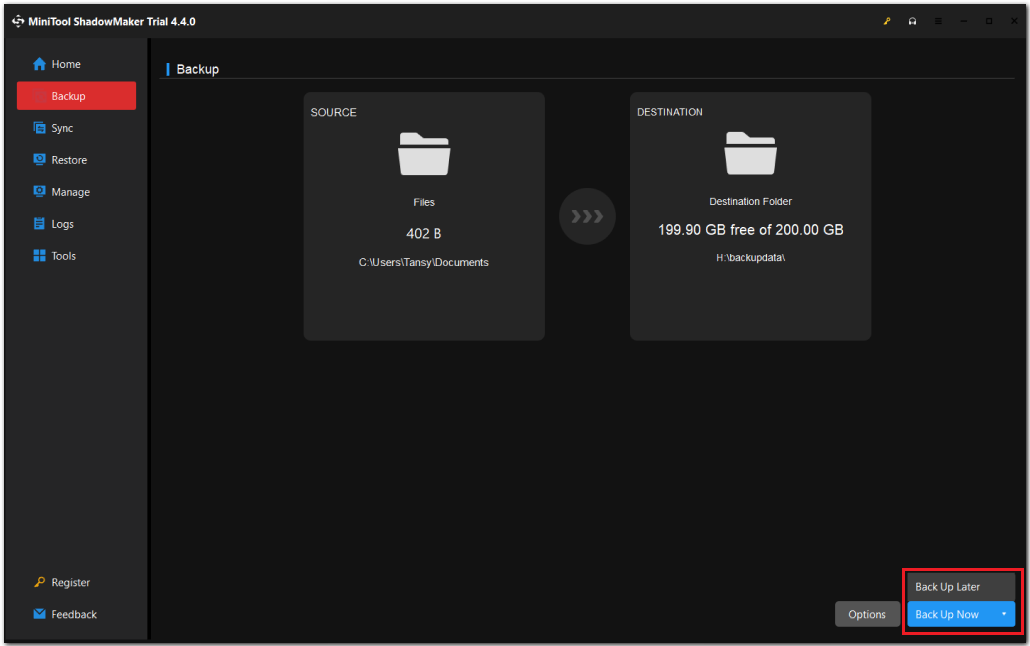
Step 4: Click DESTINATION, choose a destination path to save your backup image, and click OK.
Step 5: Go back to the Backup tab, and select Back Up Now or Back Up Later.
Five Solutions to Solve This Problem
When the issue happens, the methods below can help you solve it. You don’t have to try them all, just try the one that works for you.
Solution 1: Delete Windows Log Files
Windows log files is a system information file generated by Windows and other applications to record noteworthy system operations and major errors that Windows or programs encounter. Sometimes, corrupted Windows log files might cause the failed to connect to Windows service error. To fix the issue, follow these steps to delete all the log files.
Step 1: Hit Win + E together to the File Explorer.
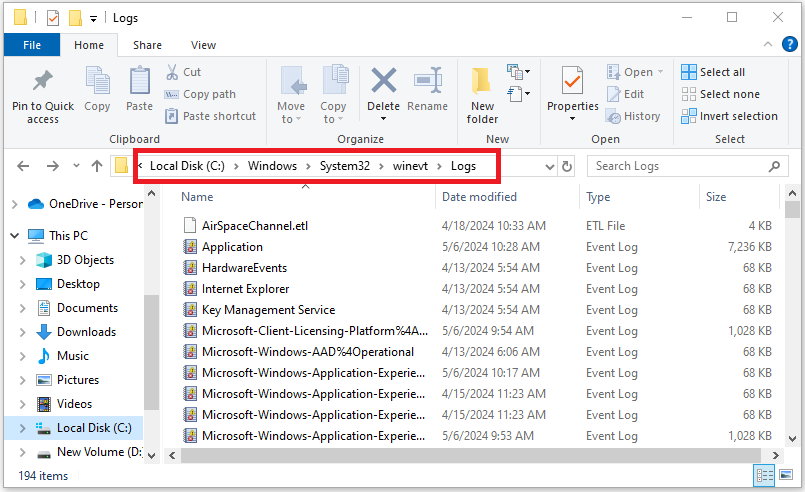
Step 2: Go to C:\Windows\System32\winevt or C:\Windows\System32\config
Step 3: Find Logs, double-click it, choose the log items you want to delete, and right-click them to select Delete.
Solution 2: Check if System Event Notification Services Are Running or Not
If the first method is not effective, you can try the second method to solve the problem. There are some necessary services for the proper functioning of the system. The failure to connect to a Windows service problem might occur due to incorrect settings for the System Event Notification Service. Now follow the steps below to check.
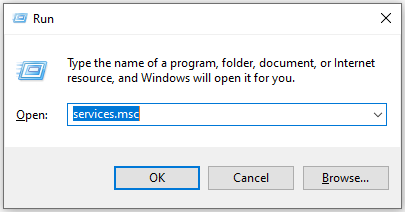
Step 1: Press Win + R together to open the Run dialog.
Step 2: Type services.msc and click OK to open Services.
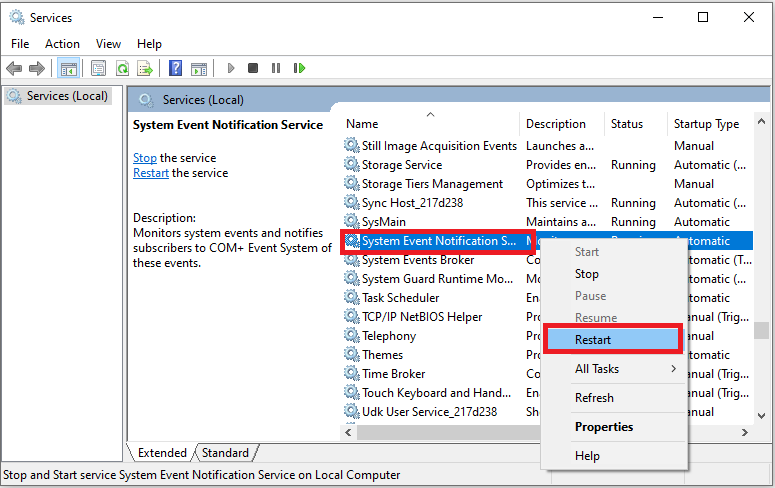
Step 3: Locate and right-click System Event Notification Service to select Restart.
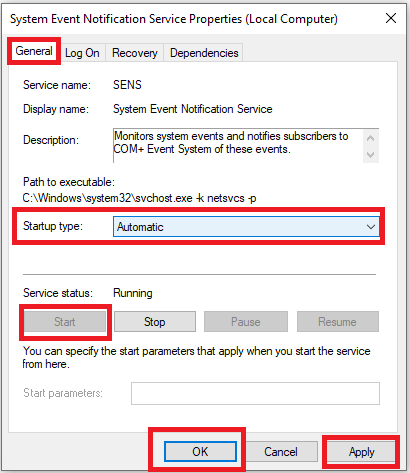
Step 4: Right-click System Event Notification Service again, and choose Properties.
Step 5: Set the Startup type to Automatic, and click Start > Apply > OK.
Step 6: Reboot your computer and check if the error message is gone.
Solution 3: Disable Windows Font Cache Service
Windows Font Cache Service is an essential component of the Windows operating system. When the system needs to load certain fonts that are frequently used by applications and other programs, these fonts are stored in a cache file called Font Cache. This file makes accessing the fonts easier and faster.
According to some users, Windows Font Cache Service can sometimes cause issues with other services. Therefore, you need to restart the service and delete the FontCache.DAT files from the system to see if it helps. There are some steps for you as a reference.
Step 1: Press Win + R keys to open the Run box.
Step 2: Type services.msc and click OK to open Services.
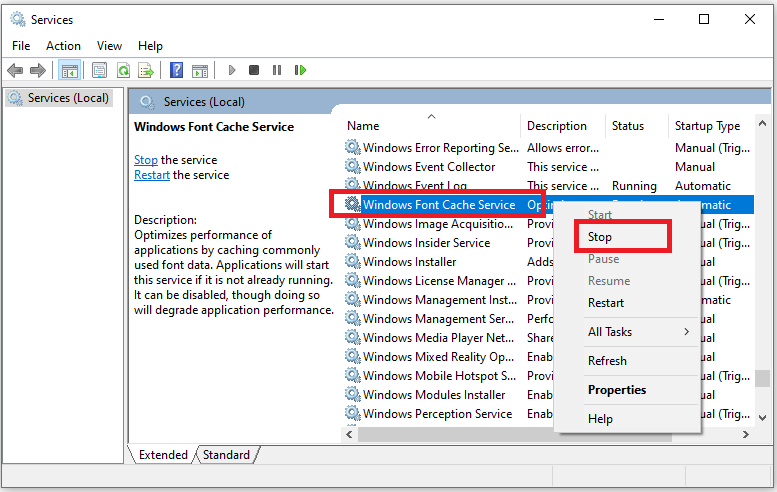
Step 3: Locate and right-click Windows Font Cache Service, then choose Stop.
Step 4: Press Win + R keys, type %localappdata% and click OK.
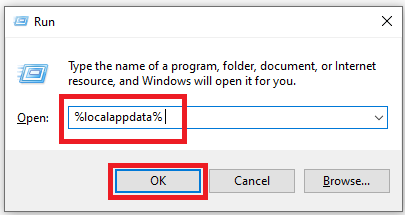
Step 5: Locate and delete FontCache DAT files.
Step 6: Go back to the service window, right-click Windows Font Cache Service and select Start.
Solution 4: Use Netsh Winsock Reset Command
Problems with the System Event Notification Service may have been caused by the Winsock catalogue. No need to panic, resetting it might work for you. Now follow the instructions below.
Step 1: Type cmd in the search box to open Command Prompt and choose Run as administrator.
Step 2: Type netsh winsock reset in the command prompt and hit Enter.
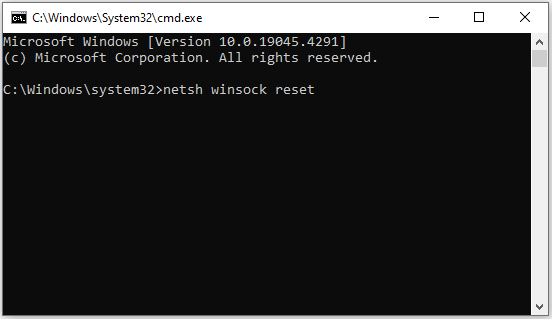
Step 3: Restart your computer and check whether the issue is solved.
Solution 5: Perform a Clean Boot
Clean boot is a troubleshooting method that works by loading only essential files and programs while disabling all non-essential programs and services that normally run at boot time. This can help identify if any third-party application or background service is the potential culprit of the Windows could not connect to the System Event Notification Service issue.
Below, you can follow the step-by-step instructions to perform a clean boot in Windows 10.
Step 1: Press the Win + R keys together to open the Run dialog.
Step 2: Type msconfig and click OK to open System Configuration.
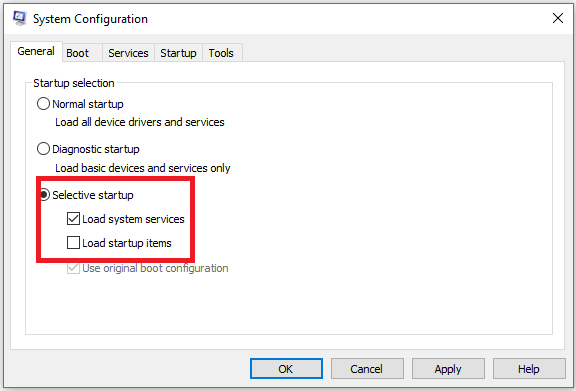
Step 3: Under the General tab, choose Selective startup and uncheck Load startup.
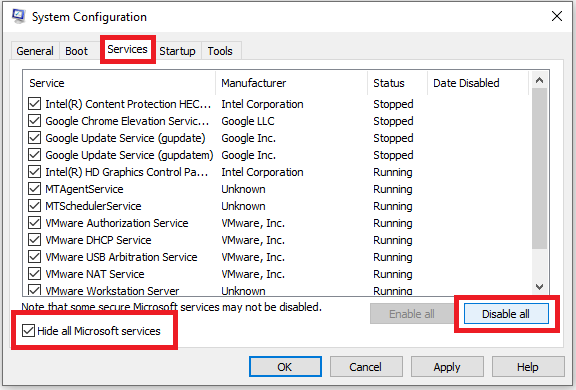
Step 4: Go to the Service tab, check the option Hide all Microsoft services, and click Disable all.
Step 5: Go to the Startup tab, click Open Task Manager, right-click each enabled startup item and select Disable.
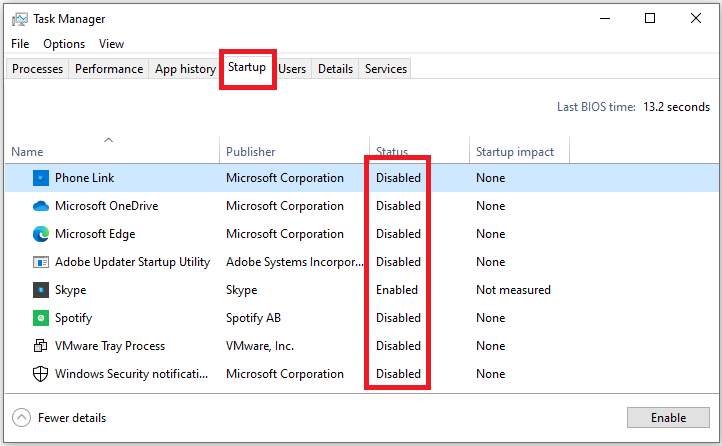
Step 6: Click OK and restart your computer.
Bottom Line
To conclude, this article has presented five solutions to fix the unable to connect to a Windows serviceissue – delete Windows log files, check if necessary services are running or not, disable Windows font cache service, use netsh winsock reset command, and perform a clean boot. Hope the solutions introduced in this article can lead you out of the woods.
What’s more, MiniTool ShadowMaker is recommended to help you keep data safe before you take measures to solve the issue. If you have any problem about MiniTool ShadowMaker, please don’t hesitate to contact us via [email protected].
Failed to Connect to a Windows Service Windows 10 FAQ
2. Check if System Event Notification Services Are Running or Not
3. Disable Windows Font Cache Service
4. Use Netsh Winsock Reset Command
5. Perform a Clean Boot