What Is File Synchronization?
File synchronization is a way to sync files and folder to other locations such as external hard drives or USB drives so as to keep data safe.
There are two different types of file synchronization including the one-way file synchronization and the two-way file synchronization. The one-way file synchronization is called mirroring. In the one-way file synchronization, the files are copied from the source location to one or more locations but the files are not copied back to the source location.
That is to say, the files are expected to change in one location only. In order to reconcile the changes, the synchronization process can only be one direction.
On the other hand, in the two-way file synchronization, the files are copied in both directions, which means that the files are expected to change in both locations and they are considered equivalent.
And nowadays, file synchronization has become increasingly popular because it is an effective way to keep data safe.
Thus, do you want to make a file synchronization so as to protect your files and folders? Or do you know how to sync files and folders with ease in Windows 10/8/7?
In the following part, we will show you the answers.
How to Sync File with MiniTool ShadowMaker?
As a matter of fact, making file synchronization can be very easy as long as you take advantage of the useful tool.
In order to sync files and folder, the best file sync software – MiniTool ShadowMaker is strongly recommended. It is a piece of professional and reliable free sync software.
MiniTool ShadowMaker can help you to easily sync files and folders with its powerful features. In addition, in order to provide better protection for your data and files, MiniTool ShadowMaker also enables you to sync files and folders periodically.
Of course, besides the file synchronization features, MiniTool ShadowMaker is also a professional backup tool which enables you to back up files, folders, partitions, the entire hard disk, and even the operating system. And you can read the post Easily & Free Create a Windows 10 Image Backup Now – MiniTool to learn how to create Windows 10 system image.
What’s more, MiniTool ShadowMaker also enables you to perform some recovery solutions when some accident occurs.
So in order to keep data and files safe, you can download the file synchronization software – MiniTool ShadowMaker Trail from the following button which can be used for free within 30 days. Or you can choose to purchase an advanced edition.
MiniTool ShadowMaker TrialClick to Download100%Clean & Safe
And, we will show you how to sync files and folders with the best free file sync software.
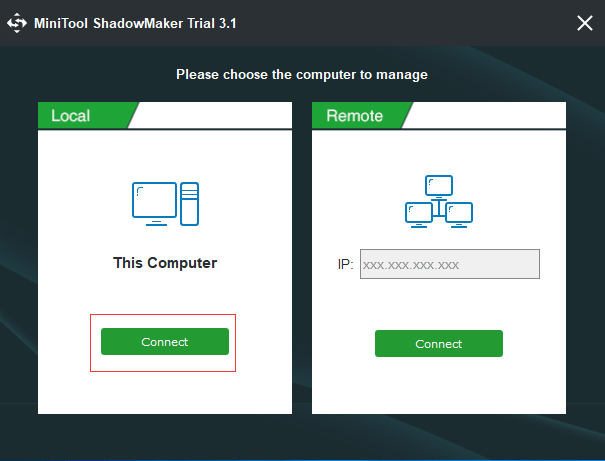
Step 1: Install the Windows file sync software and launch it, click Keep Trial, and click Connect in This Computer to enter its main interface.
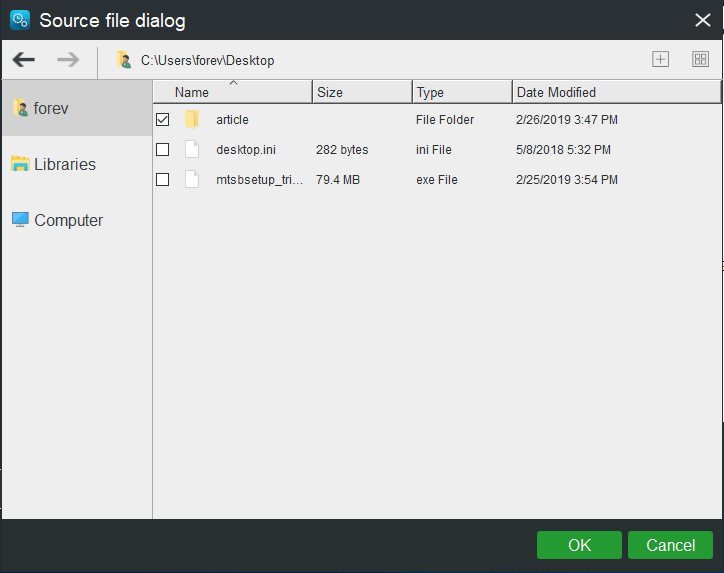
Step 2: After entering its main interface, please go to the Sync page to continue. You need to click Source module and check the files or folders you want to sync in the popup window. Then click OK to continue.
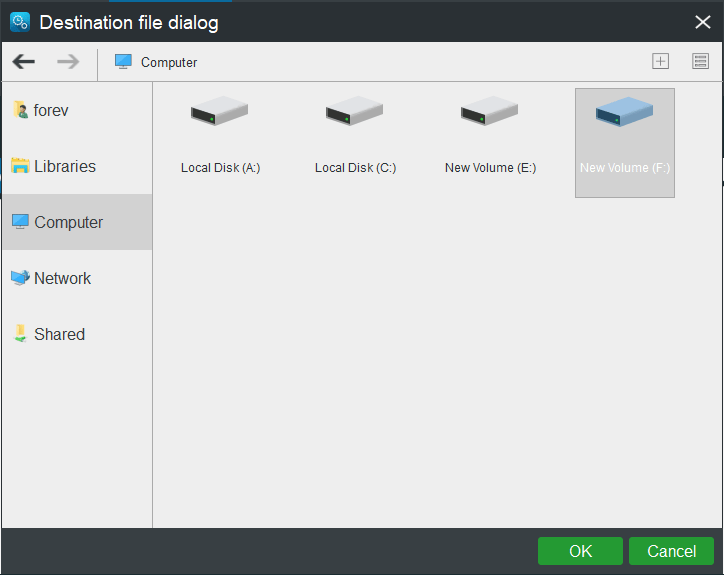
Step 3: Next, you are required to choose a destination path. MiniTool ShadowMaker, the free sync software, chooses a synchronization destination by default. You can also click the Destination module to change.
In the popup window, you can see there are five destination paths to be chosen including User account, Libraries, Computer, Network, and Shared folders. Thus, you can choose any one depending on your own needs and click OK to continue.
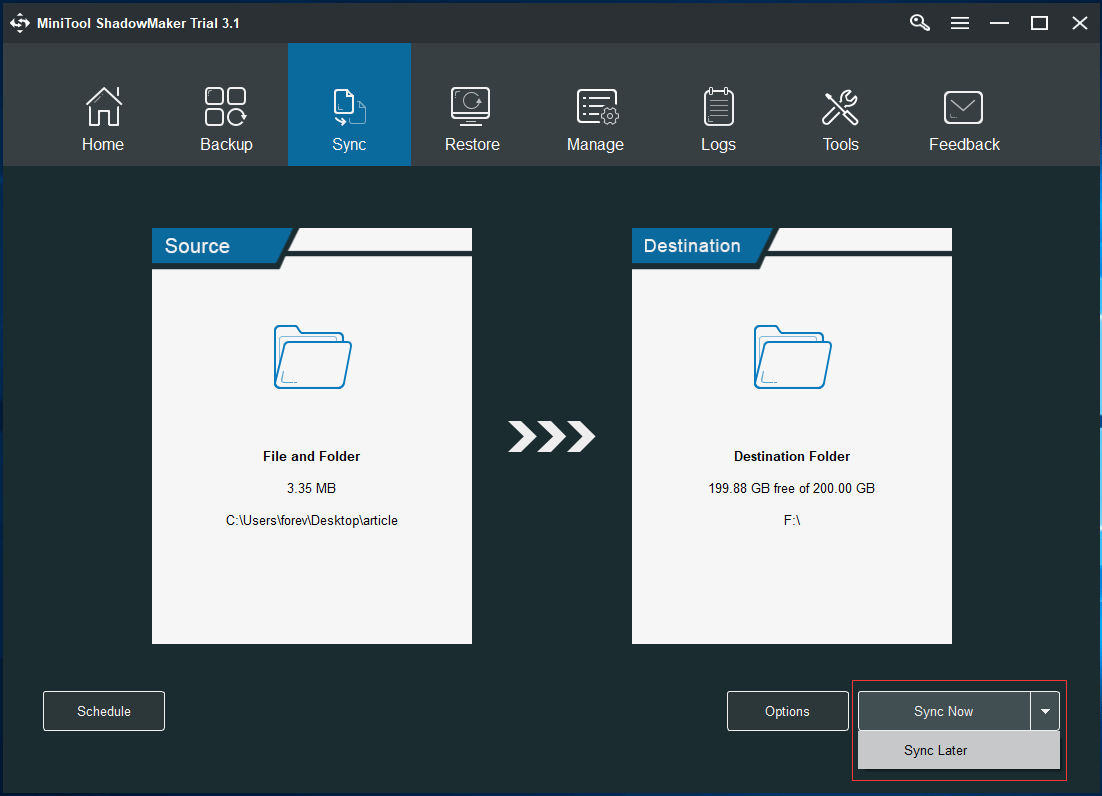
Step 4: After selecting the synchronization source and destination, click Sync Now to perform the file synchronization action immediately. Or you can click Sync Later to delay the file synchronization and then start the file synchronization task in the Manage page.
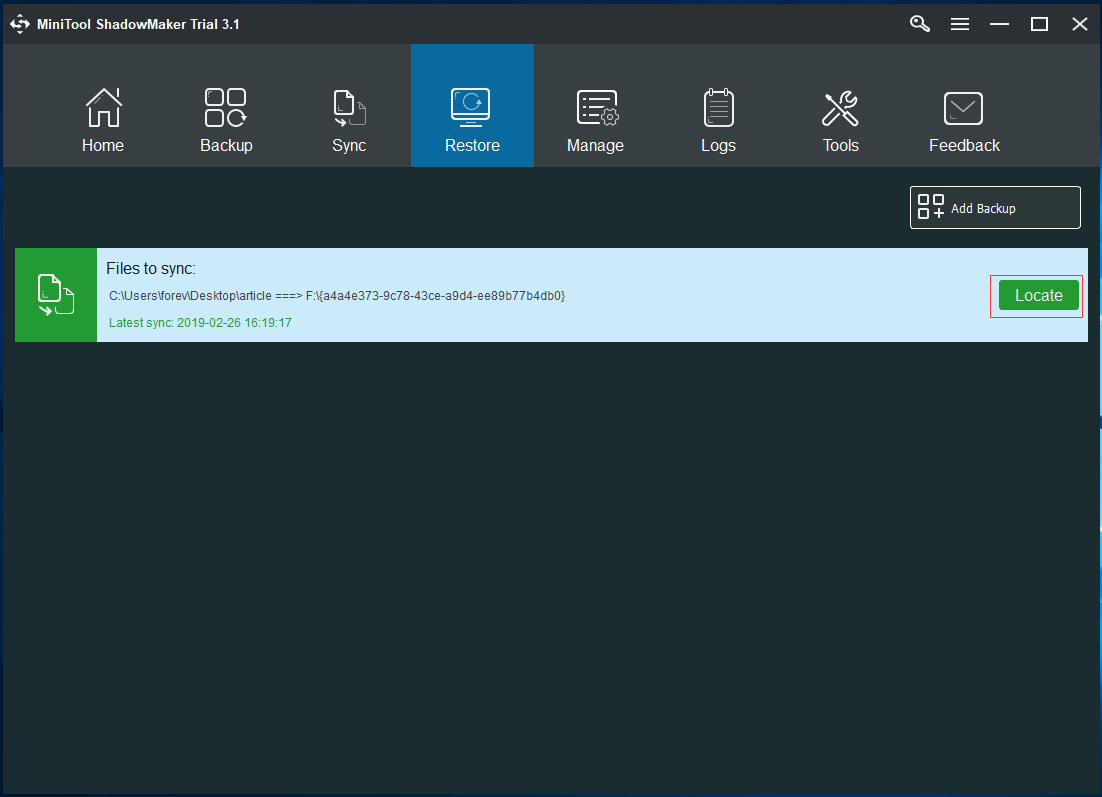
Step 5: When all steps are finished, you have successfully completed the file synchronization. And if you need to restore the files when some accidents happened, you can go to the Restore page and click Locate to find the target files.
Now, you have successfully performed file synchronization. In order to keep data safe, you had better download the best file sync software – MiniTool ShadowMaker.
MiniTool ShadowMaker TrialClick to Download100%Clean & Safe
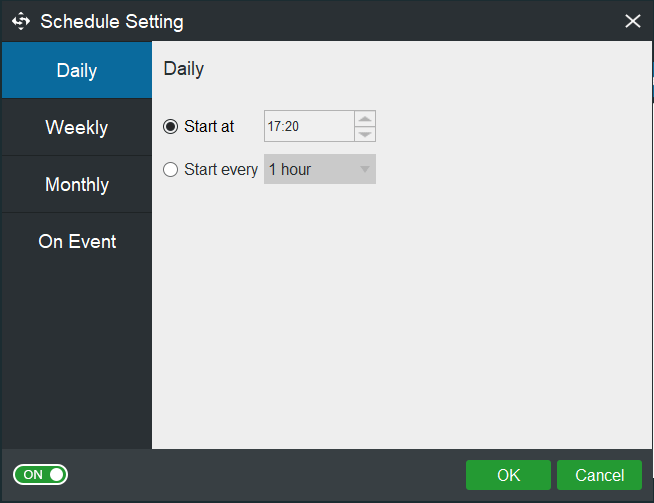
And here, there are some things you need to pay attention to. You may have noticed there are two buttons which are Schedule and Options at the bottom of the Sync page. The Schedule button allows you to set the file synchronization on a regular basis and the Options button provides some advanced file sync parameters.
You can see there are four options including Daily, Weekly, Monthly, and On Event in the popup window after clicking the Schedule button. And you can set the automatic file sync time and click OK to continue.
For more information, you can read the post: Automatic Backup Software, MiniTool ShadowMaker, for PC Protection
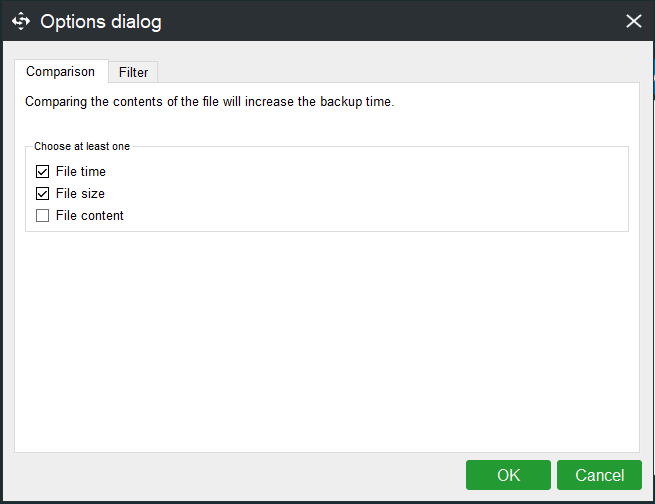
After clicking the Options button, you can get some advanced file sync parameters.
Comparison
The folder sync software – MiniTool ShadowMaker enables you to compare the synchronization source and the target file through the file time, file size, and file content. The File time and File size are checked by default and checking File content will increase the backup time.
Filter
When you set the automatic file sync, MiniTool ShadowMaker enables you to set some exclude conditions to filter backup files. If you want to exclude some files, you can check them.
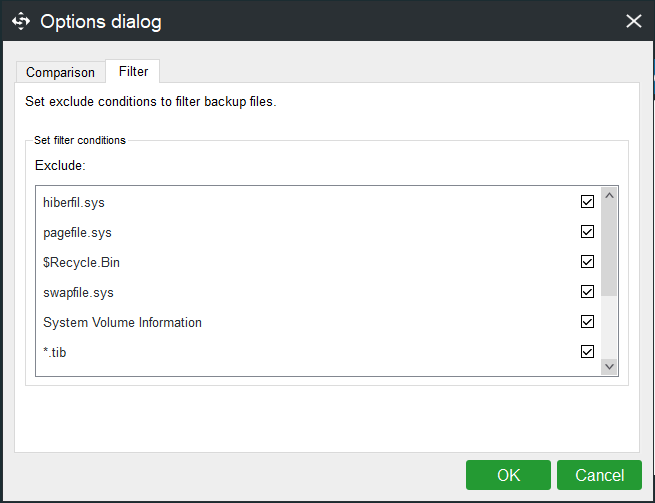
In the above part, we have introduced some main features of the file sync software – MiniTool ShadowMaker. In order to keep data safe, MiniTool ShadowMaker would be competent with its powerful features. It also enables you to make a sytem restore.
Another File Sync Software – Windows Sync Center
In addition, some of you want to use Windows best free file sync software, Sync Center for file synchronization. Sync Center allows you to sync files between your PC and offline files which are saved in the folders of the network servers.
And now, we will show you how to use the Windows files sync software – Sync Center to sync files step by step with pictures.
How to Open Sync Center?
In order to sync files and manage offline files with the Windows snap-in tool – Sync Center, you need to open Sync Center firstly.
And here, we will show you how to perform file synchronization and manage offline files.
Step 1: Type Control Panel in the search box of Windows 10 and choose Sync Center in the popup window to continue.
Step 2: In the popup window, choose Manage offline files in the left pane to continue.
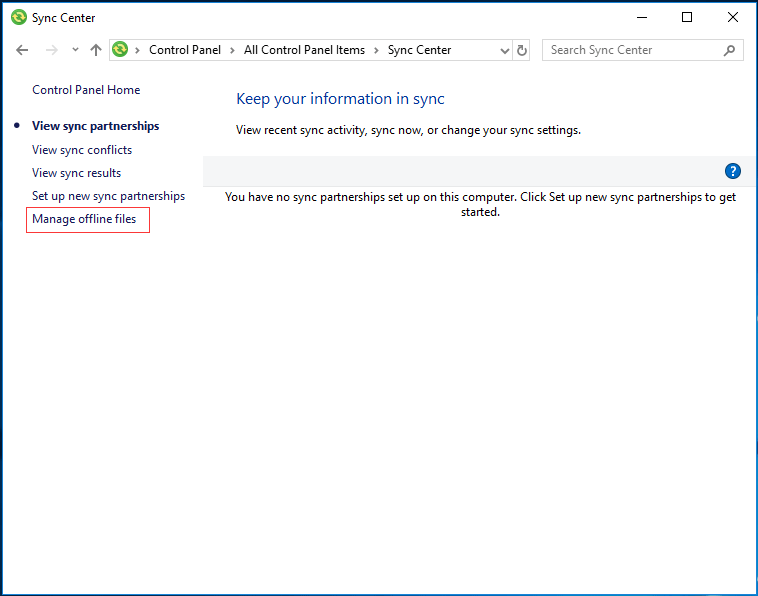
Step 3: In the popup window, click Enable offline files and restart the computer to open the file synchronization software.
Now, you have launched the file sync software – Sync Center. And if you want to sync files or manage offline files, a shared folder is required. Thus, you need to create the folder you want to sync as a shared folder. And the shared folder should be created on another computer.
And in the following part, we will show you how to create a shared folder.
Create a Shared Folder
Step 1: Open the Network & Internet settings from the right-bottom of the computer and enter its main interface. Then click Sharing options to continue.
Step 2: In the popup window, check the option Turn on network discovery, the option Turn on file and printer sharing, and the option Turn off password protected sharing. Then click Save changes to continue.
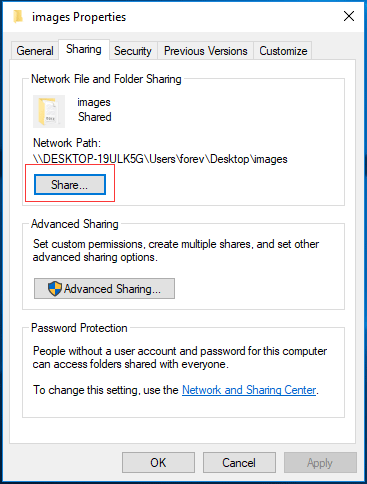
Step 3: Right-click the folder you want to sync and choose Properties to continue. In the popup window, please go to the Sharing tab and click Share…to continue.
Step 4: Next, please input guest in the box and click Add to continue. Change the permission to Read/Write and click the Share button to continue.
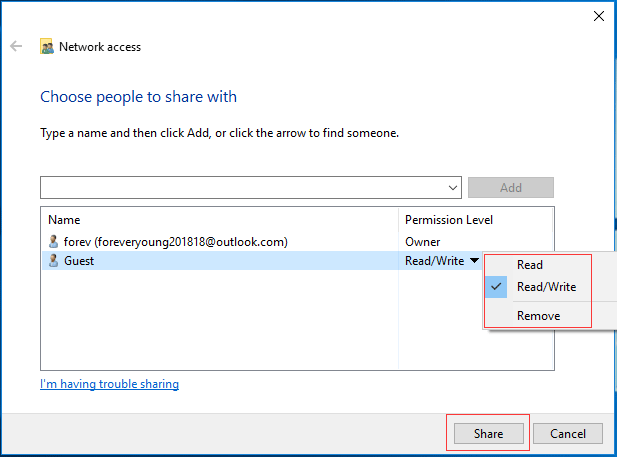
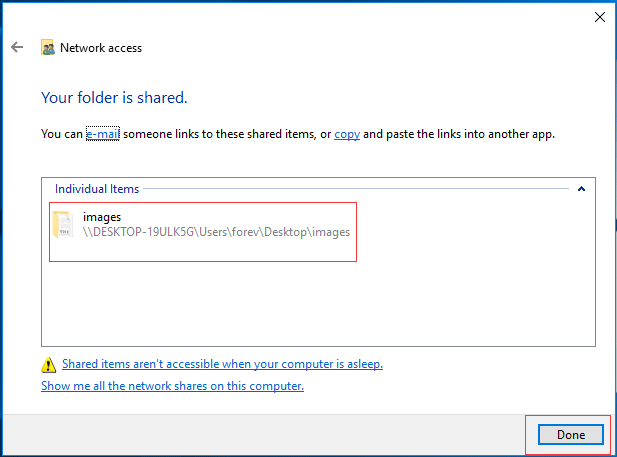
Step 5: In the popup window, click Done to continue.
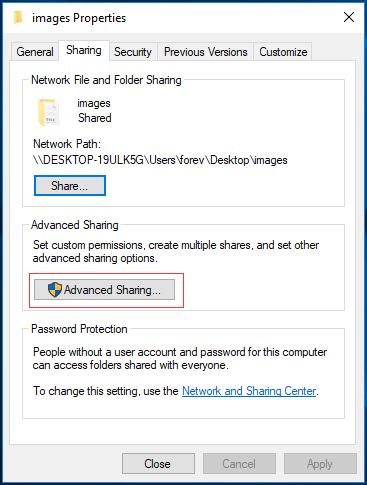
Step 6: Returning to the Properties window, click Advanced Sharing… to continue.
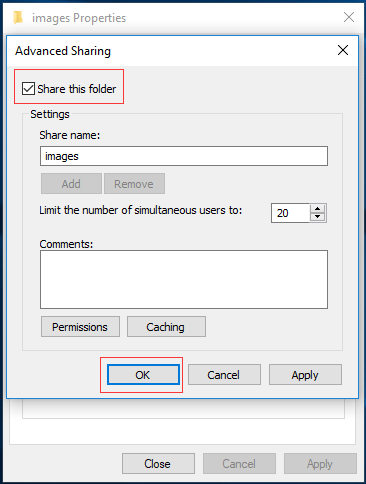
Step 7: In the popup window, check the option Share this folder and click OK to continue. At last, close this window.
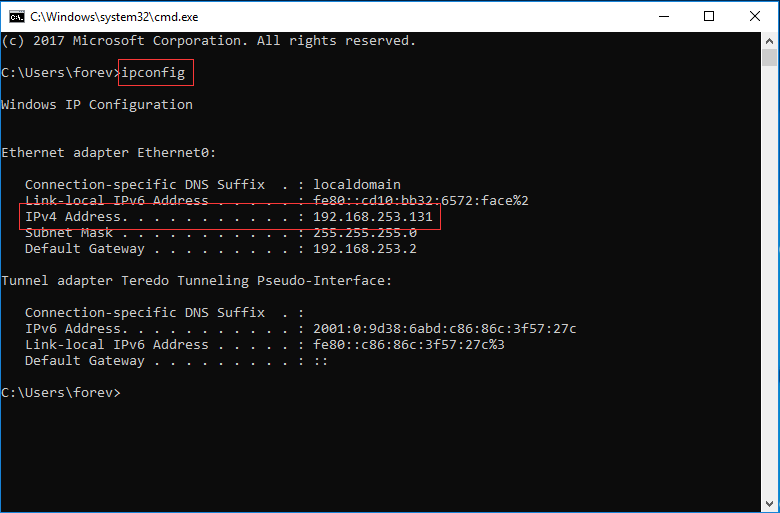
Step 8: Please press Windows key and R key together to open Run dialog and input cmd to continue.
Step 9: Then input the ipconfig command in the command line window and press Enter to continue. And please remember the IPv4 address which will be used to enter the shared folder.
Now, you have created a shared folder and it is time to performing file synchronization and managing offline files.
How to Sync Files and Manage Offline Files?
Here are the detailed instructions to sync files and manage offline files.
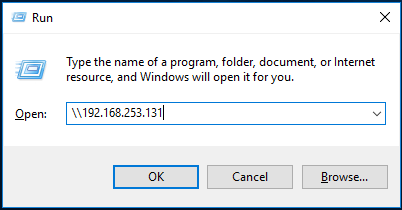
Step 1: Press Windows key and R key together to open the Run dialog on the computer which has launched the Sync Center and input the \\ plus the IP address in the box and click OK to continue.
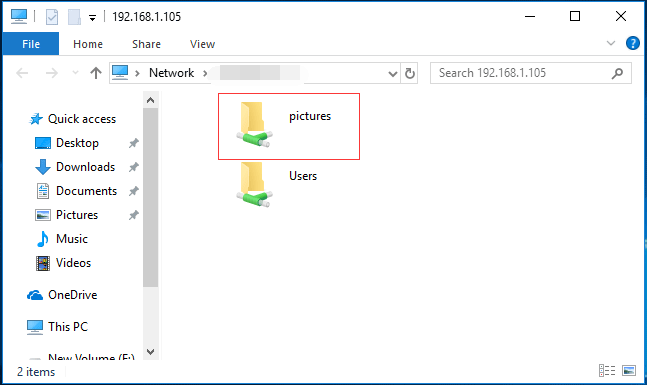
Step 2: In the popup window, you can see the shared folders are listed here.
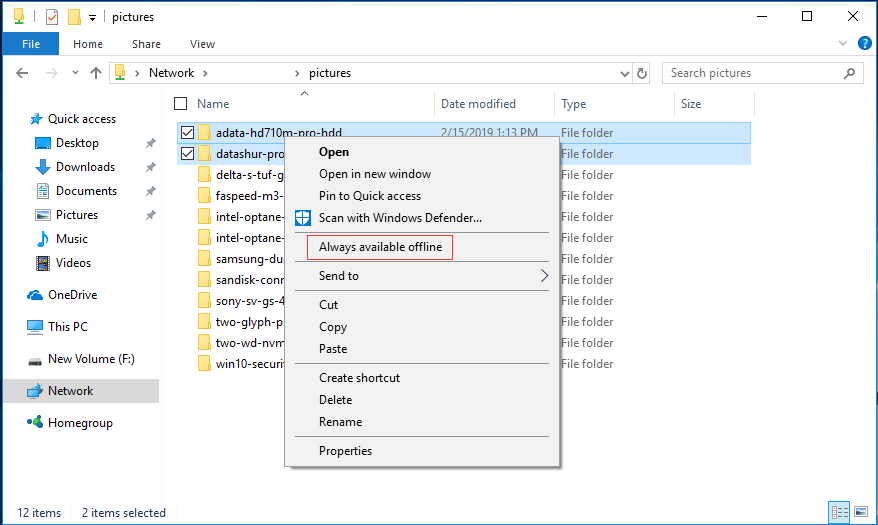
Step 3: Double-click the shared folder and you can see all items are listed here. Check files you want to manage when the computer is offline and choose Always available offline from the context menu to continue.
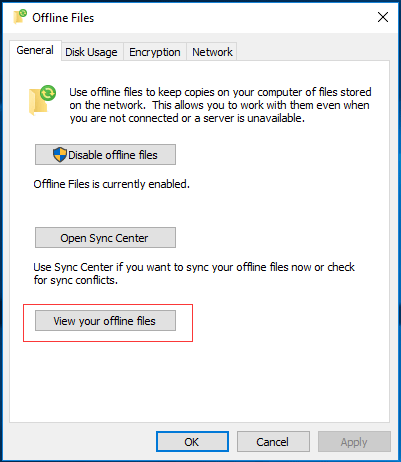
Step 4: Then you can open the folder sync software – Sync Center to view your offline files by clicking View your offline files.
Step 5: Then you can see that all your files are listed here and you can manage them even when they are offline or not connected with the computer.
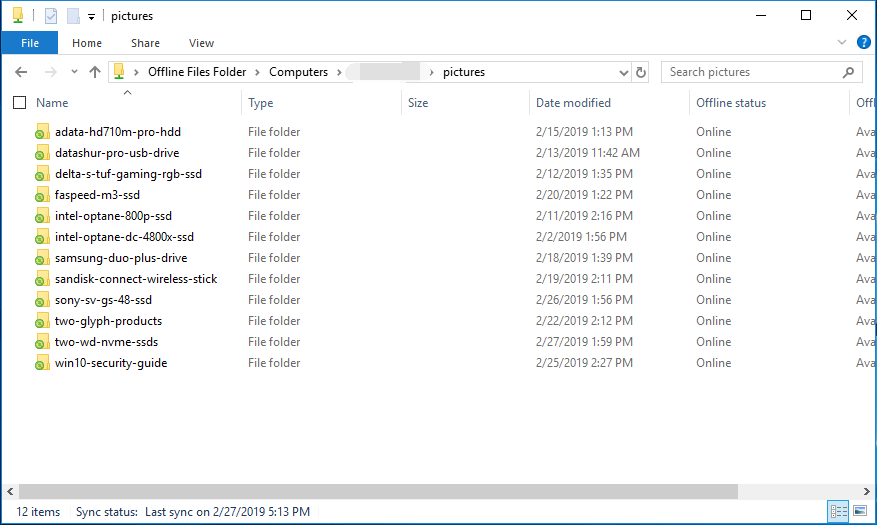
So when you have finished all the steps, you have successfully synchronized files so as to keep data safe. And if you have made some changes of the files in the shared folder, the synchronized files will update the changes too.
All in all, compared with the best file sync software – MiniTool ShadowMaker, the Windows snap-in tool is more complicated and difficult. So if you want to sync files and folder, in my opinion, MiniTool ShadowMaker is a better choice. Besides syncing files, you can also choose to back up files to keep data safe.
Related article: 5 Ways to Protect Our Inmportant and Valuable Data in Windows
MiniTool ShadowMaker TrialClick to Download100%Clean & Safe
Bottom Line
In conclusion, we have introduced two pieces of file sync software in this post. As far as I can see, MiniTool ShadowMaker is better than the Windows Sync Center since it is easier and more convenient.
However, if you have any better solution to sync files, you can share it on the comment zone.
In addition, if you have any problem with MiniTool ShadowMaker, please feel free to contact us via the email [email protected].
