What is free file sync in Windows 10? Why do you need to sync files for free and how to enjoy this function with Sync Center, Microsoft OneDrive and MiniTool ShadowMaker? This article on MiniTool Website will give you satisfying answers. Without any further chit-chat, let’s dive right in.
What Is File Sync?
Living in the information era, you put in and out data including files, folders, pictures, documents, forms, emails and so on all the time. Huge losses will take place if your important files & folders are missing. Take file loss as an example, all your efforts are in vain and you have to start your work from scratch.
What a desperate experience it is! Sync is an effective way to avoid such data loss. It is a method of keeping your files that are saved in various locations up to date.
Types of File Sync
There are 2 types of file sync including one-way file sync and two-way file sync.
One-way file sync also called mirroring which pushes your files from the source platform to the destination location in one direction and no files will be copied back to the original location. If you make some changes in your sync copies, your file sync source will remain unchanged.
Two-way file sync allows files to be copied in both directions and files in the source and target location are considered to be equivalent. This sync method is often used in work environments where files are often updated in multiple locations and then synchronized with other locations. Two-way file sync is a great way to use the same files on your mobile device and computer, no matter what computer you’re using, and you want to make sure that every file you’re already using is always the latest version.
Why Do You Need Free File Sync?
For many of you who are working from home, file sync is an indispensable part of your life. No matter when or where, as long as there is an internet connection, you can work on the spot if you know how to sync files for free. Normally, file sync is expensive thus free file sync becomes a hit in recent years.
In this article, we will show you the three best free file free software to free file sync Windows 10. One is free file sync with Microsoft OneDrive, the other two are free file sync with MiniTool ShadowMaker and Sync Center. Although there are a few charging items, most functions are free and the free part is enough for you to use.
Free File Sync with Windows Sync Center
Sync Center is one of the useful features in Windows 10 which allows you to sync your files with a network server hence you can keep your data copies up to date when needing them. What’s more, you can gain your copies even if your computer is not connected to the network. Let’s start the free file sync journey with Sync Center!
Move 1: Enable Offline Files
Step 1. Open your Control Panel and type sync center in the search box and hit Enter to navigate to Sync Center.
Step 2. Click on Manage offline files and choose Enable offline files.
Step 3. Reboot your PC and do the two steps again to access the new offline files settings.
Move 2: Create a shared folder
If you need to sync folders on Windows 10 or manage your offline files on your local hard drive, you must create a shared folder.
Step 1. Right-click the internet icon on the bottom right corner of the screen and choose Open Network & Internet settings.
Step 2. Click on Network and sharing center under the Status tab.
Step 3. Hit Change advanced sharing settings.
Step 4. Tick the three options including Turn on network discovery, Turn on file and printer sharing and Turn off password protected sharing.
Step 5. Hit Save changes to confirm your actions.
Step 6. Now, you can create a shared folder on the network server. Just right-click the folder you want to share and select Properties.
Step 7. In the Sharing tab, hit Share.
Step 8. Choose Everyone & Read/Write under Choose people to share with and click Share to continue.
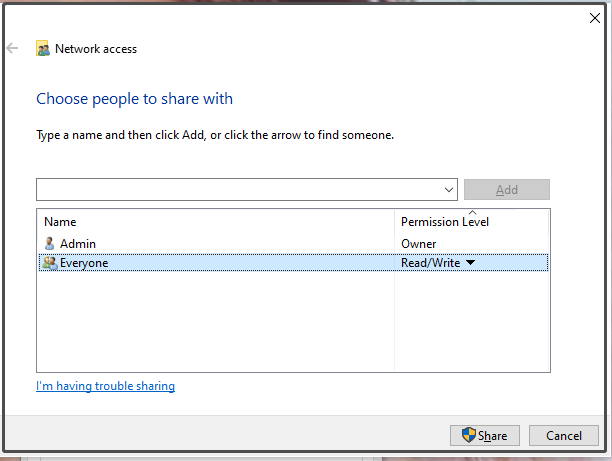
Step 9. Return to the Sharing section and tap on Advanced Sharing.
Step 10. Tick Share this folder and click Apply & OK.
Move 3: Get the IP Address and Sync the network Drive to Local Computer
Step 1. Type cmd in the search bar and hit Enter to open Command Prompt.
Step 2. Type ipconfig in the empty box and hit Enter to find your IPv4 adress.
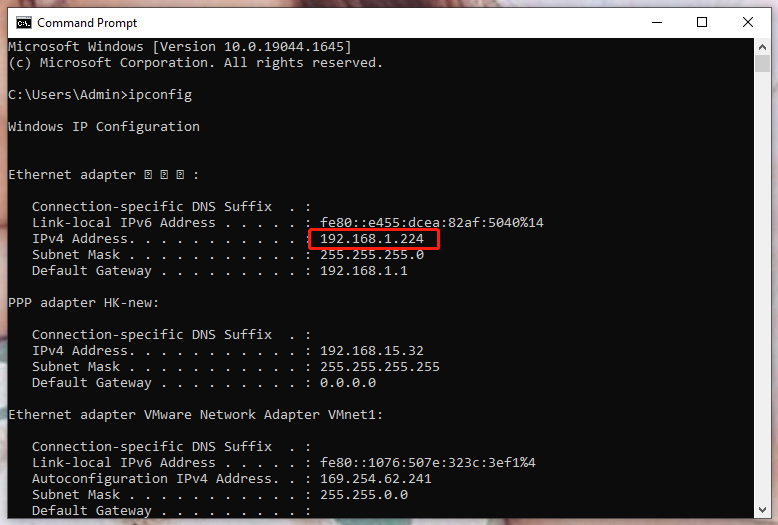
Step 3. Press Win + R to open the Run box.
Step 4. Copy & paste your IP address and add \\ in front of it, and click OK.
Step 5. After accessing the folder, choose the files/folders you would like to access at the local computer, right-click it and choose Always available offline.
Move 4: Sync Schedule for Offline Files
Step 1. Open Sync Center and right-click on Offline Files in the View sync partnerships section to choose Schedule for Offline Files.
Step 2. Choose the wanted items and click Next.
Step 3. Choose when you want this sync task to begin. Both At a scheduled time and When an event occurs are available for you. Here, we choose the first one as an example. Set the time according to your needs and then click on Next.
Step 4. You can name the sync file and click Save changes to make this action effective.
By now, your computer will sync your files on a regular basis.
Free File Sync with Microsoft OneDrive in Windows
Microsoft OneDrive is a Windows inbuilt app that can remain your files synced, protected and accessible on all your devices including your phones, pad, and PC. You can also share your files and pictures with your family and friends. Follow the instructions below for a free file sync.
Step 1. Type OneDrive in the search box and hit Enter to open it.
Step 2. After creating and signing in to your account successfully, you can see a page with the title of Your OneDrive folder. If you are sure to save your sync files by the default path, click on Next. If you want to change the location, click Change location.
Step 3. Click Next on the All your files, ready and on-demand screen.
Step 4. Now, there will be a blue or white cloud icon in the lower right corner of the screen. Select it and click on Help & Settings.
Step 5. In the Account section, tap on Choose folders.
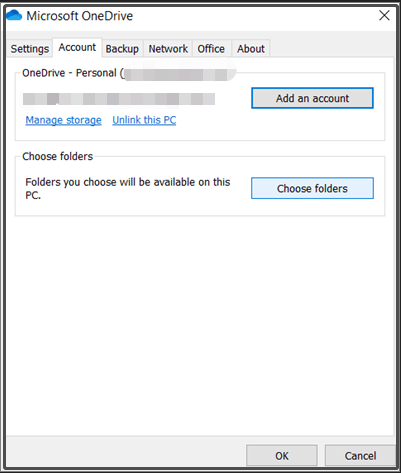
Step 6. On the Choose folders page, all files and folders are checked by default, so you need to uncheck unwanted and unnecessary files and folders. The unchecked files will be deleted from your PC but they are still accessible for you to visit online.
Unfortunately, it is reported by many users that OneDrive’s free file sync service in Windows 10 is much too slow. In addition, you might also encounter issues including OneDrive sync pending, OneDrive not starting, OneDrive error code 0x80070194, OneDrive not opening files and so on.
Free File Sync with MiniTool ShadowMaker
As mentioned above, you can obviously find that the process of getting a free file sync service with Sync Center is much too troublesome and there are all kinds of issues when deploying free file sync with OneDrive.
Here, we strongly recommend one of the best free file sync software, MiniTool ShadowMaker. It is a free sync software which enables you to sync your files or folders to two or more locations such as an external/internal hard drive, USB flash drive and NAS. Since Sync Center is more complicated, you can try this free file sync software alternative. ShadowMaker only supports one-way sync so if you change your target files, the source data will remain its original contents.
MiniTool ShadowMaker TrialClick to Download100%Clean & Safe
ShadowMaker’s free file sync keeps the same copy of your files to another location. What’s more, you are able to sync files when they are in use. Now, let me show you how to run free file sync in Windows 10 with this helpful assistant.
Step 1. Download MiniTool ShadowMaker Trial and then you can enjoy the free file sync service for 30 days.
MiniTool ShadowMaker TrialClick to Download100%Clean & Safe
Step 2. Launch this program and click on Keep Trial.
Step 3. Click Sync to go to the Sync interface.
Step 4. Press Source to choose the files you would like to sync and click OK after you make a decision. You are allowed to sync your files to several locations including Administrator, Libraries, Computer and Shared. Also, you can choose multiple files at a time.
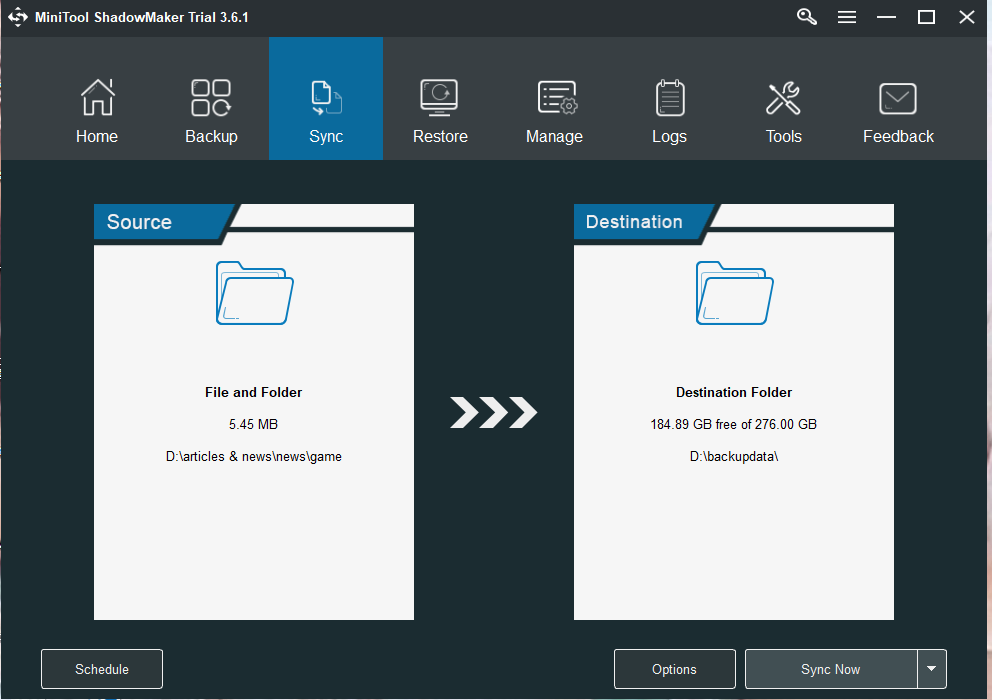
Step 5. After you choose the sync source and target, you can tap on Sync Now button or Sync Later. Click the first one to execute the free file sync task now and click the latter one to put off this task. The delayed task will leave in the Manage interface.
Other Considerate Functions of MiniTool ShadowMaker
MiniTool ShadowMaker is so considerate that it offers you some options and automatic file sync services.
For Schedule
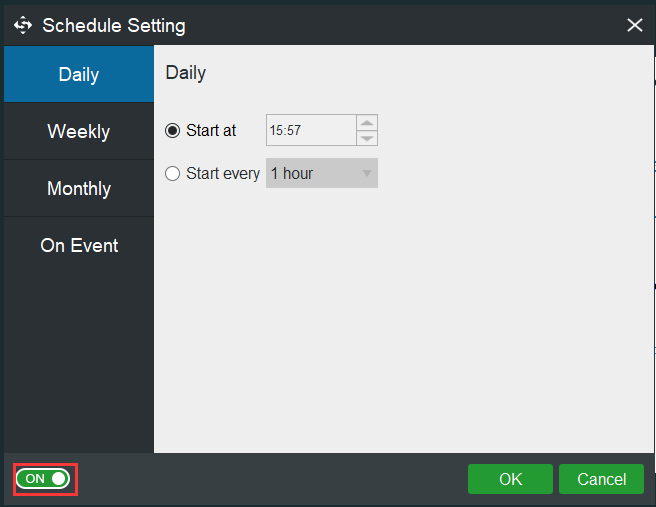
Just click on Schedule on the lower left of the Sync interface after choosing the source files and target locations. You will see this function is disabled by default, so turn it on manually. Now, you are able to set to sync files or folders automatically on a regular basis such as for a daily, weekly, monthly even on event free file sync service.
For Options
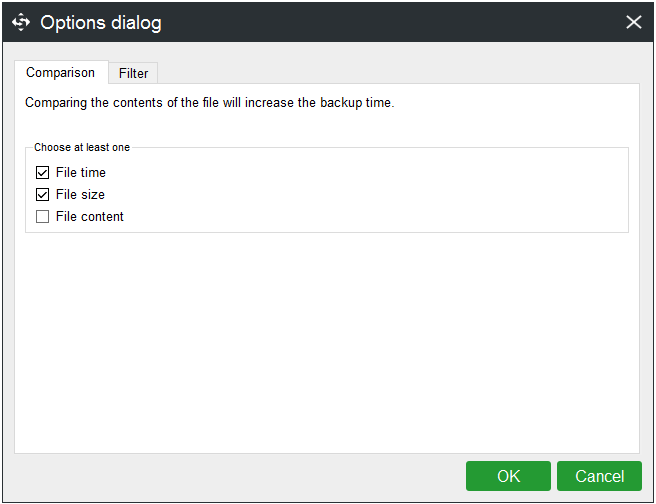
Click Options and you can set a few advanced parameters for your free file sync task.
In the Comparison tab, there are 3 options for you to choose, File time, File size, and File content. It enables you to compare the destination files and sync sources from the three aspects. By default, the last one is unchecked because comparing file content will extend the sync time.
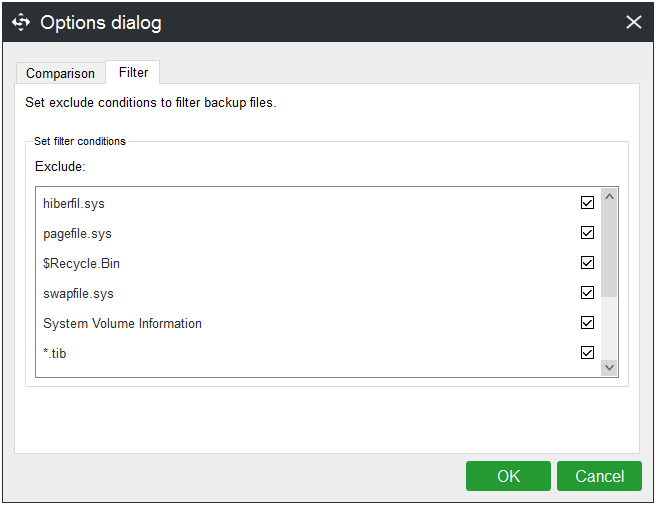
In the Filter section, you can exclude conditions to filter sync files. Just uncheck the file if you would like to update it in the sync process.
You may also like to read:
# 2 Best File Synchronization Software in Windows 10/8/7
# How to Use SyncToy Windows 10 for File Sync? Here Are Details!
# How to Solve “Make Sure OneDrive Is Running on Your PC” Error
# How to Sync Folders Windows 10 to External Drive? Top 3 Tools!
Wrapping Things up
That’s all about free file sync in Windows 10. Feel free to drop a comment below if any methods of syncing files for free listed above suits for you. We also welcome alternate methods in case you’ve found one that you think is much better. Please contact our support team via [email protected] if necessary.
