It’s Important to Install an SSD in PC
As to types of hard drives, SSD and HDD are two common types. An HDD is a traditional hard drive that can offer large storage capacity but relatively slow boot time and low PC performance. An SSD, solid-state drive, is popular with many users due to its fast speed, no noise, good performance, etc.
You may want to install an SSD to the machine so that Windows can boot up or shut down faster, programs can load faster and the PC can respond quickly. Some of you may want to replace the HDD with an SSD or some want to keep both of these two hard drives into the computer and set an SSD as primary drive and HDD as a storage disk.
In this post, we will show you how to install an SSD into a PC without reinstalling Windows.
Two Tips Before You Do
When you want to install an SSD, you need to prepare an SSD in advance. Then, you may ask which SSD should you use in your PC? Choosing a good solid-state drive is important.
And here, two related articles are for you to choose:
- Best 1TB SSD Internal Hard Drive for Laptop and Desktop PC
- Best M.2 SSDs 2020: Here Are 4 Best M.2 SSDs for You
After connecting your SSD to your computer, you need to go to Disk Management by right-clicking This PC or My Computer to choose Manage and initialize the disk to MBR (if your computer is old).
Next, see how to install SSD in PC.
Transfer Data and System to Your New SSD
How to install SSD in PC without reinstall Windows?
If you want to install an SSD as a primary drive, the first step you can do is to transfer the operating system to the SSD via disk cloning. To only keep the SSD in your computer, you can also transfer data to it.
To move the Windows system and files to your solid-state drive, you need to use a piece of PC cloning software to clone HDD to SSD. Here, we strongly recommend using MiniTool ShadowMaker.
At first sight, you find this software is a piece of backup software. Besides, it is also a program that can be used to perform disk cloning with its Clone Disk feature. Everything including Windows operating system, settings, apps, registry keys, files, etc. is cloned to your SSD.
That is, the target disk (SSD) is the exactly same as the original hard drive (HDD). To boot the PC from the SSD, you only need to install it on the machine. The setup steps will be described later and here let’s get MiniTool ShadowMaker Trial Edition by clicking the following download button to start the disk cloning.
MiniTool ShadowMaker TrialClick to Download100%Clean & Safe
Now let’s see how to install SSD in PC without reinstalling Windows: first operation – disk cloning.
Step 1: Connect your SSD to your computer and ensure it can be recognized by the machine.
Step 2: Double-click the icon of MiniTool ShadowMaker to launch it.
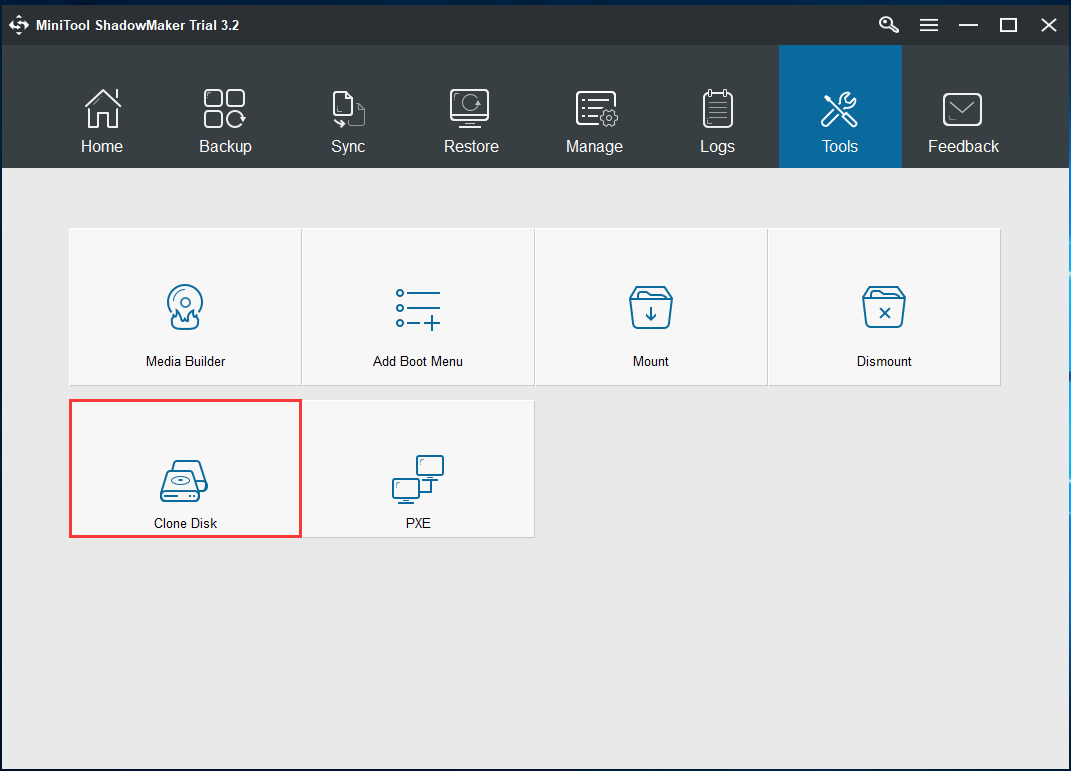
Step 3: Go to the Tools tab, locate and click the Clone Disk feature to continue.

Step 4: In the pop-up window, click the corresponding modules to choose your original disk and target disk. Here, the HDD should be the source drive and your SSD should be the target drive. And then, click OK.

Step 5: Now the disk cloning operation is performing. Wait some minutes patiently.
With only a few steps, you can easily clone your HDD to SSD without reinstalling Windows operating system. If you need to install an SSD to your PC, just get MiniTool ShadowMaker firstly to start the cloning.
MiniTool ShadowMaker TrialClick to Download100%Clean & Safe
After finishing the disk cloning, disconnect the SSD from your computer and you can perform the SSD installation to your PC in order to boot the machine from the cloned SSD for better performance.
Now, you should perform the second operation – SSD installation.
How to Install SSD in PC
The operations to install an SSD are a bit complicated and you need to follow these instructions below. Here, we will show you how to install an SSD into a laptop and desktop.
How to Install SSD Laptop
For a SATA SSD:
Step 1: Disconnect the power cable, use a screwdriver to take out the screws on the back of your laptop and remove the computer bottom cover.
Step 2: Remove the battery of the machine.
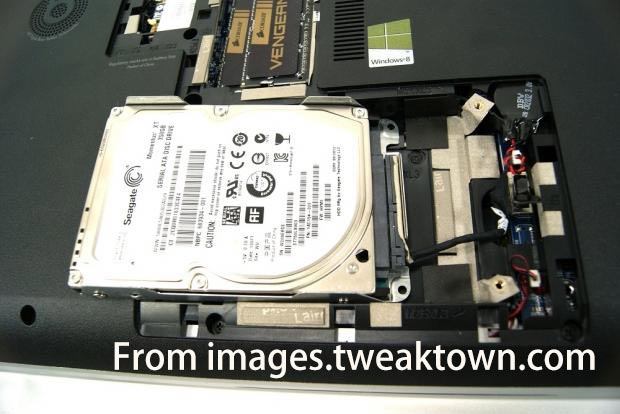
Step 3: Locate the storage bay and remove the original hard drive.

Step 4: Fasten your SSD to the bracket. If anything is attached to the old disk, remove it and put it on the SSD in the same way.
Step 5: Fasten the bracket, put the new SSD to the laptop via SATA connection and put the battery back in.
Step 6: Remount the laptop’s bottom panel and screw the fasteners.
For an M.2 SSD
Step 1: Also, open the bottom panel of the laptop.
Step 2: Inside the M.2 SSD to the M.2 slot on the motherboard. Note that the side with product information and labels should be up.
Step 3: Use the screwdriver to screw in place with the SSD.
Step 4: Make sure everything is in place and screw the laptop’s cover back in.
After following these steps, it is simple to install an SSD in your laptop. If you are using a desktop, now let’s see how to install SSD in desktop.
How to Install SSD in Desktop
Install a SATA SSD
Step 1: Disconnect the power, remove all cables, and put it to a cool and dry place.
Step 2: Take the case cover off and you can see the installed hard drive.
Step 3: Connect your SSD to the motherboard via the SATA cable and use the SATA power cable to connect the SSD to the PSU.
Step 4: Put the SSD to the mounting tray and slide the tray into the case.

Step 5: Remount the desktop case.
Install an M.2 SSD
Step 1: Also, open the computer case.
Step 2: Choose the M.2 slot you want to use and place the M.2 SSD to the motherboard.
Step 3: Tighten the screw down and put the case back.
Boot Your PC from the New SSD
After finishing the SSD installation, there is another thing you should do and that is you need to tell the computer to boot from it.
Reboot your computer to enter its BIOS menu by pressing a specific key. Based on different computer brands, the key is different and it can be Del, F2, F10, F12, etc.
Then in the BIOS menu, look for the boot options. Also, they are in a different place depending on the PC. Next, change the first boot sequence to the SSD, save the change and your computer will run from the SSD at a fast speed. Now, the machine will be significantly snappier without having to reinstall a thing.
Another Way: Install Windows 10 on New SSD
If you don’t want to use the original operating system, you can choose to perform a clean install of Windows 10 on the new SSD. Here, Media Creation Tool can be used to perform this work. Just get it from the Internet and create a bootable USB flash drive. Next, boot the PC from the USB drive and start the clean install.

Bottom Line
Now we come to the end of this post. From the article, you know how to install SSD in PC including a desktop or laptop, and how to boot the PC from the SSD. If you have a need to perform the SSD installation, just follow the guide above – transfer system (and data) from HDD to SSD and install an SSD into a PC.
If you have any other idea about installing an SSD in a PC, don’t forget to tell us. You can contact us via the email [email protected] or leave a comment in the following part. Thanks in advance.
How to Install SSD in PC FAQ
- Transfer your original disk data and system to the SSD.
- Install an SSD via the guide above to your gaming PC to get better performance.

