Many users want to find a full guide to install Windows Server 2019. If you are one of them, you come to the right place. This post from MiniTool introduces how to install Windows Server 2019. Now, keep on your reading.
Windows Server 2019 was released in October 2018, which builds on the foundation of Microsoft’s previous version, Windows Server 2016. Windows Server 2019 has three editions – Essentials, Standard, and Datacenter.
Windows Server 2019 offers many enhancements over its predecessor, including improved security features, enhanced virtualization capabilities, and better performance. It is designed to be a stable and scalable foundation for your network infrastructure to ensure your systems run smoothly and securely. Now, we will introduce how to install Windows Server 2019.
Tip: The following guide is also suitable for users who want to reinstall Windows Server 2019.
Related posts:
- How to Install, Set up, and Configure Windows Server 2022?
- How to Reinstall Windows Server 2016 Without Losing Data
- How to Install Windows Server 2012 R2? Here Is a Guide!
Important Things Need to Do Before Installing Windows Server 2019
1. Check Windows Server 2019 System Requirements
To install Windows Server 2019 correctly, your computer must meet the minimum hardware requirements. The Windows Server 2019 requirements are very similar to Windows 10 system requirements.
- Processor – 1.4 GHz 64-bit processor
- RAM – 512 MB
- Disk Space – 32 GB
- Network – Gigabit (10/100/1000 based) Ethernet adapter
- Optical Storage – DVD drive (if installing the operating system from DVD media)
- Video – Super VGA (1024 x 768) or higher -resolution
- Input Devices – Keyboard and mouse
- Internet – Broadband access
2. Back up Important Data or Current System
Before installing Windows Server 2019, it’s highly recommended to back up the current system or important data to protect it. To do that, here is a piece of Server backup software for you – MiniTool ShadowMaker. It is designed to back up the operating system, disks, partitions, files, and folders.
It supports Windows Server 2008/2012/2016/2019/2022. Besides the Backup feature, it is a clone tool, allowing you to clone SSD to larger SSD, and move Windows to another drive. Now, we will show you how to use MiniTool ShadowMaker to back up files or systems.
1. Download, install, and launch MiniTool ShadowMaker.
MiniTool ShadowMaker TrialClick to Download100%Clean & Safe
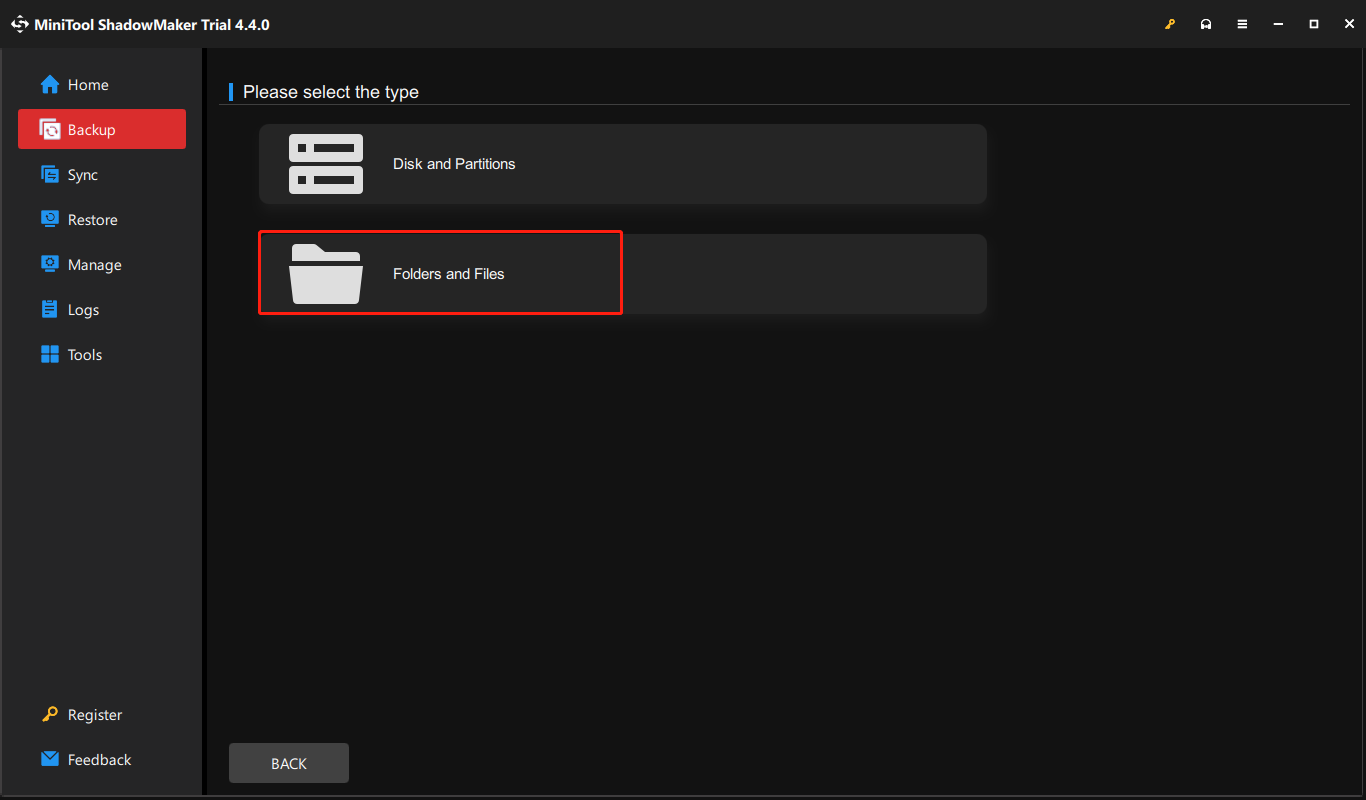
2. Then click Keep Trial. After entering its main interface, go to the Backup page. MiniTool ShadowMaker chooses the operating system as the backup source by default. If you need to back up files, click Folders and File and select the files you need.

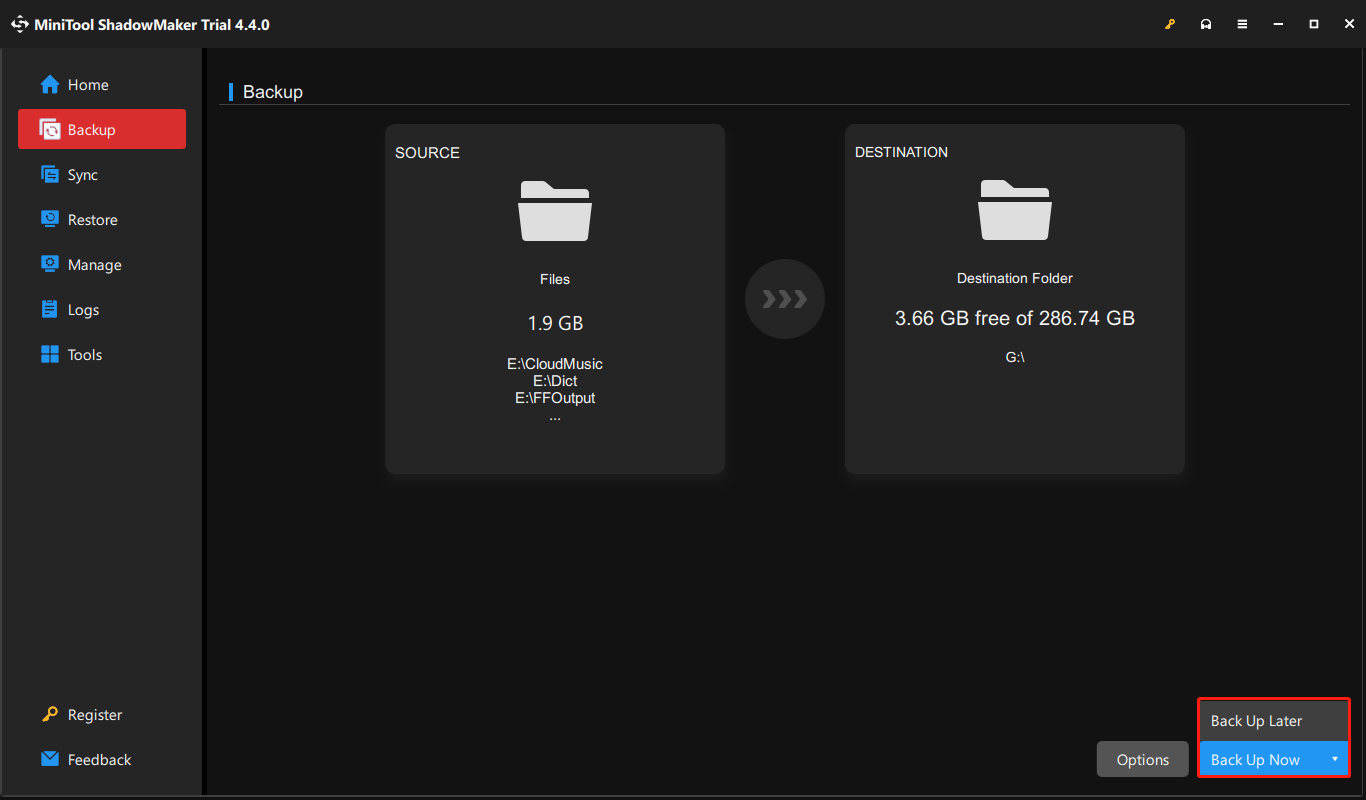
3. Then click DESTINATION to choose a target disk to save the backup image. Besides, MiniTool ShadowMaker also enables you to create an Automatic Backup and it offers three different backup schemes.
4. Then click Back Up Now to start the Windows Server backup process. Or, you can click Back Up Later to delay the backup task. Then, you can find the task on the Manage page.

After that, you performed a backup. If you want to restore the system image or backed-up files, you can go to the Restore page and follow the on-screen wizard to continue.
How to Install Windows Server 2019
Now, you can start to install Windows Server 2019.
1. Go to the Windows Server 2019 download page to get its official ISO file. Here, you can also evaluate using Azure, and VHD. All of them are free for 180 days.
2. After downloading the ISO file, create a bootable USB flash drive and insert the installation USB into your PC.
3. Restart your computer and press a specific key (eg: ESC, F2, F10) to enter BIOS.
4. Choose the USB drive as the first boot option. Then, press F10 to save your changes and boot from it.
5. Then, you need to choose language, time and current format, and keyboard or input method. After choosing them click Next to continue.
6. In the next window, click Install Now.
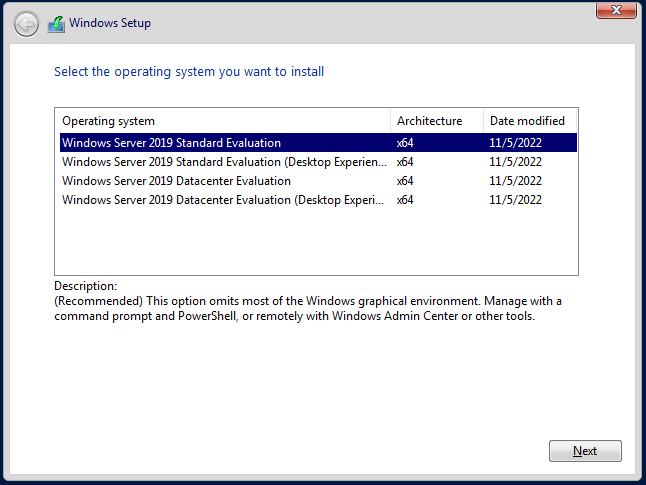
7. Choose the operating system version you need to install. There are four types:
- Windows Server 2019 Standard Evaluation
- Windows Server 2019 Standard Evaluation (Desktop Experience)
- Windows Server 2019 Data Center Evaluation
- Windows Server 2019 Data Center Evaluation (Desktop Experience)

8. Check the box to accept the software license terms and click Next.
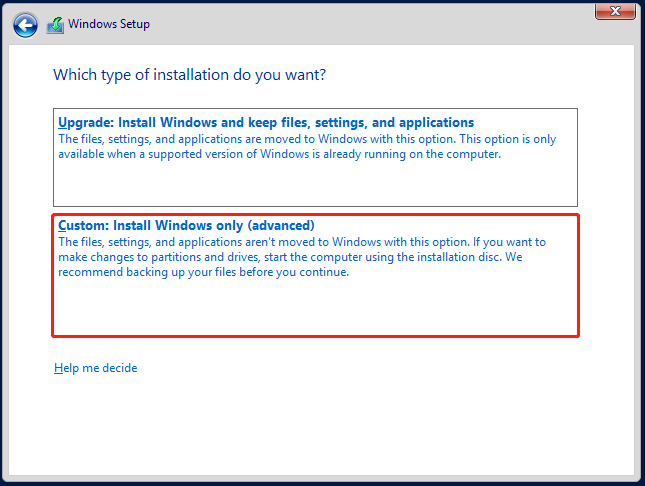
9. Then, choose Custom: Install Windows only (advanced). Otherwise, if upgrading from a previous version of Windows Server, choose the Upgrade: Install Windows and keep files, settings, and applications option.

10. Select a partition to install Windows Server and click Next. Then, it will start to install the necessary system files. When it’s completed, the system will restart automatically.
11. After your system restarts, you’ll be greeted with a graphical interface. You’ll be prompted to create an administrator password before proceeding. Click Finish.
12. The login screen will appear when you press Ctrl + Alt + Del. Enter the password set in the previous step to continue accessing your server. Then, Server Manager will be launched.
2. Evaluation versions of Windows Server must activate over the Internet in the first 10 days to avoid automatic shutdown.
Final Words
Do you want to clean install install Windows Server 2019? How to install install Windows Server 2019? After reading this post, you know it. Also, what to do before the installation is told to you. Now, don’t hesitate to install Windows Server 2019.