If you want to request service for your Surface when it goes wrong, you should notice some things to avoid data loss and privacy leaks. In this post, MiniTool will offer a full guide on how to prepare your Surface for service in Windows 11/10.
About Microsoft Surface Service
Like other computer brands, Microsoft Surface can also malfunction, for example, it won’t turn on, Surface keeps shutting down, Surface has a black screen, etc. When your device suffers from one issue, you can click the corresponding link to get solutions or search for fixes online.
But sometimes you fail to address your problems with the offered troubleshooting tips or you don’t have some computer skills to solve issues. Then, you may request service for Surface from Microsoft if it is under warranty. Usually, Surface and Surface-branded accessories come with 90 days of technical support and a one-year limited hardware warranty.
Before sending the device to the Microsoft repair center, you should pay attention to certain things, and below are the instructions on how to prepare your Surface for service.
Move 1: Back up Surface to External Hard Drive
What happens to the data on your Surface? According to Microsoft, everything on the device is erased if you send it to the service center. Microsoft won’t be responsible for data loss during servicing. So to protect your data, you can prepare a USB flash drive or external hard drive and then backup crucial files to it.
For data backup, you can consider running the powerful PC backup software, MiniTool ShadowMaker that supports automatic backups and incremental & differential backups. In file backup, folder backup, disk backup, partition backup, and Windows backup, this tool plays an important role.
See how to backup Surface to external hard drive:
Step 1: Connect your external drive to your PC.
Step 2: Download, install, and launch MiniTool ShadowMaker Trial Edition.
MiniTool ShadowMaker TrialClick to Download100%Clean & Safe
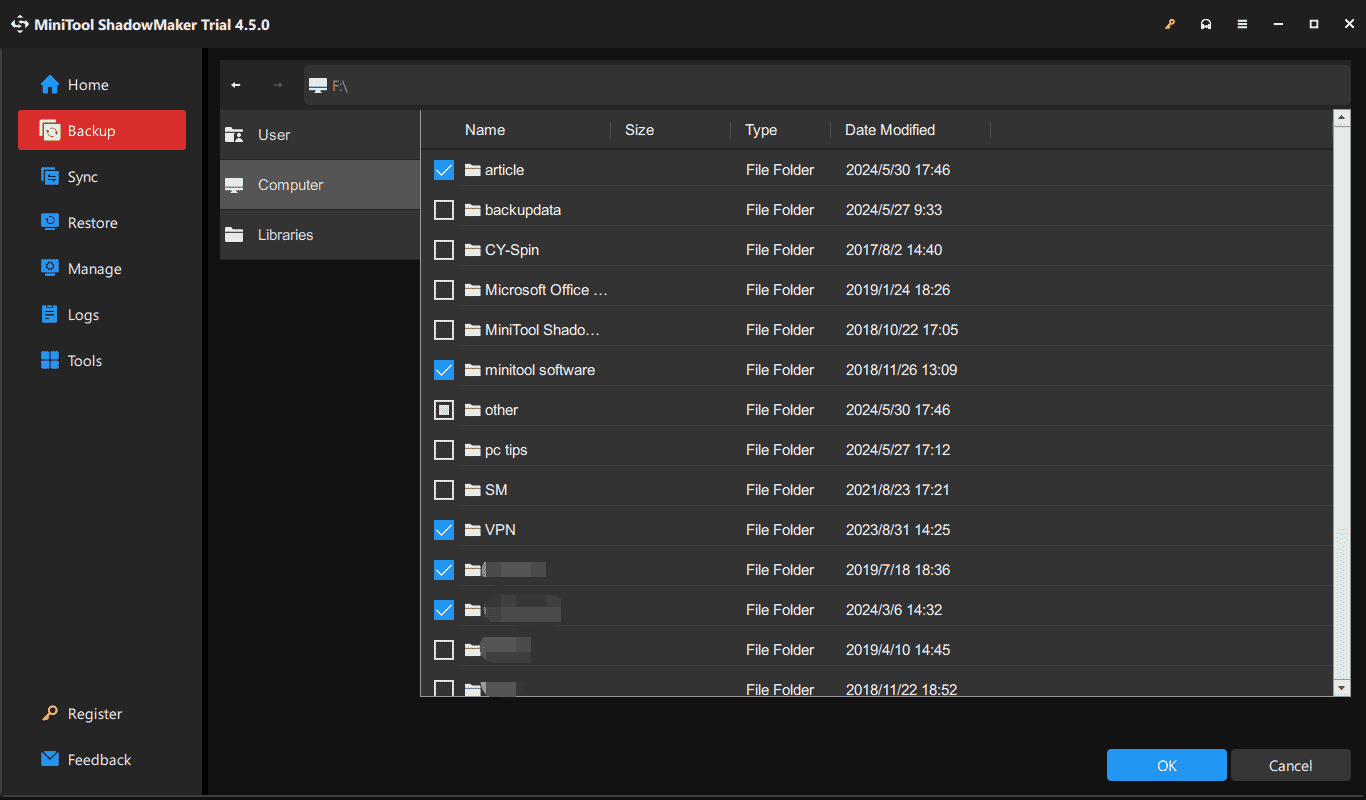
Step 3: Navigate to Backup > SOURCE > Folders and Files, select the files and folders you wish to backup including pictures, videos, documents, etc., and click OK.

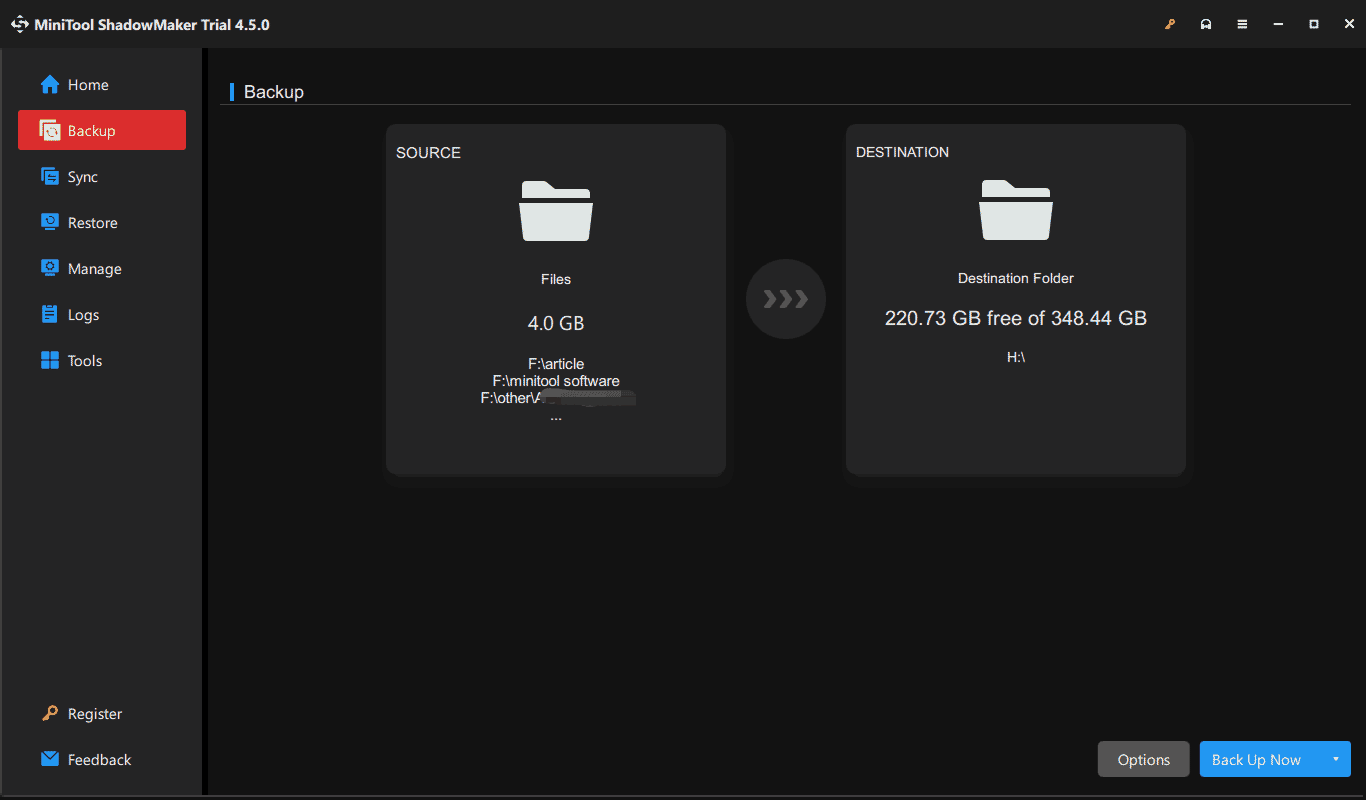
Step 4: Tap DESTINATION and choose a partition on your external hard drive.
Step 5: Tap on Back Up Now to begin the backup task.

Move 2: Manually Back up Outlook Data Files
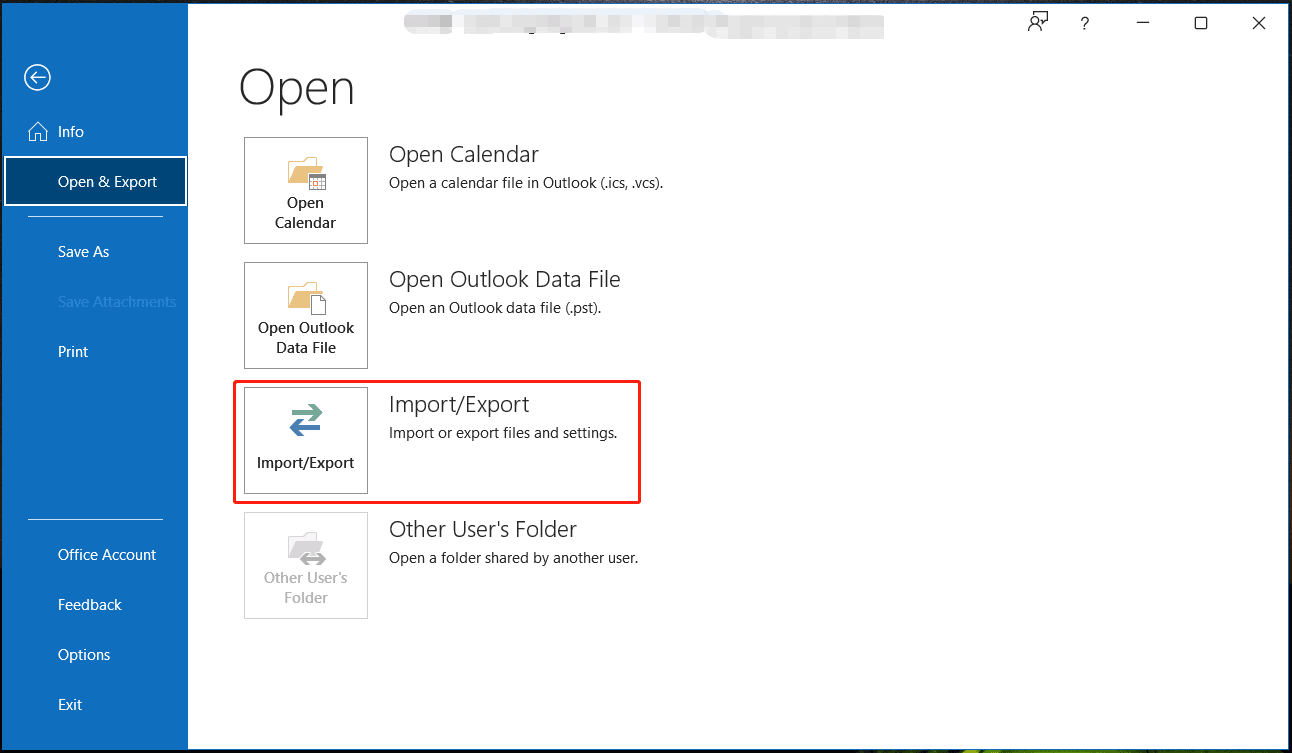
Before you prepare Microsoft Surface for service, you should also pay attention to Outlook data file backup if you use this email client in Windows 11/10. These files contain your email messages, tasks, calendar, and other items on your Surface. After getting your device from the service center, you can transfer Outlook data files (.pst and .ost files) to your Surface.
Wonder how to backup Outlook data files? Refer to these two articles:
- How to Create an Outlook PST Backup? Try 4 Ways Here
- How to Back up OST File in Microsoft 365? Here Are 3 Ways

Move 3: Erase Your Data
As mentioned above, the data on your Surface will be erased as part of the service process. To prevent privacy leaks, you had better delete the data by yourself before sending the device to Microsoft.
There are several ways for you to erase, for example, format a drive, wipe a partition, and reset the PC. To protect your privacy, the latter two options are recommended strongly. For partition wipe, refer to this guide – How to Wipe Partition | MiniTool Partition Wizard Tutorial.
Here is how to wipe or erase your data by resetting your PC:
Step 1: Use Win + I to open Windows Settings.
Step 2: In Windows 10, navigate to Update & Security > Recovery and click Get started under Reset this PC.
In Windows 11, choose System > Recovery and click Reset PC from Reset this PC.
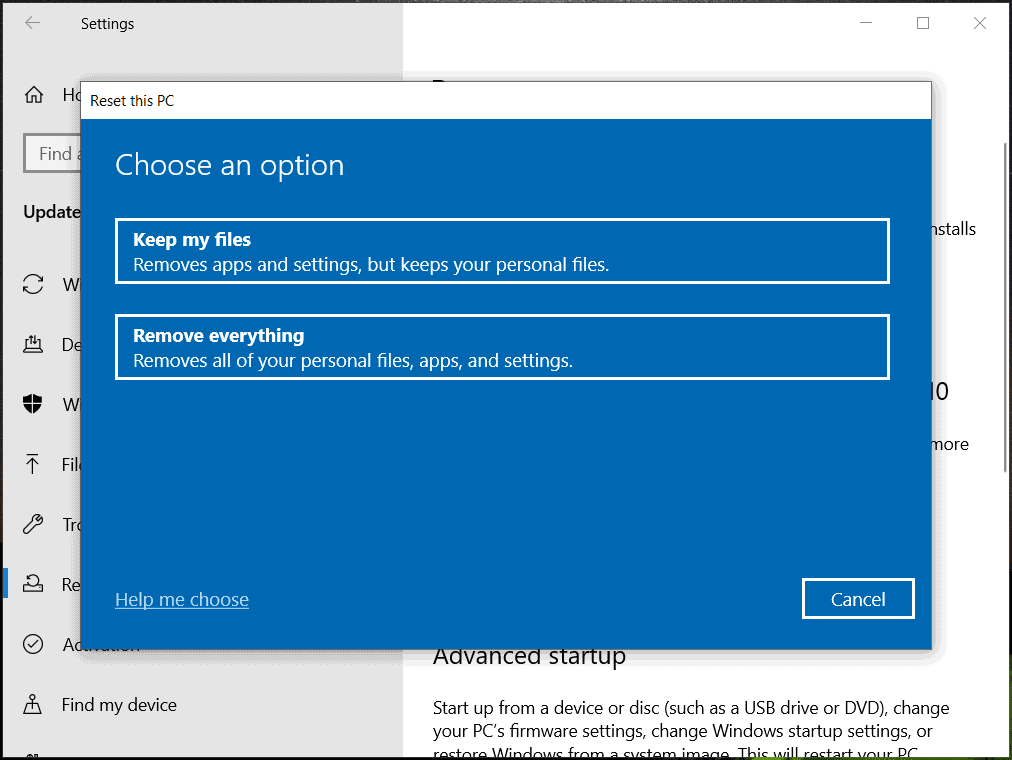
Step 3: Click Remove everything to continue.

Step 4: Complete the resetting task by following the popped-up instructions. Later, your machine is fully restored to its factory settings.
Move 4: Remove Your Accessories
After backing up data and erasing data, make sure you remove all the accessories unless the support team has told you to include some with your Surface return.
These add-ons include USB devices like a flash drive, keyboard or mouse, a memory card, Surface Dock, Surface Type Cover, a power supply, an audio adapter, audio cables, headphones, etc. Then, you can send your Microsoft Surface to the service center.
Final Words
That’s a full guide on how to prepare your Surface for service. Do those things by following the given steps when your Surface goes wrong and needs to be repaired. The most important one is you should take measures to back up your important data if you decide to send the machine for service.
After you receive your Surface after service, you should also do some things: turn on the Surface and complete the setup using the same Microsoft account, use the Surface app to install updates, pair your Bluetooth accessories, and reinstall apps. For more information, refer to this official document – Set up your Surface after service.