Today, most users realize the need for backup to properly protect critical data. Many operating systems come with backup options, and Windows Server is no exception. The backup utility that comes with Windows Server is called Windows Server Backup.
When needed, you can access Windows Server Backup to restore your files, folders, and systems. Windows Server Backup allows you to restore individual files and entire systems from backups. Individual files can be restored from the Windows Server Backup GUI, while a full system restore can only be performed from the Windows Recovery Environment (WinRE).
In this tutorial, we will introduce how to restore files using Windows Server Backup and how to restore the system from Windows Server Backup.
How to Restore Files Using Windows Server Backup
To restore files using Windows Server Backup, make sure you have created the file backup in Windows Server Backup. Then, you can follow the guide:
Step 1. Open Windows Server Backup by searching for it in the Search box.
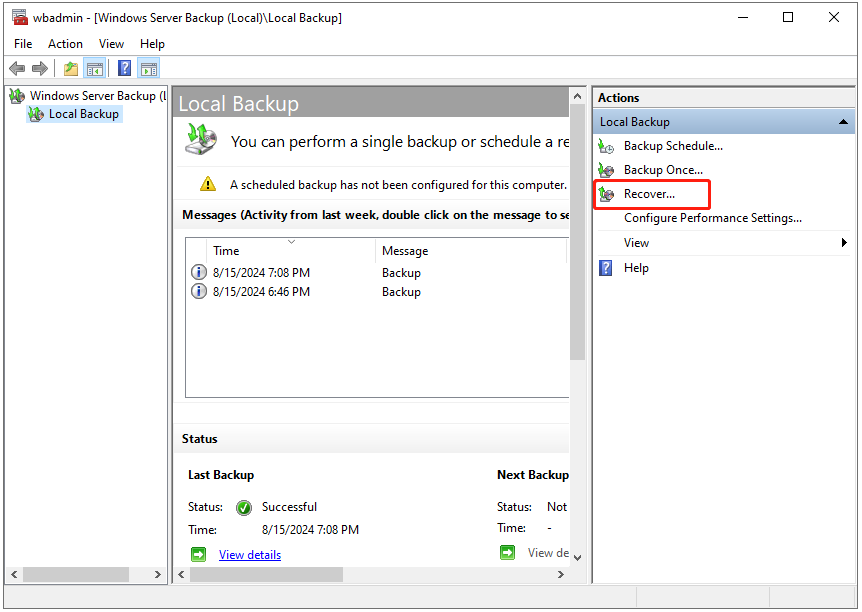
Step 2. Under the Actions part, click Recover… to continue.
Step 3. Now, you need to choose where the backup is stored that you want to use for the recovery and click Next. You can choose This server or A backup stored on another location.
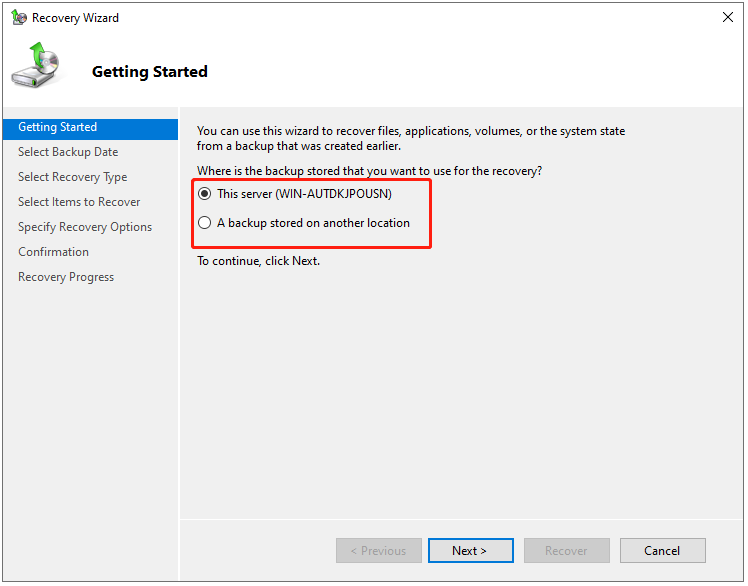
Choice 1: Choose This Server
1. Select the date of a backup for recovery and click Next.
2. Select the recovery type – files and folders, volumes, applications, system state, and Hyper-V.
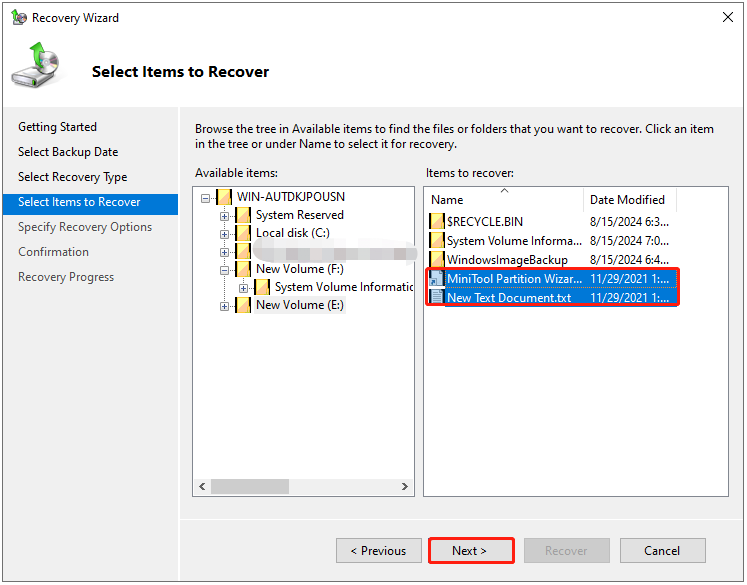
3. Browse the tree in Available items to find the files or folders that you want to recover. Then, choose them and click Next.
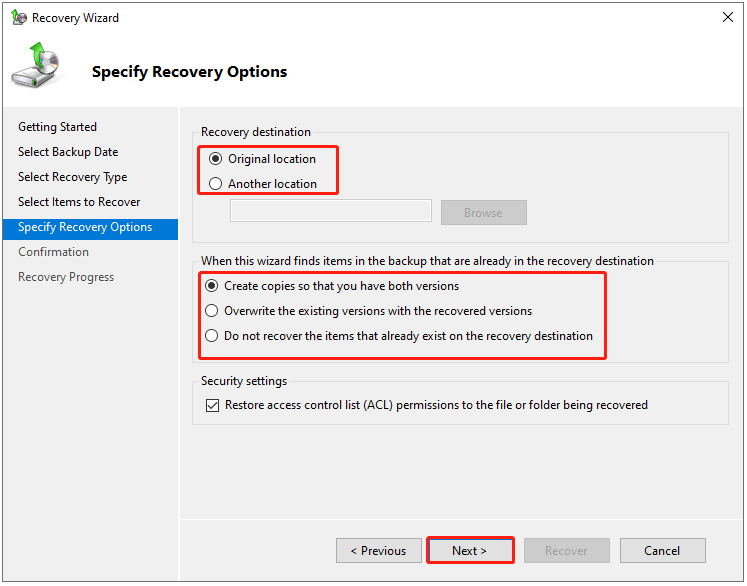
4. Under the Specify Recovery Options part, you can select Original location if you want to restore the data directly to the original location or select Another location if you want to restore databases and their files individually to another location.
There are 3 options for you when this wizard finds items in the backup that are already in the recovery destination. Choose one of them based on your needs and click Next.
- Create copies so that you have versions.
- Overwrite the existing versions with the recovered versions.
- Do not recover the items that already exist on the recovery destination.
5. Under the Confirmation section, confirm the recovery items, destination, option, and security settings. Then, click Recover and you can view the progress of the recovery.
Choice 2: Choose A backup stored on another location
1. In the Specify Location Type window, choose Local drives or Remote shared folder, then click Next.
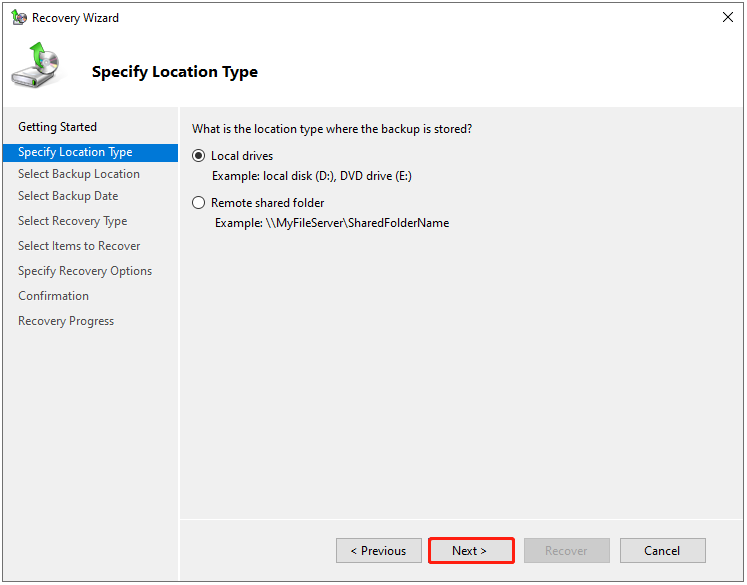
2. Then, click the drop-down menu to choose the backup location and click Next.
3. Select which server’s data you would like to recover and click Next.
4. Select the date of a backup to use for recovery and click Next.
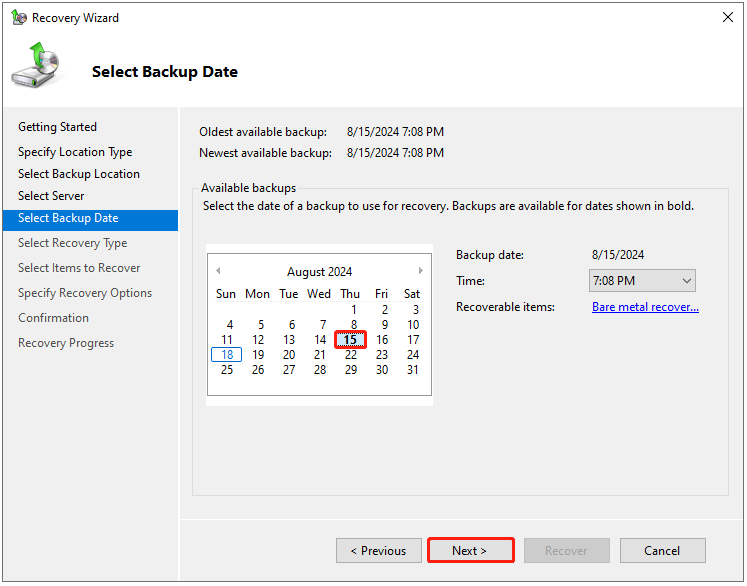
5. Select the recovery type. To restore the files, you need to choose files and folders, and click Next.
6. Browse the tree in Available items to find the files or folders that you want to recover. Then, choose them and click Next.
7. Under the Specify Recovery Options part, choose Original location or Another location.
8. Under the Confirmation section, confirm the recovery items, destination, option, and security settings. Then, click Recover.
How to Restore the System Using Windows Server Backup
How to restore the system from Windows Server Backup? The following steps need to be performed in the Windows Recovery Environment (WinRE). If your PC can boot normally, you can enter WinRE from Settings. If your PC can’t boot normally or your PC can’t enter WinRE from Windows Server, you can use the Windows Server recovery media to boot the computer into a recovery environment. Here are the detailed steps:
Step 1. Enter the Windows Recovery Environment.
Situation 1: PC can boot normally
1. Press the Windows + I keys together to open the Settings application.
2. Go to Update & Security > Recovery > Restart Now.
3. Choose a reason that you want to shut down the computer and here you can choose Operating System: Reconfiguration (Planned).
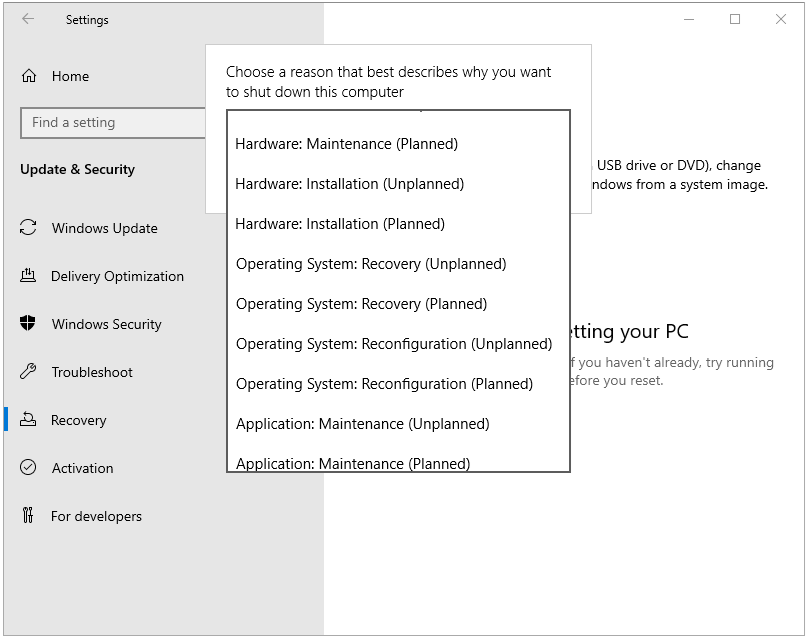
4. Then, your PC will enter the system setup page.
Situation 2: PC can’t Boot normally
1. Use the created recovery drive and enter the BIOS by pressing a certain key (different PC brands may use different BIOS hotkeys).
2. Then, change the boot order to make your PC boot from the USB drive to enter WinRE.
3. Once you see the “Press any key to boot from CD or DVD..” message on the screen, press the Enter key.
Step 2. Select the language and other preferences then click Next. Then, click Repair your computer.
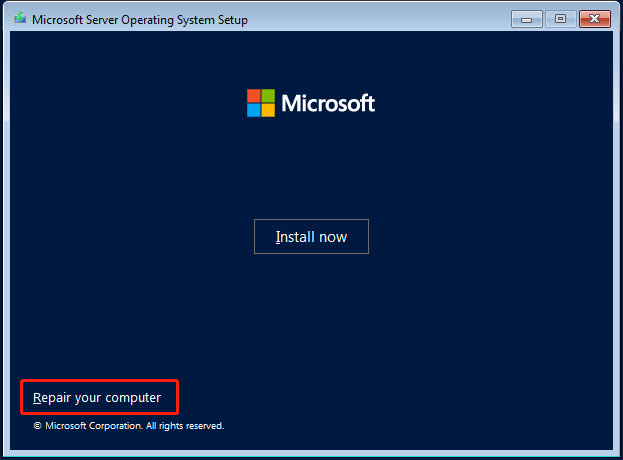
Step 3. Under the Choose an option page, choose the Troubleshoot option to continue.
Step 4. Under the Advanced options page. Choose System Image Recovery to continue.
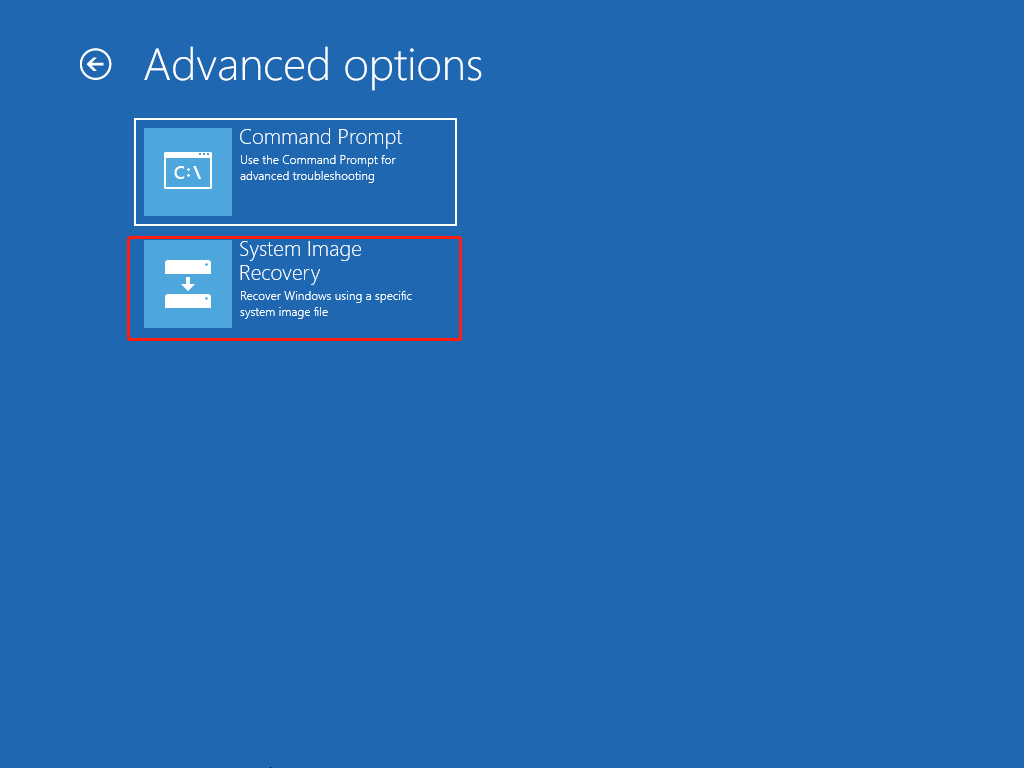
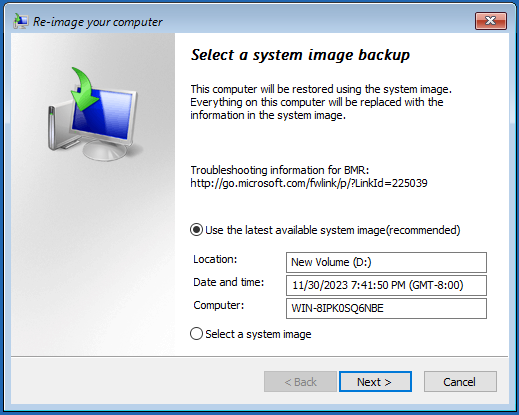
Step 5. Next, choose Windows Server. Then, select a system image backup and click Next.
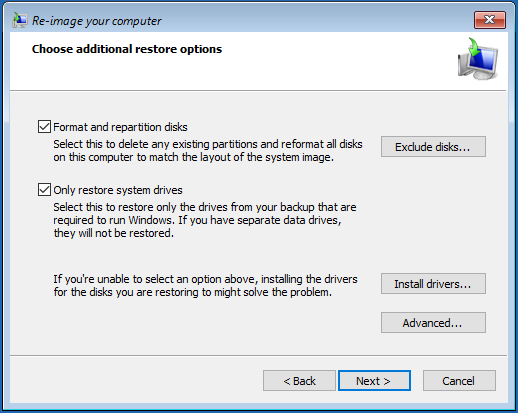
Step 6. Then, you can choose Format and repartition disks or Only restore system drives. Click Next to continue.
Step 7. Click the Finish button and wait for the restoration to complete.
Restore Files/Systems Via MiniTool ShadowMaker
As to restoring files using Windows Server Backup, the best Windows Server Backup alternative – MiniTool ShadowMaker is competent. It is a piece of Server backup software, that provides an all-in-one backup and recovery solution. It is designed to back up the operating system, disks, partitions, files, and folders.
It supports Windows Server 2022/2019/2016/2012/2012 R2. Windows Server Backup only can create a full backup, while MiniTool ShadowMaker provides three backup schemes, including full backup, incremental backup, and differential backup.
Besides the Backup feature, it is a clone tool, allowing you to clone SSD to larger SSD, and move Windows to another drive.
Now, we will show you how to use MiniTool ShadowMaker to back up and restore Windows Server files/systems.
Step 1. Download it from the following button.
MiniTool ShadowMaker TrialClick to Download100%Clean & Safe
Step 2. Install and launch it. Then click Keep Trial to enter its main interface.
Step 3. Go to the Backup page. MiniTool ShadowMaker chooses the operating system as the backup source by default. To back up Windows Server files, click SOURCE > Folders and Files. Check the files you want to back up.

Step 4. Then click DESTINATION to choose a target disk to save the backup image. There are 4 paths available – User, Computer, Libraries, and Shared.
Step 5. Click Back Up Now to start the backup task.
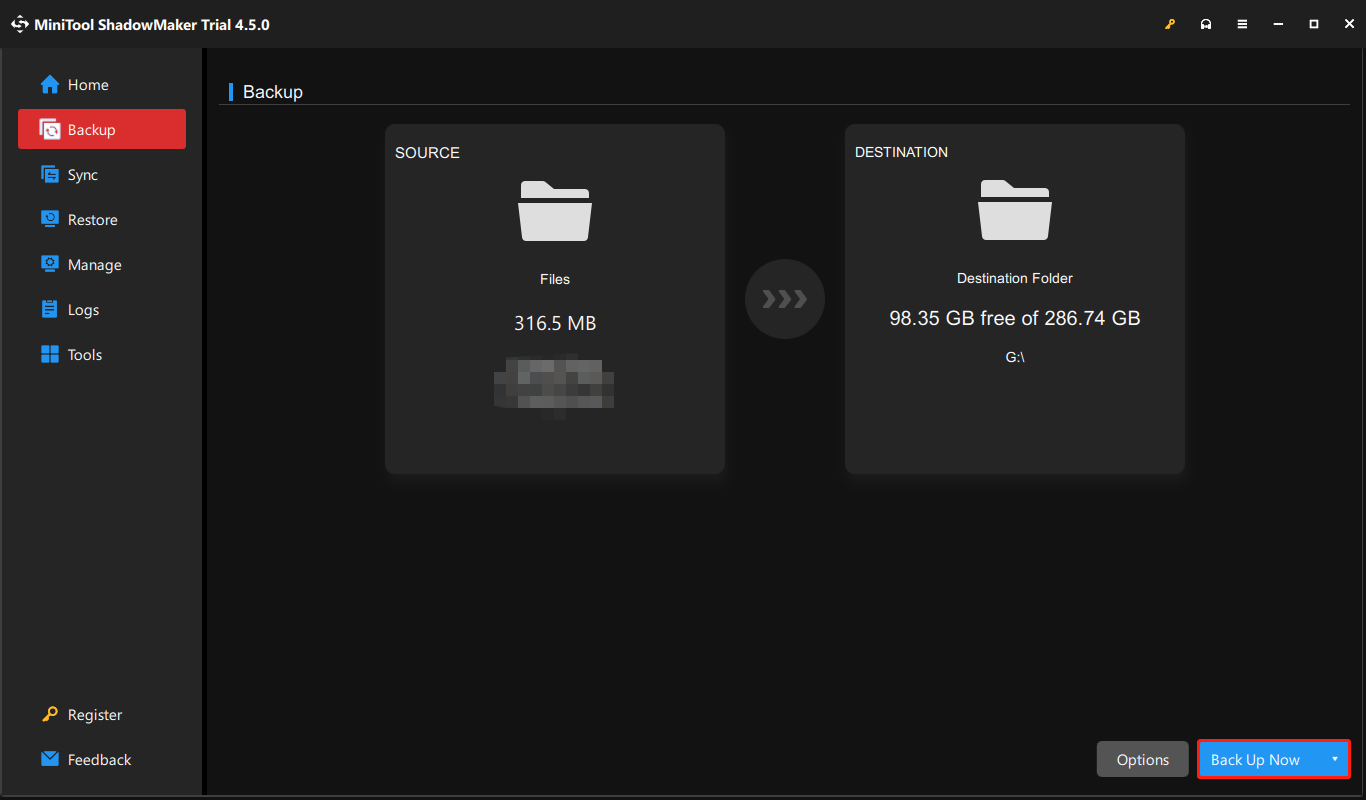
How to Restore Files with MiniTool ShadowMaker
Now, let’s see how to restore Windows Server files with MiniTool ShadowMaker.
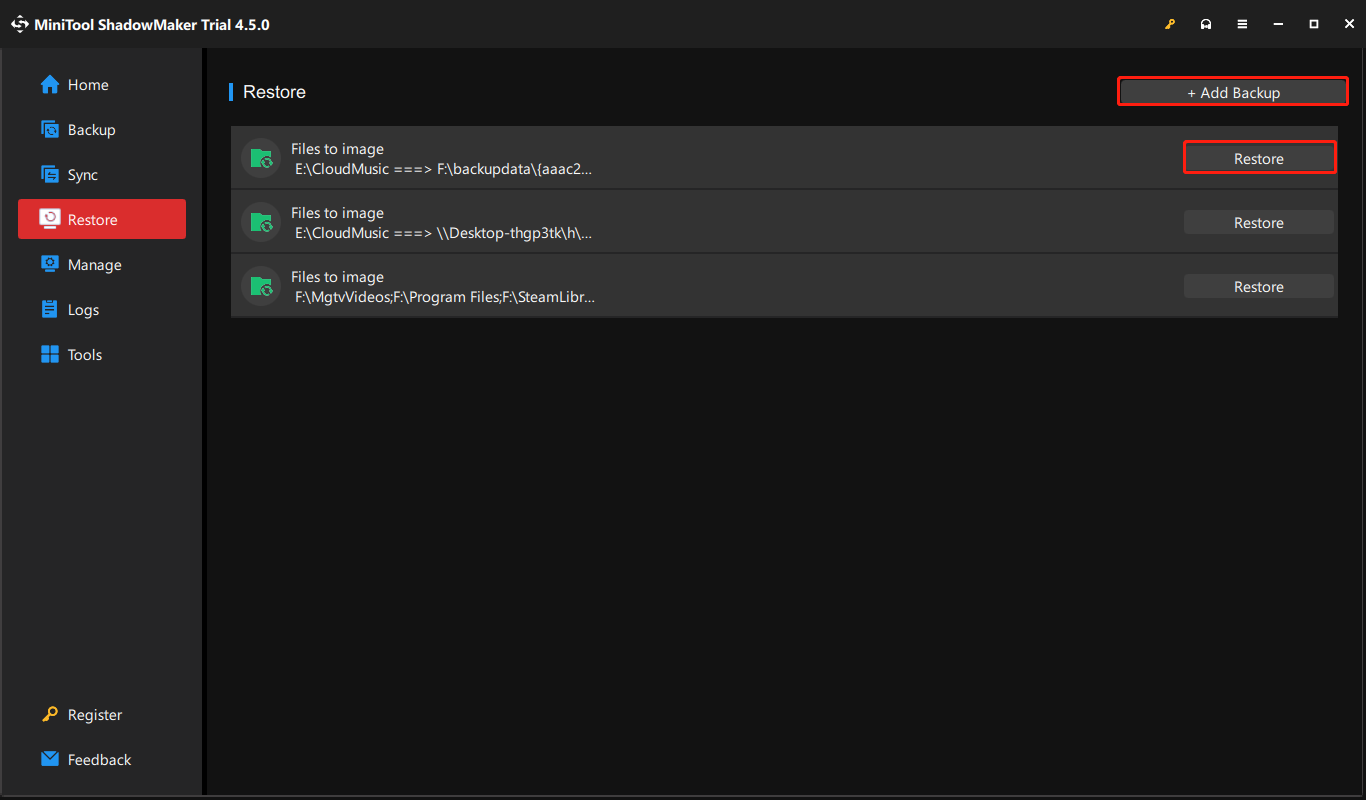
Step 1. Go to the Restore tab, select the file backup image you want to restore, and click the Restore button. If the desired backup is not listed here, click Add Backup located at the top right corner to select the file backup image manually.
Step 2. In the pop-up window, select the file restore version and click Next.
Step 3. Then choose the files/folders to restore and click Next.
Step 4. Click Browse to choose a destination location to save the restored files.
Step 5. Then, click Start to begin the operation. MiniTool ShadowMaker will perform file image restoration quickly and show you the result.
How to Restore System with MiniTool ShadowMaker
When a system crash or Windows Server system failure happens and Windows can’t boot, you can recover your system from a system backup image that was previously created by MiniTool ShadowMaker. You need to create a bootable CD/DVD or USB flash drive with the Media Builder feature. Then, boot the computer from the bootable disc to the main interface of MiniTool ShadowMaker. The following 2 posts are useful to you,
- Create Bootable CD/DVD/USB Drive with Bootable Media Builder
- How to Boot from Burned MiniTool Bootable CD/DVD/USB Flash Drive/USB hard drive
Next, see how to restore the Windows Server system with MiniTool ShadowMaker:
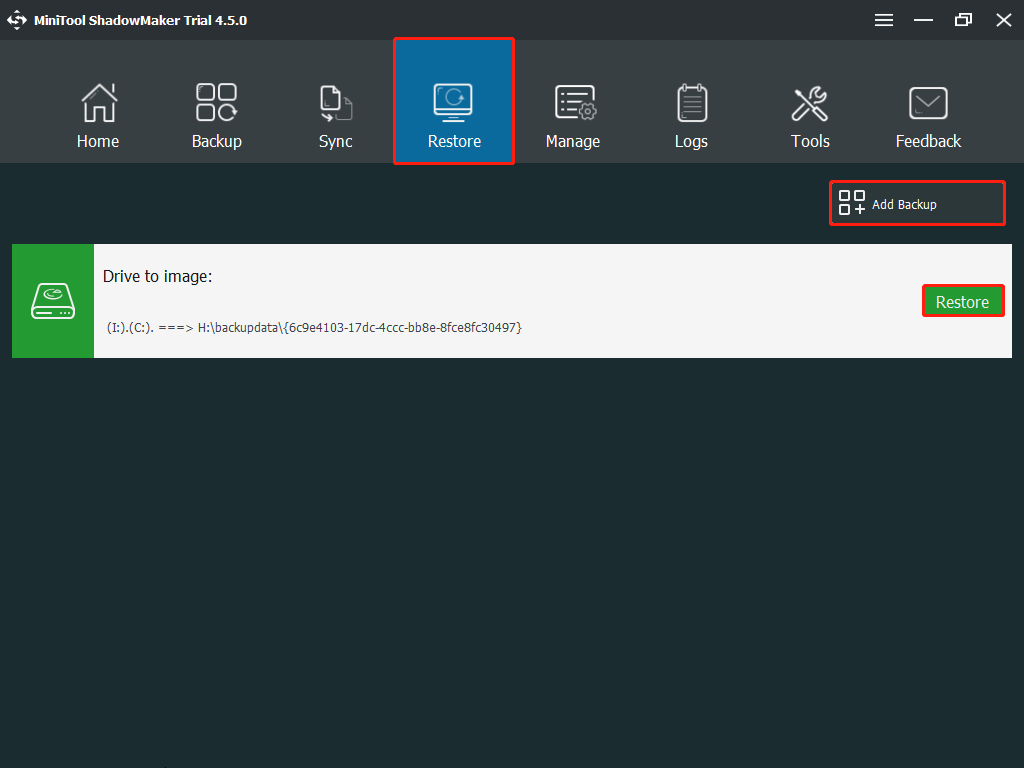
Step 1. On the Restore page, click Add Backup, select the system backup image you want to restore, and click OK. Now the system backup is displayed there and you can click Restore to continue.
Step 2. Select a backup version you want to restore. Then click Next to continue.
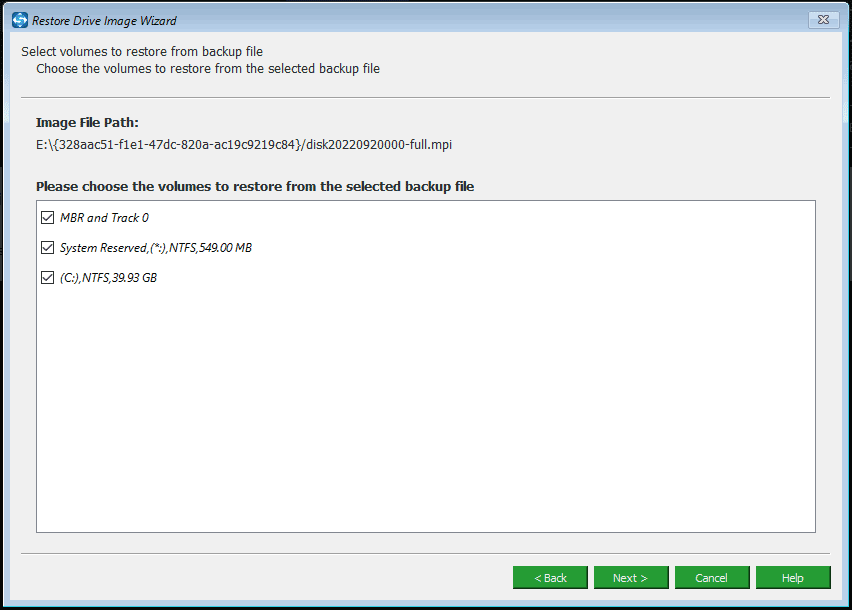
Step 3. Choose all the partitions you need to restore from the selected backup file and click Next.
Step 4. Select a disk to which you want to restore the system and then click Next to continue. You are not allowed to restore the image to the disk containing backup files. Then, MiniTool ShadowMaker will show you which partition will be overwritten while restoring an image.
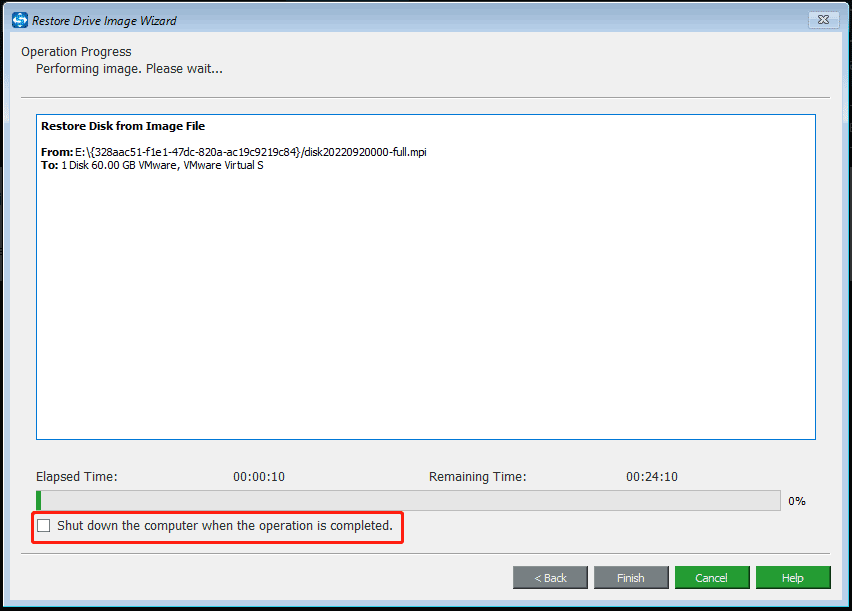
Step 5. Then you will enter the interface of operation progress. After finishing the system image recovery, click Finish. You can check the Shut down the computer when the operation is completed box if you don’t want to wait a long time.
Bottom Line
To sum up, this post has shown how to restore files using Windows Server Backup and how to restore the system from Windows Server Backup. Besides, you can use Windows Server backup software – MiniTool ShadowMaker to restore files and systems.
If you have any problem with Windows Server Backup and MiniTool ShadowMaker, you can feel free to contact us via [email protected] and we will reply to you as soon as possible.
Restore Files Using Windows Server Backup FAQ
2. Right-click in the folder’s blank space.
3. Go to the Previous Versions tab.
4. Choose the version of the folder/file you want to recover.
5. Click and drag the folder/file you want to recover into the target directory.
For more methods, refer to this post - SOLVED: How To Quick & Safely Recover Lost File In Windows Server.