Do you receive the Your VAIO failed to start Windows error message when booting the Sony VAIO laptop? What causes this problem? How to fix it? If not, please dive into this post from the MiniTool Website. We will explain the reasons and provide several solutions to the Sony VAIO not turning on issue.
Why Is My Sony VAIO Laptop Not Turning on?
If you use a Sony VAIO laptop, there is a chance that you encounter the Sony VAIO not turning on problem. You will see a black screen or the Your VAIO failed to start Windows error message. It prevents the Windows operating system from loading.
When the Sony VAIO laptop failed to start, you may wonder why it happens. This issue may be triggered by hard disk failure, improper BIOS configuration, corrupted system files, a defective motherboard, or the connected peripherals.
How to Deal with Sony VAIO Not Turing On?
In this section, we will introduce several solutions to fix your Sony VAIO laptop not turning on problem. But before trying these fixes, you should do some basic checks to rule out the problem.
Pre-check
- Ensure that your VAIO is in charge.
- Make sure your AC adapter is working.
- Check that all cables are securely connected to devices, such as between your VAIO computer and the AC adapter, the AC adapter and the power cord, and the power cord and an AC outlet.
- Note that you should use the Sony VAIO’s original adapter instead of a third-party adapter.
- Unplug Battery and AC Adapter
Fix 1: Change the BIOS Boot Mode
The wrong BIOS boot configuration can be the culprit of the Sony VAIO laptop not powering on problem. Therefore, refer to this quick tutorial to change the BIOS boot mode.
Step 1: Turn off your laptop and press the ASSIST button. Then you can see a screen with the Your VAIO failed to start Windows error message.
Step 2: Select Start BIOS setup, navigate to Boot, and click Boot Mode under Boot Configuration.
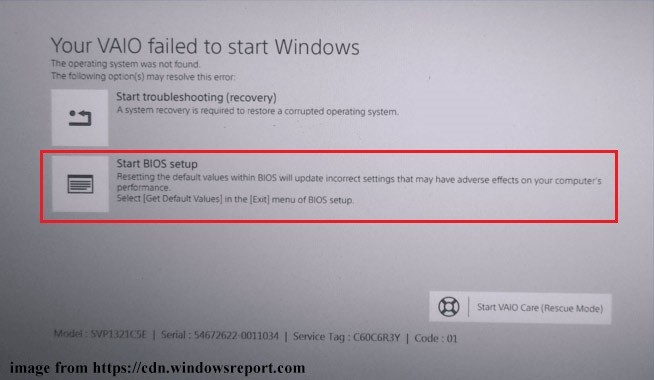
Step 3: Change the Boot Mode and press F10 to save the change. If the Legacy mode is selected, change it to the UEFI mode.
Exit the BIOS page and check whether the “Sony VAIO laptop not powering on” issue is solved.
Fix 2: Start VAIO Care (Rescue Mode)
Some users in Sony Forum report that going to Start VAIO Care mode can solve the “VAIO failed to boot” problem. Here is the guide:
Step 1: On the error screen, click Start VAIO Care (Rescue Mode) at the bottom.
Step 2: Select Shut down and wait for a moment to reboot your laptop to see if you can start Windows.
Fix 3: Run Windows Startup Repair
Startup Repair is a built-in tool in Windows. You can use it to fix the system glitches resulting in the Sony VAIO not turning on issue rather than spending a lot of time to find out the causes. By performing a startup repair, you may boot your PC properly without any issue.
Step 1: Boot your VAIO laptop with a Windows installation media.
Step 2: Press any key when the startup screen pops up. Then customize the language and click Next.
Step 3: Click Repair your computer > Troubleshoot > Advanced options > Startup Repair.
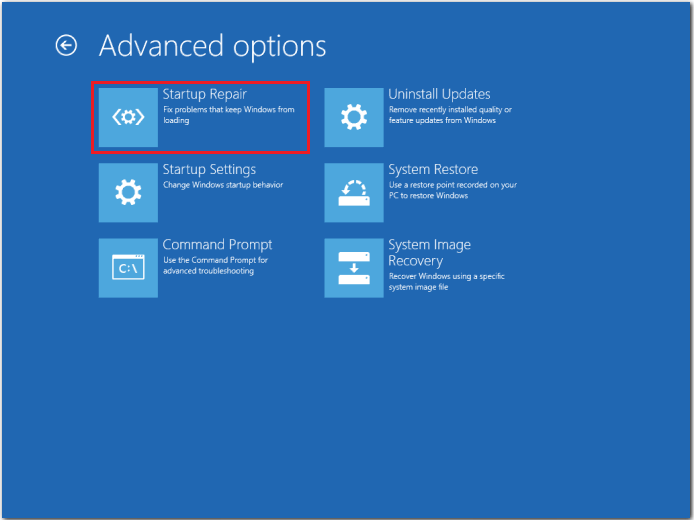
Step 4: Enter your account password and click on the Continue button.
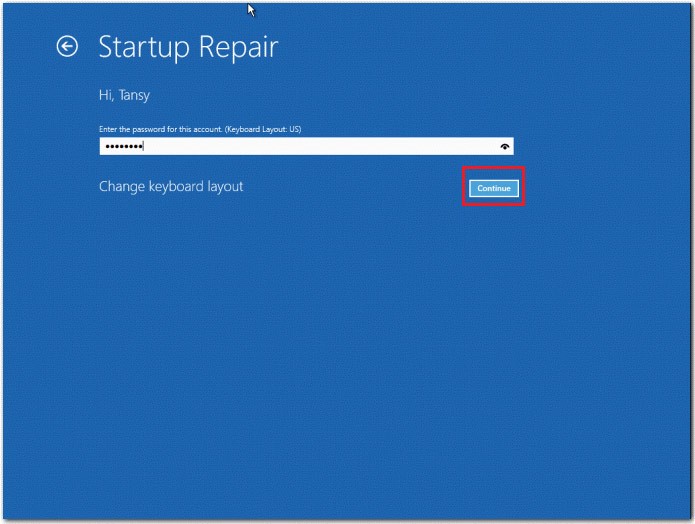
After that, the computer will automatically repair the problems that prevent Windows from booting. You need to wait for the process to complete and restart your VAIO laptop.
Fix 4: Perform a System Restore
You may encounter the Sony VAIO not turning on issue after making some big changes to the operating system. Therefore, you can perform a system restore on your VAIO computer to cancle these changes. Here are two ways for you to do it. Let’s follow the detailed guides.
Way 1: via VAIO Recovery
Step 1: Press the ASSIST button while the laptop is off to enter the error screen.
Step 2: Click on Start troubleshooting (recovery) and select language and keyboard layout to continue.
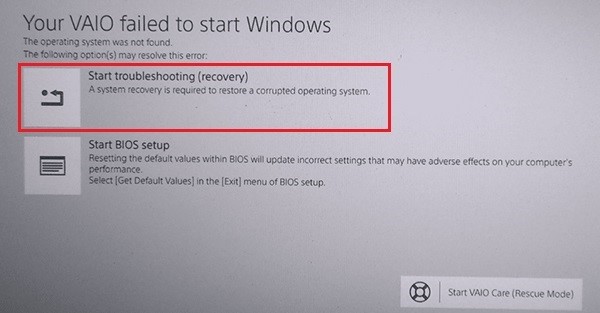
Step 3: In the pop-up window, click Troubleshoot > VAIO Recovery > choose your operating system.
Step 4: Next, click Select English and start VAIO Care (Rescue Mode) > Wizard > Skip rescue > Yes, I’m sure > Start recovery.
Way 2: via WinRE
Step 1: Boot your laptop with a Windows installation media.
Step 2: Press any key when the startup screen pops up. Then customize the language and click Next.
Step 3: Click Repair your computer > Troubleshoot > Advanced options > System Restore.
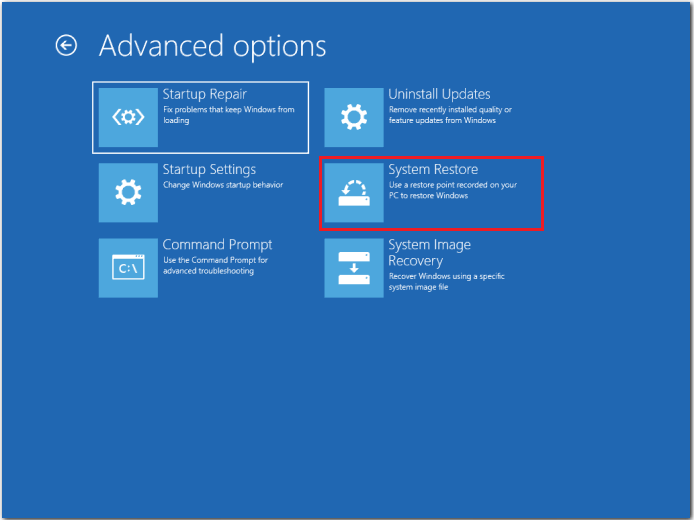
Step 4: Follow the on-screen instructions to finish the restore process
This process will take a while, just wait patiently and your problem will be solved.
Fix 5: Reset BIOS to Factory Default
If the above methods can not fix the Sony VAIO not turning on problem, you can try to reset BIOS to its factory default.
Step 1: Power off your laptop and press the ASSIST button to enter the error screen.
Step 2: Click Start BIOS setup and navigate to the Security tab.
Step 3: Select Factory Default and press the Enter key to confirm your action.
Fix 6: Reinstall the Windows System
If your Windows operating system is corrupted, your Sony VAIO will fail to boot. In this case, you’d better reinstall Windows. Reinstallation will erase everything on your system drive and reset the system to its original state. Therefore, make sure to perform a data backup first.
MiniTool ShadowMaker TrialClick to Download100%Clean & Safe
Step 1: Go to Microsoft’s official website on another bootable computer to download the Windows 10 Media Creation Tool and run it. To do so:
- On the applicable notices and license terms page, click Accept.
- Wait for Media Creation Tool to get a few things ready. When it’s done, click Next.
- On the What do you want to do window, select Create installation media (USB flash drive, DVD, or ISO file) for another PC and then click Next.

- Set the language, architecture, and edition. Then choose USB flash drive and click Next.
- Wait patiently for the installation process to complete.
Step 2: Connect the bootable USB flash drive to your VAIO laptop, power it on and enter BIOS by pressing F2 or Delete.
Step 3: Set the bootable USB flash drive as the first boot device and boot from it.
Step 4: After the Windows screen appears, set up the language and other preferences, and then click Next to continue.
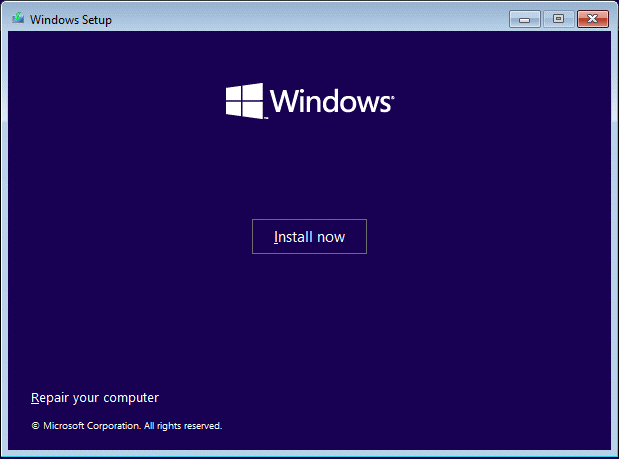
Step 5: Click Install now and follow the on-screen instructions to finish the setup configurations.
To get more details, refer to the guides below:
- Detailed Steps and Instructions to Reinstall Windows 10.
- How to Reinstall Windows 11? Try 3 Simple Ways Here Now.
Top Recommendation – Back up Your Data
Sometimes, the Sony VAIO not turning on issue may lead to potential data loss. In this situation, it is necessary to back up your essential files after solving the problem. By doing so, you can avoid the loss if you run into the issue again next time. Here, we highly recommend MiniTool ShadowMaker, a free Windows backup software.
It is a tool with powerful features that enables you to backup files, folders, disks, partitions, and the system. With the backup image of data, it is easy to restore them. For higher security, you can add password protection to the backups. And if you want to change the backup scheme to Full or Differential, MiniTool ShadowMaker can do the favor.
In addition, it supports cloning HDD to SSD and moving Windows to another drive. More importantly, you can create a bootable USB drive to boot the unbootable computer and then perform the recovery operations.
Now, get MiniTool ShadowMaker by clicking the button below. You can enjoy the free trial for 30 days. For an advanced edition, just click here. Then follow us to learn how to back up files with it.
MiniTool ShadowMaker TrialClick to Download100%Clean & Safe
Step 1: Launch MiniTool ShadowMaker and enter its main interface.
Step 2: Go to the Backup tab > click SOURCE > Folders and Files.
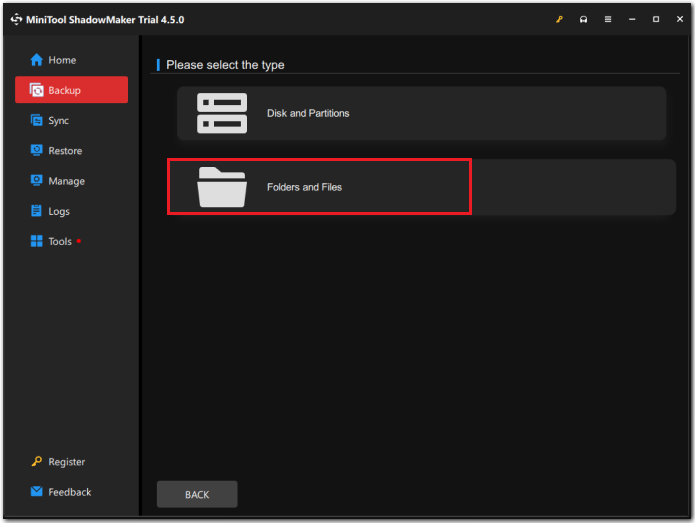
Step 3: Select the files you need to back up and click OK to go back to the Backup page.
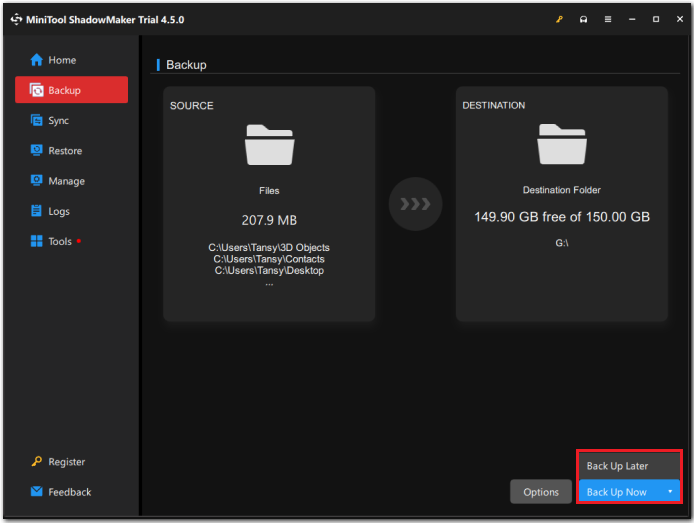
Step 4: Click DESTINATION and choose a target location to save your backup. USB flash drive and external hard drive are recommended. Then click OK.
Step 5: At the bottom of the right corner, select Back Up Now to execute the backup task. If you choose Back Up Later, the delayed backup task will be displayed on the Manage page.
We Need Your Voice
To conclude, it’s frustrating to face the Sony VAIO not turning on problem, but you can resolve it with 8 effective fixes mentioned in this post. Please remember to back up your important data to prevent data loss due to other errors.
MiniTool ShadowMaker TrialClick to Download100%Clean & Safe
You can feel free to contact us via [email protected] if you have trouble using MiniTool ShadowMaker. We will reply to you as soon as possible.
Sony VAIO Not Turning on FAQ
2. Change the BIOS boot mode
3. Start VAIO Care mode
4. Reset BIOS to its factory default
5. Perform a system restore
6. Run a Windows Startup Repair
7. Reinstall the Windows system
Step 2: Make sure your computer is properly plugged into an outlet and the battery is fully charged, then restart your laptop.
Step 3: After powering on the PC, press FN + F7 to select the display output and then press Enter.
