Do you know how to upgrade Windows Server 2012/2012 R2 to 2016 without losing data? During the upgrade, it is easy to run into some accidents and lose your data, so, here on MiniTool, we would like to give you some advice for the upgrade.
Upgraded Features of Windows Server 2016
Windows Server 2016 was initially released on September 26, 2016, and broadly released for retail sale on October 12, 2016. It has many excellent and advanced features attracting Windows Server 2012/2012 R2 users to change their system.
Some users may still be reluctant to part with the old Server system. If you are one of them, let’s see some upgraded features of Windows Server 2016 that may change your mind.
Developed security features include:
- Shielded Virtual Machines
- Host Guardian Service
- Credential Guard
- Remote Credential Guard
- Device Guard
- Control Flow Guard
- Etc.
Better datacenter operations develop here, including:
- Cluster OS Rolling Upgrade
- Storage Spaces Direct
- Storage Replica
- Site-Aware Failover Clusters
- Virtual Machine Storage Resiliency
- Storage Health Monitoring
- Network Controller
- Etc.
Now, it’s time to make the decision for the Windows server 2012 R2 to 2016 upgrade. This upgrade is available for both Windows Server 2012 and 2012 R2 users. More Windows Server comparisons, you can see Windows Server 2022 vs 2019 vs 2016 – Which One to Choose.
Preparations Before Upgrading Windows Server 2012/2012 R2 to 2016
First of all, don’t hurry to migrate Windows Server 2012/2012 R2 to 2016 directly. You need to make some preparations to make sure the upgrade process will go smoothly and for that, the basic requirements should be met.
This is the minimal system requirements for Windows Server 2016:
- Processor: A minimum of AMD64 or 1.4GHz EMT64 Processor
- RAM: 512 MB and 2 GB for Window Servers that have the Desktop Experience feature
- Disk Space: A minimum disk space of 32 GB, PCI Express-compliant
- Network: A Gigabit adapter with 1 Gbps throughput; PXE-supported
- Optical Storage: DVD drive (if installing the OS from DVD media)
This is the recommended requirements for Windows Server 2016:
- Processor: 3.0GHz 64 Bit Processor
- RAM: 8GB RAM
- Disk Space: 32 GB
- Network: Gigabit (10/100/1000baseT) Ethernet adapter, 1Gbps connection is ideal.
- Optical Storage: DVD drive (if installing the OS from DVD media)
Apart from that, there are other notifications to upgrade Windows Server 2012 (R2) to 2016 without losing data.
1. Notice that Windows Server 2016 only supports the x64-bit operating system and upgrading from 32-bit to 64-bit is not possible, so you need to check if the installed programs are x64-bit, or they may fail to work after the upgrade.
2. The version upgrade among Servers will erase all your data. For example, you can’t keep your data when upgrading Windows Server 2012 Standard Edition to Windows Server 2016 Datacenter Edition.
3. Make sure the system and applications installed have been up to date.
4. Clean up unnecessary data as much as possible and verify if your disk has enough space.
5. Deactivate your virus protection because it may stop or lag the upgrade procedures, and make sure no virtual machines running.
6. If the server uses NIC Teaming, disable it and after the server is upgraded, enable the NIC Teaming again.
7. Prepare a full backup for your system because once the upgrade goes wrong, you can resort to the backup to get everything restored.
8. Prepare a Windows Server 2016 Setup media.
How to Upgrade Windows Server 2012/2012 R2 to 2016 Without Losing Data?
Part 1: Collect Diagnostic Information
According to what Microsoft suggests, you had better collect some information from the Server for diagnostic and troubleshooting purposes. You need to store it somewhere so that you can get it when you can’t access your device once the upgrade failure happens.
To collect the diagnostic information, you can do as follows.
Step 1: Run an elevated PowerShell prompt as administrator and write down the current directory.
Step 2: Run the following commands.
- Get-ComputerInfo
- systeminfo.exe
- ipconfig /all
Step 3: Go to File Explorer and navigate to the noted directory. Then copy the files to your external hard drive or network location from your computer.
Part 2: Protect Your Data
You need to start a backup for your important data, at best the whole system, to prevent any failure happens. It is an important step and if you want to find a reliable backup software, we would like to recommend MiniTool ShadowMaker.
MiniTool ShadowMaker, as free backup software, has many wonderful features available to improve the user experience. It provides multiple backup sources, including files, folders, partitions, disks, and your system. You are allowed to apply a Server backup for data backup and recovery.
Furthermore, to save time and make your system resources highly utilized, MiniTool offers backup schedules and schemes for automatic backups. You just need to configure the time point and choose schemes among full, incremental, and differential backups.
Download and install MiniTool ShadowMaker and you will get a 30-day free trial version. We advise you to prepare an external hard drive to store the backup and you need to connect the drive before launching the program so the drive can be recognized.
MiniTool ShadowMaker TrialClick to Download100%Clean & Safe
To do the backup, you can start with these steps.
Step 1: Launch the program and click Keep Trial to enter the interface.
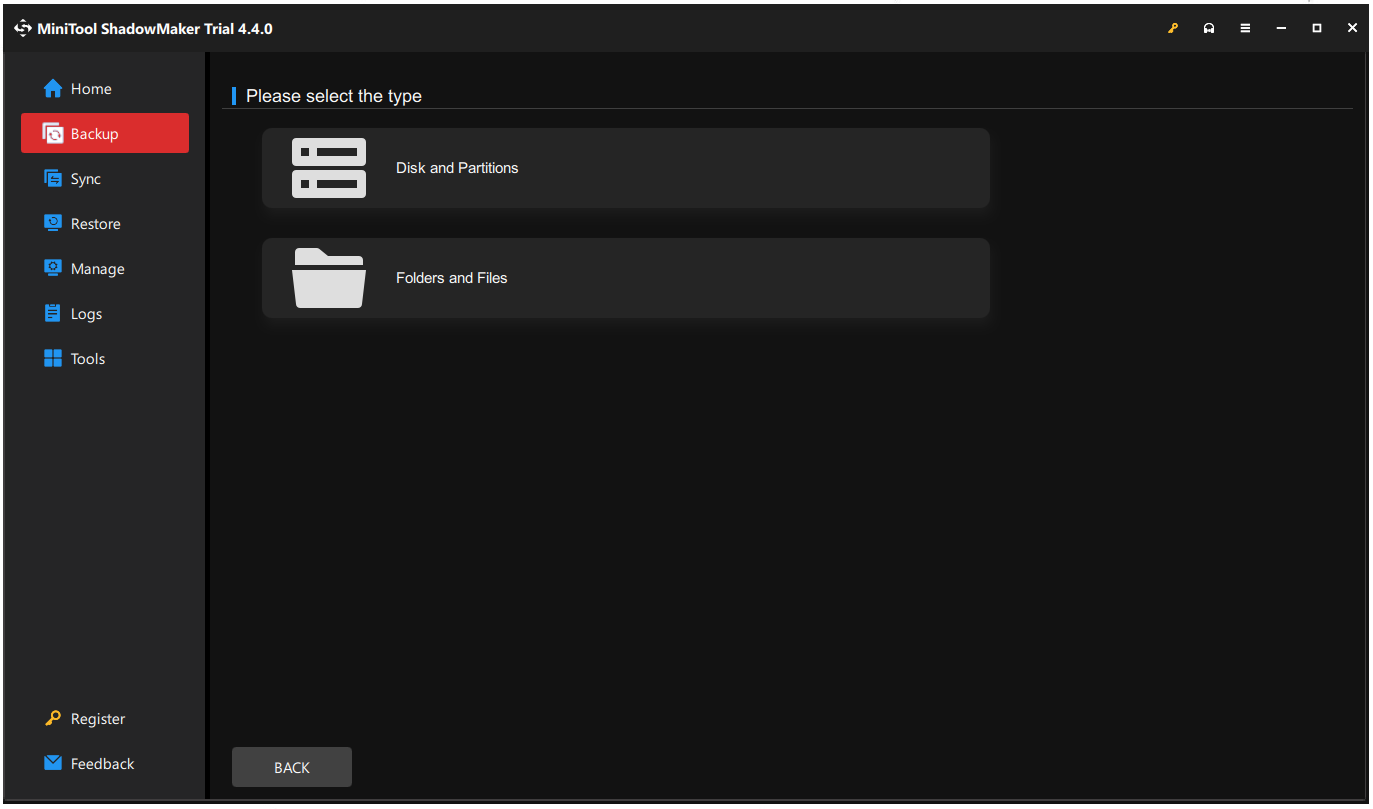
Step 2: In the Backup tab, choose the SOURCE section where the system-included partitions have been set by default. If you want to back up others, you can choose Disk and Partitions and Folders and Files.
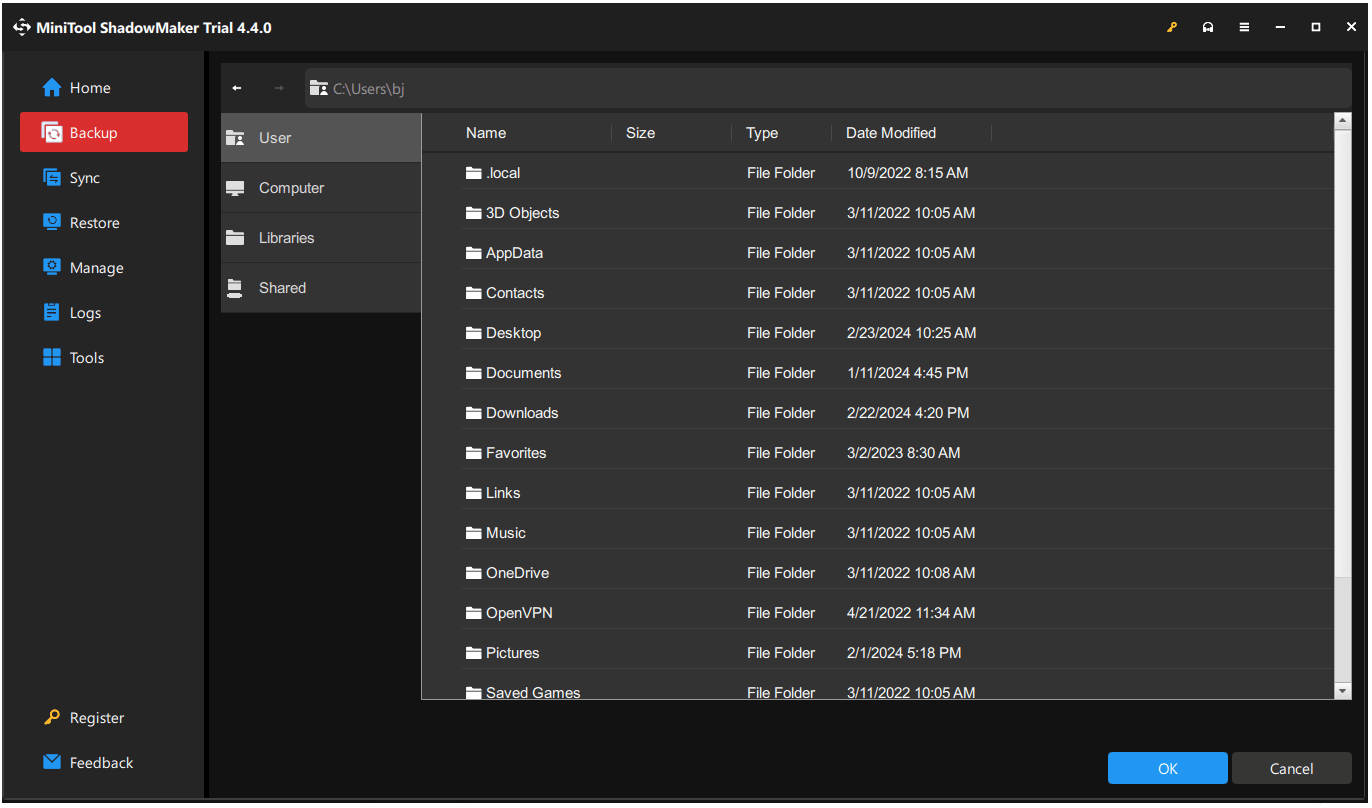
Step 3: Go to the DESTINATION section where four options are available – User, Computer, Libraries, and Shared and choose where to store the backup.
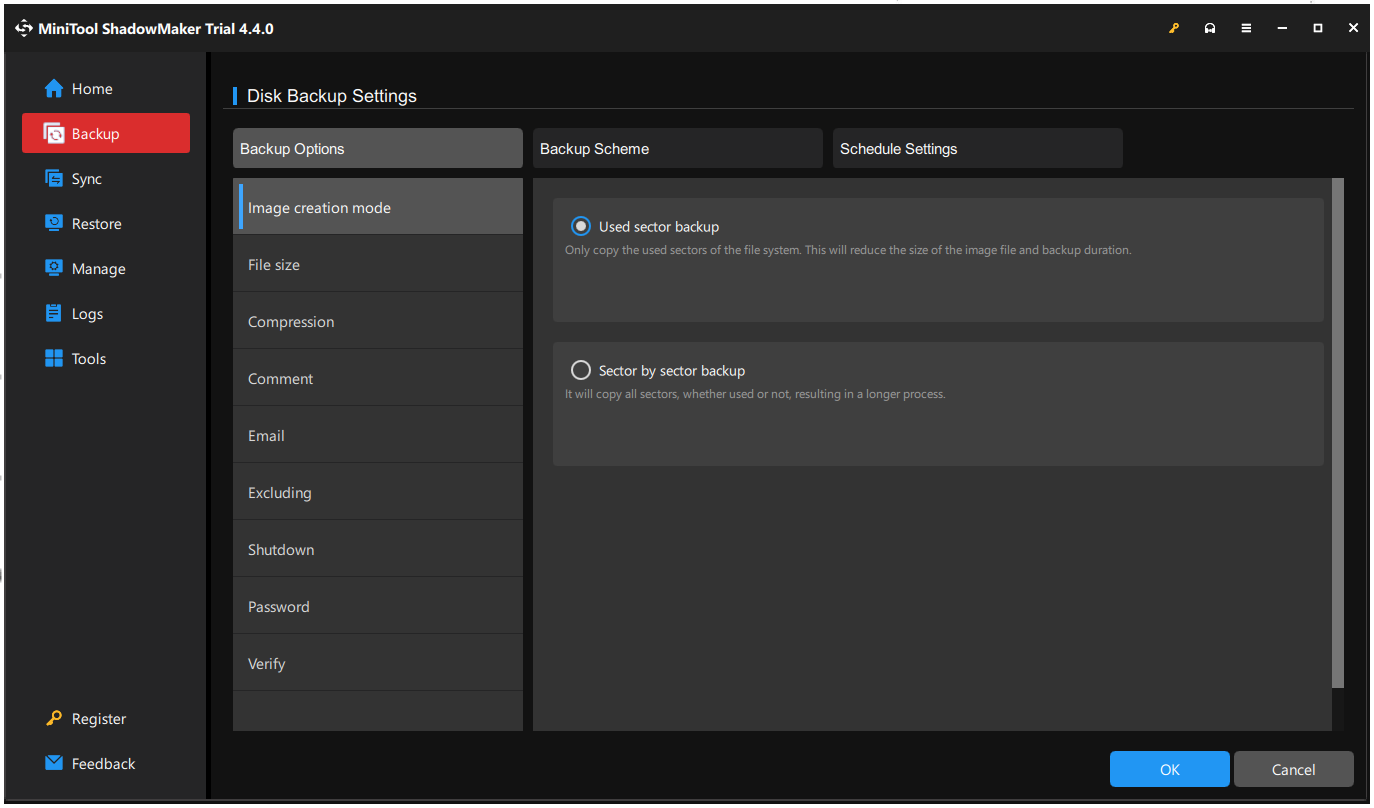
Step 4: Choose the Options feature if you want to configure the backup settings. You can choose your image creation mode, file size, and compression level, and enable password protection.
Step 5: When you finish that, now, you can click Back Up Now to start the task immediately. Alternatively, choose Back Up Later and start it in the Manage tab when needed.
Related post: How to Clone Windows Server to HDD/SSD? Here Is a Guide!
Part 3: Upgrade Windows Server 2012/2012 R2 to 2016
Now that you have prepared all of the above, you can upgrade Windows Server 2012 (R2) to 2016 without losing data. Here is the detailed guide and please follow that one by one.
Step 1: Make sure you have inserted or installed the Windows Server 2016 installation media and login to the server as an administrator.
Step 2: Locate and browse the root of the installation media and double-click setup.exe.
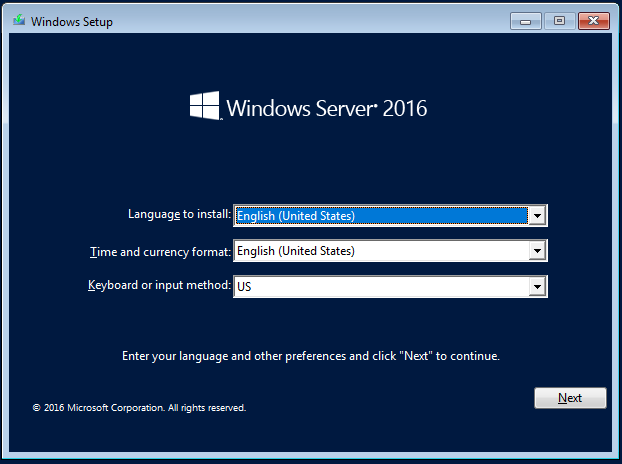
Step 3: When the Windows Server 2016 Setup window appears, choose language, time and currency, and keyboard or input method, and click Next to go on with the steps.
Step 4: Then you may click Install now to start the setup.
Step 5: When you are asked to input the product key, do that and click Next for the next steps.
Step 6: When you are prompted to the Select Image window, you can see multiple system editions are allowed to choose. Choose the one that meets your organization’s requirements and click Next.
Step 7: After that, Microsoft will show you a series of applicable notices and license terms. You can click Accept to continue the procedures.
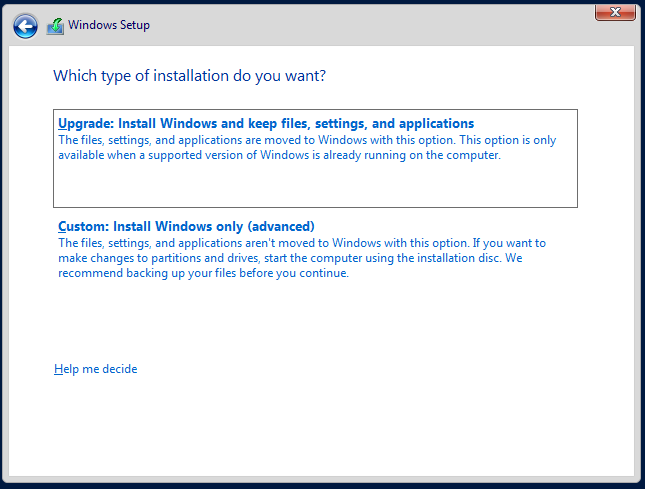
Step 8: Now, you can choose which type of installation you want – Upgrade or Custom. each one has a detailed explanation and you can choose them based on your demands. Here, you can choose the second one for Windows only.
Step 9: Choose the right drive to start the installation. If the chosen drive has files related to the old system, they will be moved to a folder named Windows.old.
Then Windows will automatically check your system for compatibility and start the upgrade process.
Please be patient and the installation may take some time to finish. You can follow the on-screen prompts to customize the settings.
Further Reading: Migrate Windows Server 2012/2012 R2 to 2016 via Backup and Restore
Backup and restore can help you migrate Windows Server 2012/2012 R2 to 2016 if you can find a running Windows Server 2016. It will be easier to perform only if you choose a reliable utility – MiniTool ShadowMaker.
You can use this tool to back up Windows Server 2016 and restore this system backup to a Windows Server 2012 computer. If you are worried about hardware compatibility issues, MiniTool can resolve that easily via Universal Restore.
MiniTool ShadowMaker TrialClick to Download100%Clean & Safe
First of all, you need to use MiniTool to back up Windows Server 2016 on an external hard drive and then prepare another drive to store the bootable edition of MiniTool ShadowMaker created by MiniTool Media Builder.
You can find this feature in the Tools tab and for detailed steps to create a bootable drive, this post can be helpful: Create Bootable CD/DVD/USB Drive with Bootable Media Builder.
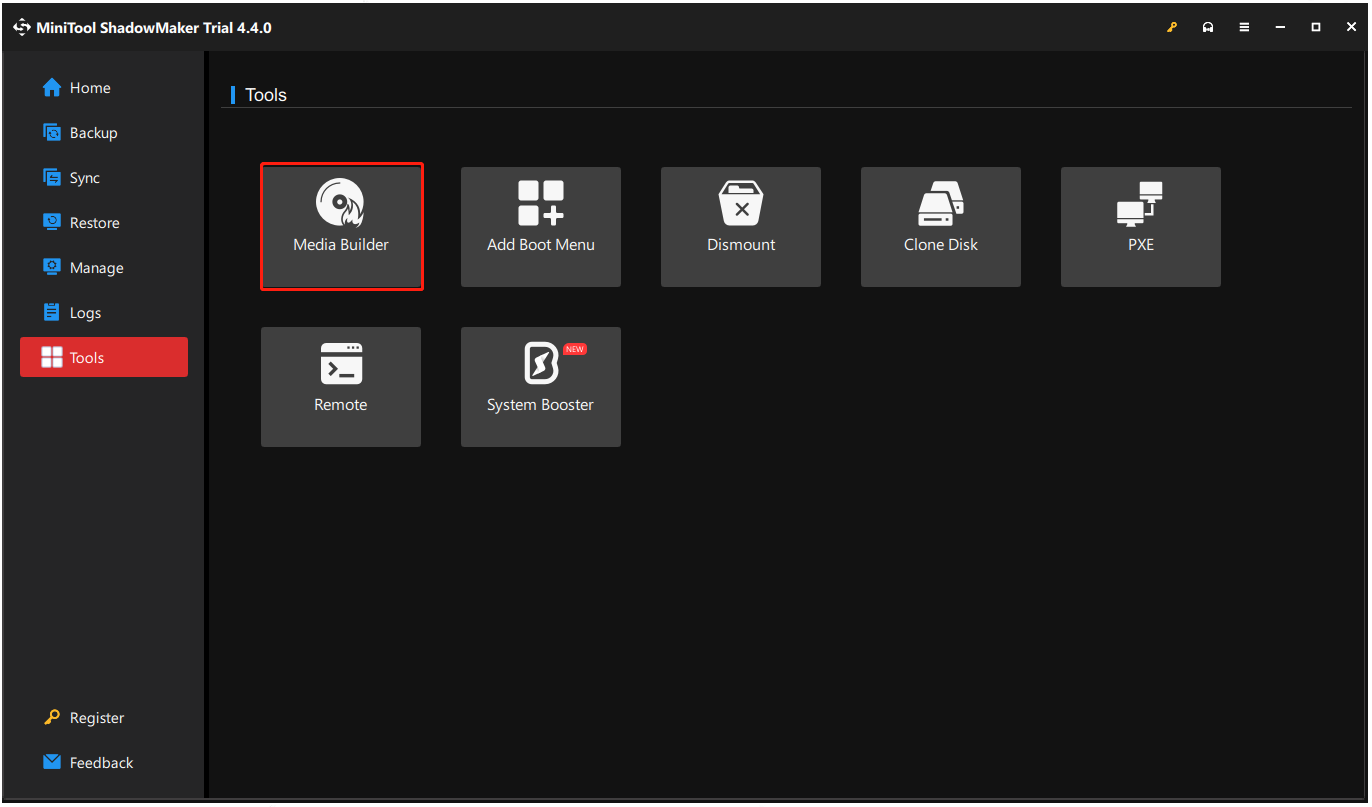
Connect the two drives to the target computer, enter the MiniTool recovery environment. In the Restore page, find the system image you have created, and click the Restore button to follow the next on-screen instructions.
After that, open MiniTool ShadowMaker in WinPE and choose Universal Restore in Tools. This feature will automatically detect and list all the operating systems that are installed on the hard disk. Just choose the one you need and click the RESTORE button to continue.
You need to wait for a while until the restoration operation and then exit WinPE to boot Windows from the computer with dissimilar hardware without any issues.
If you still have issues with the universal Restore feature, the previous article on MiniTool has more explanations and a detailed guide to it: A Guide on How to Restore Windows Backup to a Different Computer.
Bottom Line:
Before upgrading Windows Server 2012/2012 R2 to 2016, you need to do some preparations to prevent data loss. Some people will ignore this step but that is necessary. The whole detailed steps are listed and you can choose the suitable method to finish the Windows server 2012 r2 to 2016 upgrade.
Besides, MiniTool SadowMaker, which we recommended, boasts many wonderful features and if you run into any issues when using this software, you can contact us via [email protected] and we have a professional support team to resolve your concerns.
