Windows Failed to Start Windows 10/11
Some of you might be unable to start Windows after a hardware or software change. As soon as it occurs, you will be stuck at the following error message screen and cannot boot into Windows.
Windows failed to start. A recent hardware or software change might be the cause. To fix the problem.
- Insert your Windows Installation disk and restart your computer.
- Choose your language setting, and then click “Next”.
- Click “Repair your computer”.
Some possible causes for why you are stuck at this screen might be:
- Corrupted BCD files.
- Damaged System Files.
- Virus and malware infections.
- Incompatible third-party software
- Incorrect boot order.
Suggestion: Back up Your System Before Hand
Now, your computer can boot up without error. To avoid having trouble in starting the computer once more, it is essential to create a backup of your system. When your computer crashes, you can use this backup image to restore your system to an earlier state.
Here, we recommend backing up your system with a piece of free backup software – MiniTool ShadowMaker. It allows you to create a backup for your systems, partitions, disks, folders and files. Meanwhile, this tool is also known for providing a one-click system backup solution for Windows devices, that is to say, you can back up your OS easily. To do so:
Step 1. Launch MiniTool ShadowMaker and go to the Backup page.
MiniTool ShadowMaker TrialClick to Download100%Clean & Safe
Step 2. In this page, you can choose the backup source and destination. As you can see in SOURCE, this program is set to back up your operating system by default, so you just need to choose a destination path for the backup image in DESTINATION (an external drive or USB flash disk is preferred).
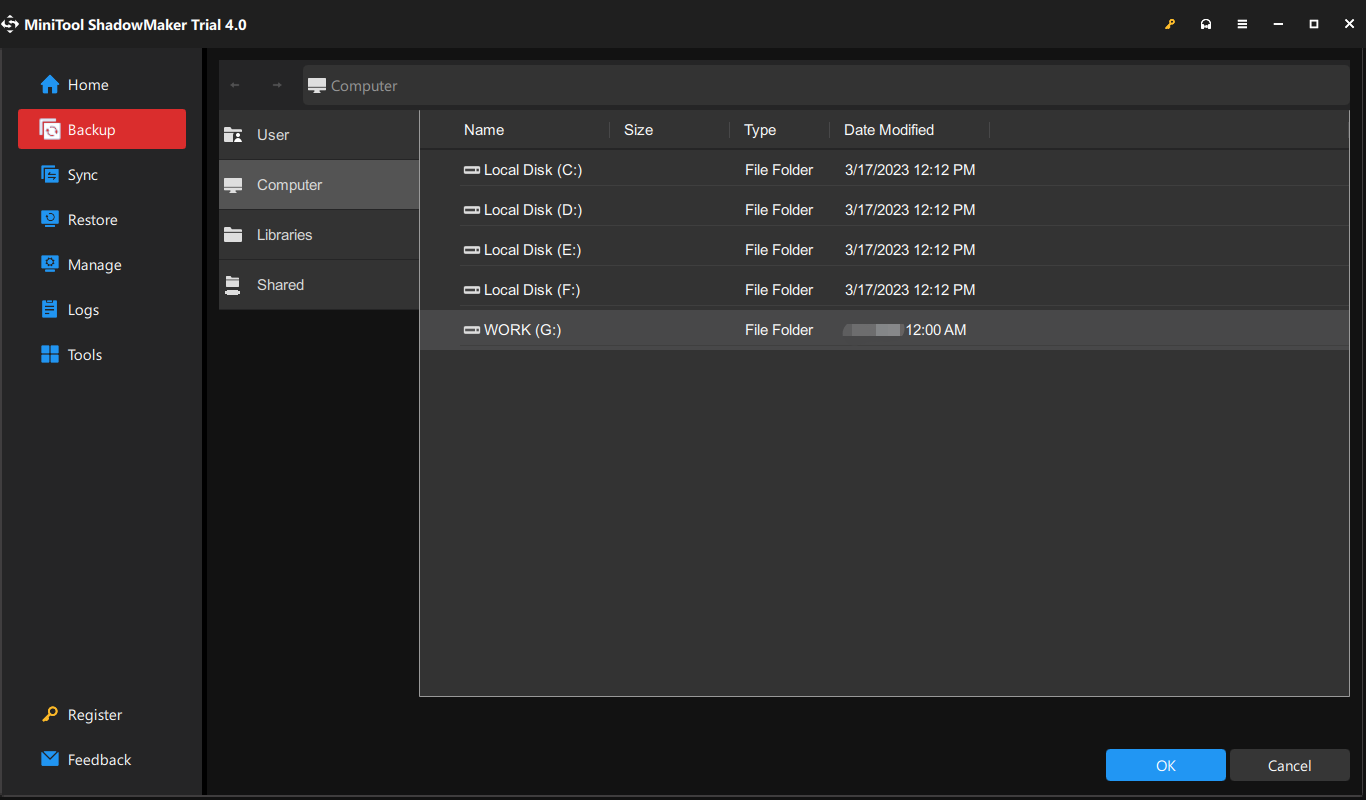
Step 3. Click on Back Up Now to start the task immediately.
How to Fix Windows Failed to Start Windows 11/10?
Fix 1: Run Automatic Repair
When your system encounters issues like Windows failed to start Windows 10, you can use the inbuilt Automatic Repair feature. This feature will scan system files, registry settings, & configuration settings and fix the problem on its own.
Step 1. Press the Power button to power off your computer and reboot it several times when you see the Windows logo. Then, you will see the Automatic/Startup Repair screen.
Step 2. Press Advanced options to enter WinRE.
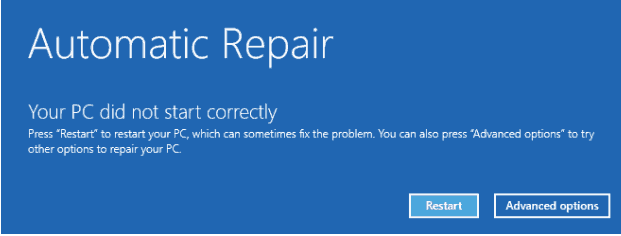
Step 3. Go to Troubleshoot > Advanced options > Automatic/Startup Repair. Then, this feature will start to deal with Windows failed to start Windows 10 for you.
Step 4. Once the process is complete, reboot your computer.
Fix 2: Rebuild BCD
BCD (also known as Boot Configuration Data) contains the files that the bootloader can find to boot Windows. Sometimes, BCD might be corrupted due to some reason, leading to Windows failed to start Windows 10/11. In this is the case, rebuilding BCD might do the trick.
Step 1. First, you need to create a bootable USB disk on another computer that works normally. Insert the Windows bootable recovery disk and reboot your computer.
Step 2. If prompted by Press any key to boot from CD or DVD, hit any key to continue.
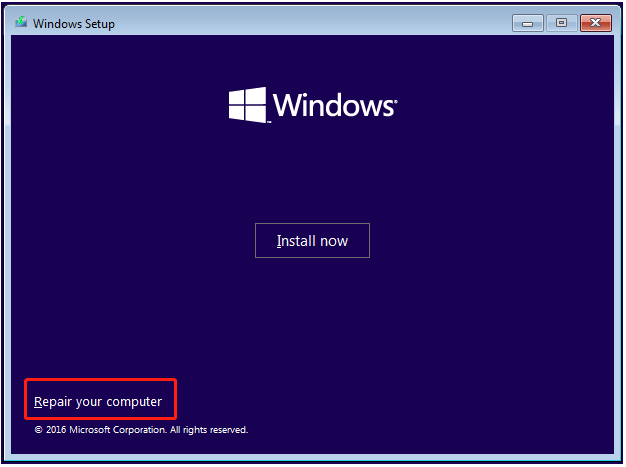
Step 3. Choose your language preferences and click on Repair your computer from the lower left corner.
Step 4. Go to Troubleshoot > Advanced options > Command Prompt.
Step 5. Type the following command one by one and don’t forget to hit Enter after each command.
bootrec.exe /FixMbr
bootrec.exe /FixBoot
bootrec.exe /RebuildBcd
Step 6. If these commands fail, run the following command:
bcdedit /export C:\BCD_Backup
c:
cd boot
attrib bcd -s -h -r
ren c:\boot\bcd bcd.old
bootrec /RebuildBcd
Step 7. Quit Command Prompt and reboot your computer to check if Windows failed to start on startup is gone.
Fix 3: Run SFC & CHKDSK
Another method is to run SFC and CHKDSK in Windows Recovery Environment. Follow these steps:
Step 1. Boot your computer from the bootable recovery disk or reboot the computer three times to enter WinRE.
Step 2. Go to Troubleshoot > Advanced options > Command Prompt.
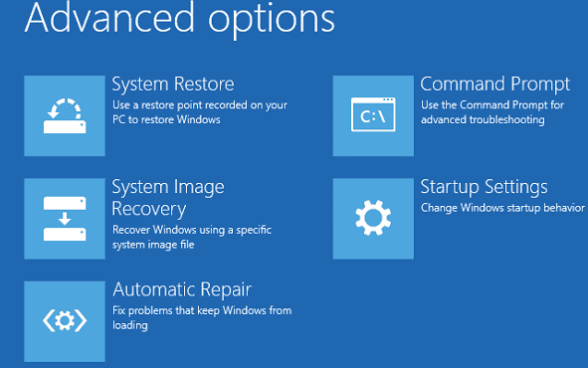
Step 3. Type sfc /scannow and hit Enter.
Step 4. After the process is done, run chkdsk C: /f /r /x.
Fix 4: Set Correct Boot Order
The bootloader will look for a set of files when Windows starts. If it cannot find the corresponding files, Windows will not load and you may be probably stuck on the Windows failed to start a recent hardware or software change might be the cause screen. Therefore, make sure that the OS drive is the first priority. Here’s how to set the correct boot order:
Step 1. Shut down your computer and reboot it. When pressing the power button to restart it, press Delete, F1, or F2 (depending on the manufacturer of your computer) to enter the BIOS setup.
Step 2. Go to the Boot tab > select Boot Device Priority > press Enter.
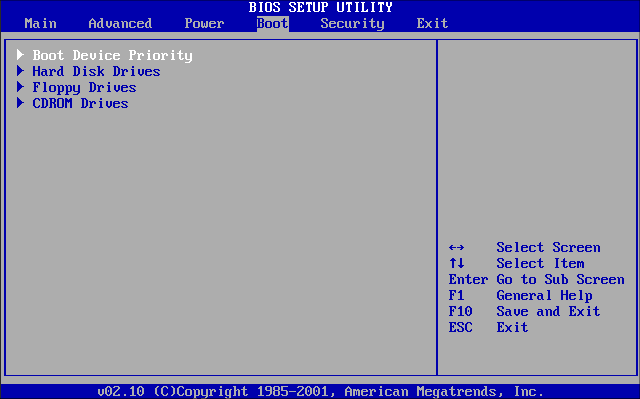
Step 3. Set the default bootable drive to HDD or SSD.
Step 4. Press F10 to save the changes and exit BIOS.
We Need Your Voice
That’s all the causes and solutions for why Windows failed to start after a recent hardware or software change. For more problems about our products, you can leave a comment below or send an email to [email protected]. Have a nice day!
