For some reason, you might need to factory reset your computer but the device won’t boot up normally. In a situation like this, you will ask: is it possible to factory reset Windows 10/11 from boot? Of course, yes. MiniTool Software writes this post to tell you how to factory reset a PC without turning it on.
When your Windows 10 or Windows 11 computer is not working normally, one of the ways to fix it is to factory reset Windows from boot. This article focuses on these issues:
- Factory reset Windows 10 from boot
- Factory reset Windows 11 from boot
- Factory reset a laptop from startup
- Factory reset a PC without turning it on
The expressions are different, but the operation is the same: we will show you how to factory reset Windows 10/11 from boot here.
What Does a PC Factory Reset Do?
Factory resetting your PC will let you perform a clean reinstallation and update of Windows. During the process, you can choose to keep your personal files and most Windows settings intact. In some cases, a clean installation may improve your PC’s performance, security, browsing experience, and battery life. In addition, it can help you solve some system issues that could not be solved by other solutions.
However, how can you factory reset Windows 10 if your computer won’t boot normally? You can choose to factory reset Windows 10 from boot. If you are running Windows 11, you can also do this. No matter you are using a desktop computer or a laptop, you can use the method introduced as follows to reset Windows 10/11 from boot.
Rescue Your Files to Keep Them Safe (Before Factory Reset)
When your computer won’t boot, you’d better first recover your files from the device to keep them safe. However, you can’t use the normal way to recover data because you can’t boot the device normally.
Fortunately, you can use MiniTool Power Data Recovery Bootable Disk to recover data from a PC that won’t boot.
About MiniTool Power Data Recovery
MiniTool Power Data Recovery is a special data recovery software, which is designed to recover all kinds of files like documents, images, pictures, videos, audio, emails, and more from different types of data storage devices.
The supported storage devices include computer internal hard drives, external hard drives, USB flash drives, SD cards, memory cards, pen drives, USB sticks, and more. It can find existing, deleted, and lost files on your drive. So, it fully meets your need to recover data from an unbootable PC.
This software can run on all versions of Windows, including the latest Windows 11. And it can work in different situations:
- Mistakenly files deletion.
- Drive reformatted or inaccessible.
- Accidental drive deletion.
- Hard drive damage.
- SSD not showing up on a PC.
- OS crash.
- And more.
To recover data from a computer without turning it on, you need to use the MiniTool’s built-in media builder to create a MiniTool Power Data Recovery Bootable Disk and then boot your PC from the disk to recover data.
How to recover data from an unbootable PC using MiniTool Power Data Recovery?
In this section, we will show you how to rescue data from a PC that won’t boot.
2. You will need a USB flash drive with a capacity of 4GB to 64GB (recommended) for creating a bootable drive. There should not be important files on that USB flash drive.
3. You need to prepare an external hard drive or a USB drive that has enough space to save the files you want to recover.
Action 1: Create a bootable USB disk
Step 1: Download and install MiniTool Power Data Recovery on a normally working computer.
MiniTool Power Data Recovery FreeClick to Download100%Clean & Safe
Step 2: Launch the software to enter its main interface.
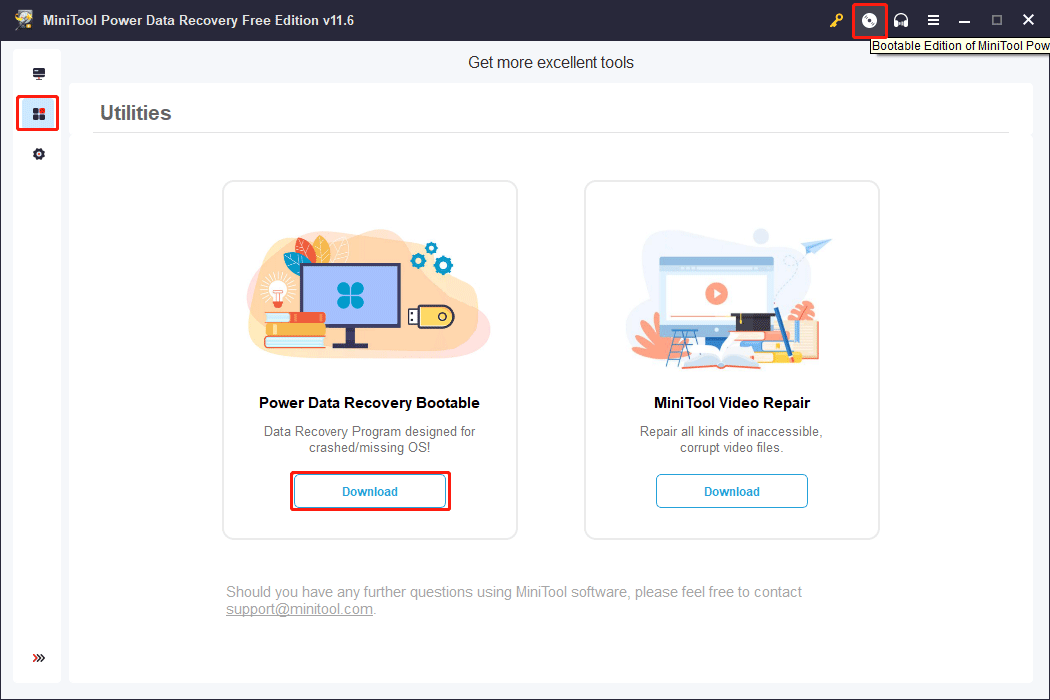
Step 3: Click the compact disc icon from the top toolbar or click Utilities > Download under Power Data Recovery Bootable, then follow the on-screen guide to get an advanced edition that contains a Snap-in WinPE Bootable Builder.
Step 4: Plug in the USB drive that is used for bootable drive creation.
Step 5: Open the advanced edition of the software. Then, click the compact disc icon > WinPE-based media with MiniTool plug-in.
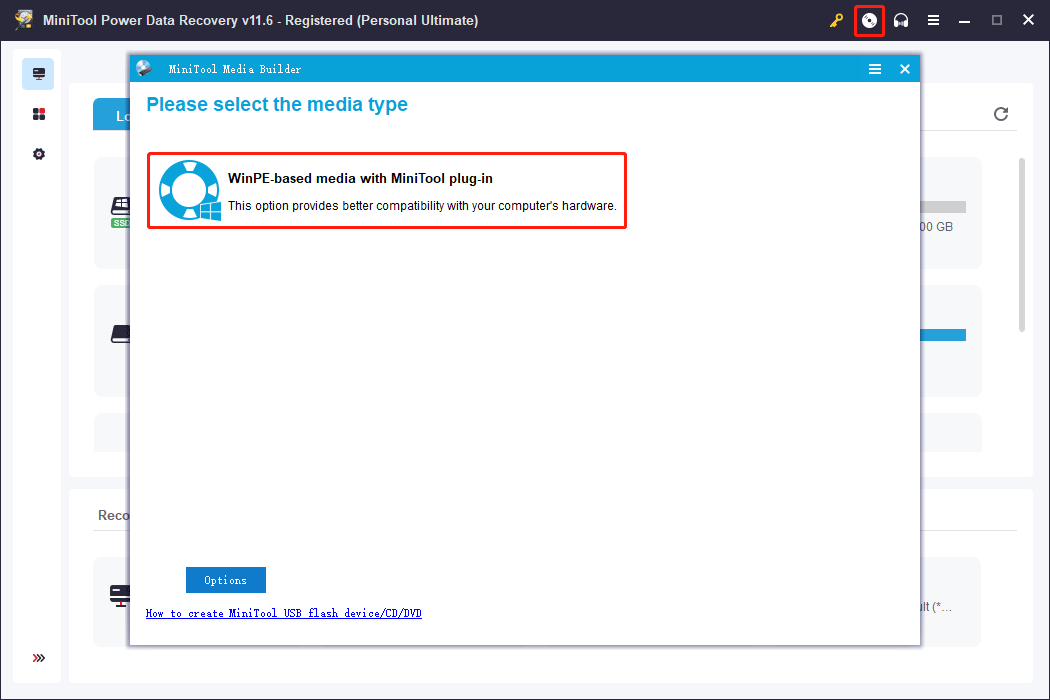
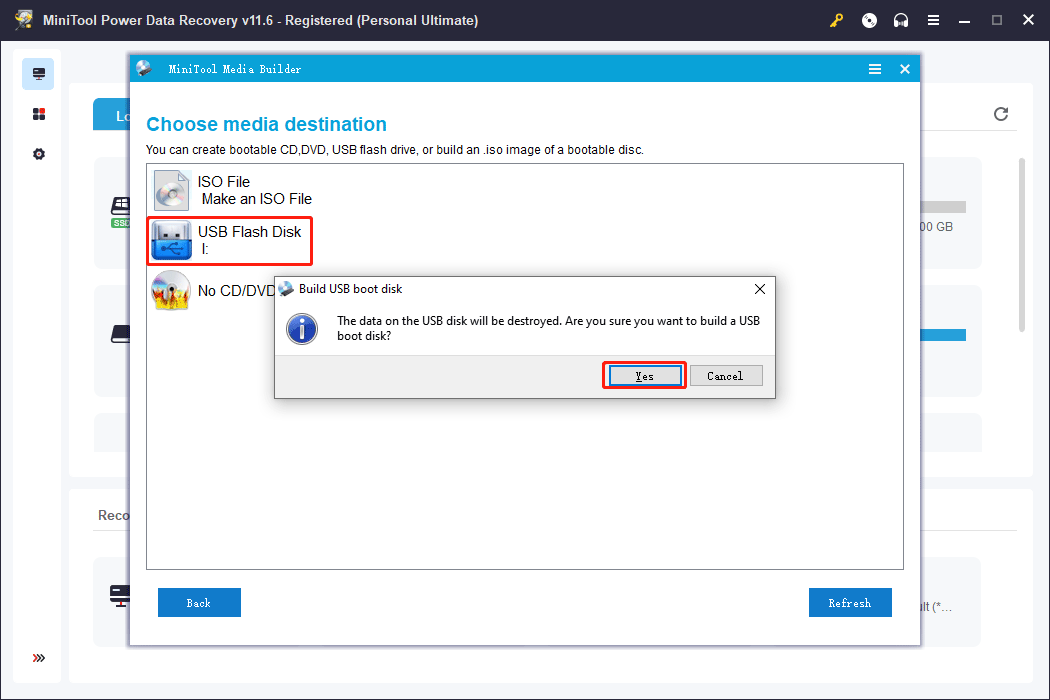
Step 6: Select USB Flash Disk to continue.
Step 7: A small window will pop up with a message saying The data on the USB disk will be destroyed. Are you sure you want to build a USB boot disk? Then, click Yes to continue.
Step 8: The builder will begin to build a bootable UBS disk. You should wait until the entire process end. Then close the software and unplug the USB flash drive.
Action 2: Recover data from your PC that won’t boot
Step 1: Connect the bootable USB drive to the computer and plug in the other drive for saving data.
Step 2: Boot your computer into BIOS, then set your computer to boot from the created bootable disk.
Step 3: Change the screen resolution if necessary. On the next screen, you can click the OK button to launch MiniTool Power Data Recovery. You can also do nothing and your computer can also automatically boot into MiniTool Power Data Recovery.
Step 4: The software will display all partitions under Logical Drives. Move your mouse cursor to the drive you want to recover data from, then click the Scan button to start scanning that drive. You can also double-click that drive to start the scanning process.
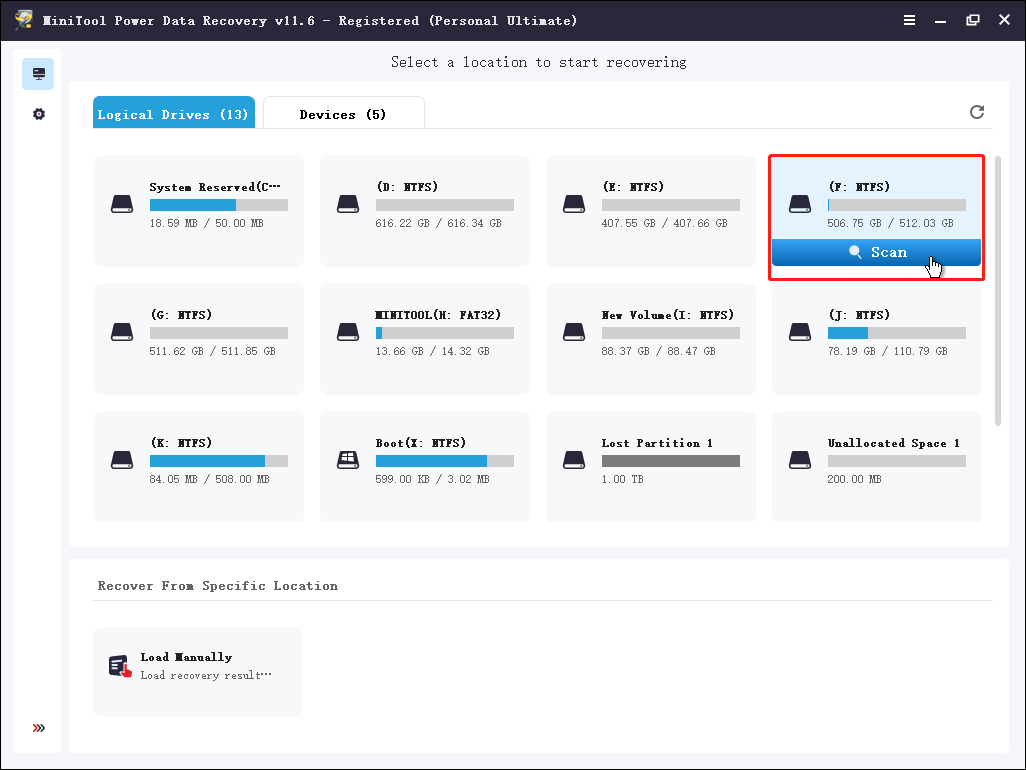
Step 5: Although this software can show the scan results during the scanning process, you should wait patiently until the entire process ends. This can make sure you get the best data recovery effect.
After scanning, the found files including existing, deleted, and lost files will be displayed as 3 paths: Deleted Files, Lost Files, and Existing Files. You can open each path to find the files you want to recover.
In addition, you can use these features to help you quickly filter the scan results:
- Type: after switching to this tab, this software will display the scan results by type, then you can find your needed file by type, which can save a lot of time for you.
- Filter: it allows you to filter files by type, date modified, file size, and file category. If you know this information, you can easily find your files with the help of this feature.
- Search: you can search for your needed file by its name.
- Preview: this software allows you to preview types of files, such as documents, images, audio, videos, etc. as long as they are not larger than 2 GB.
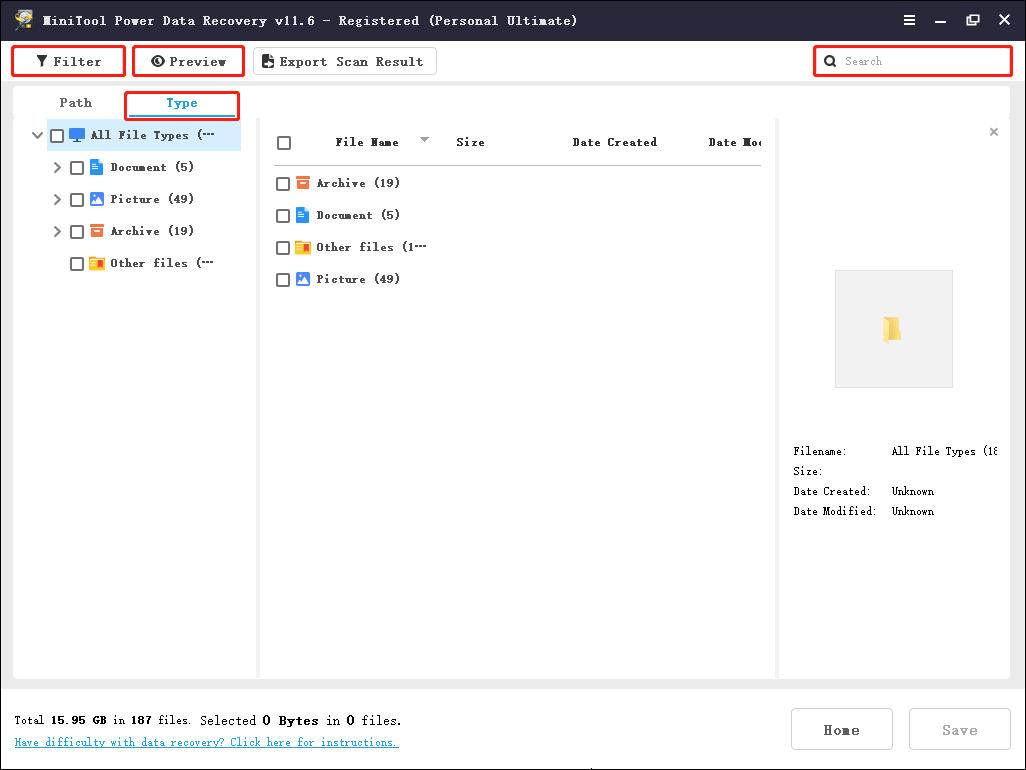
Step 6: Select the files you want to recover. You can select different files from different folders. Then, click the Save button and select the connected external drive to save your selected items.
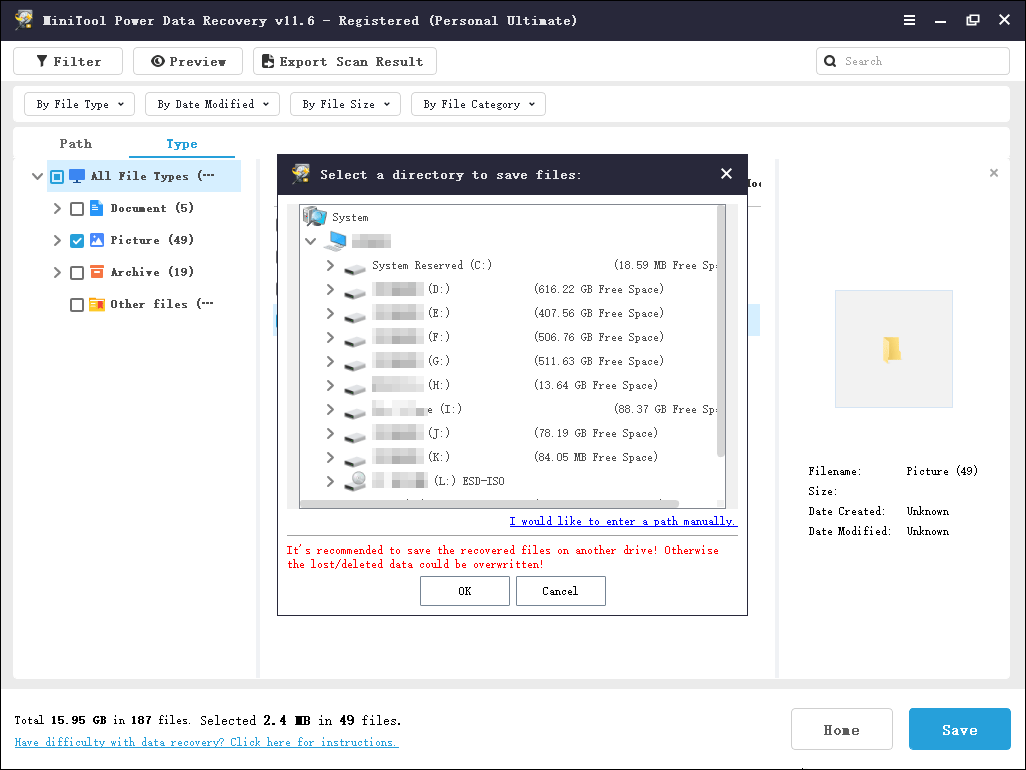
Now, you can close this software and then shut down your computer. After that, you can try to factory reset your laptop or desktop computer from boot.
About MiniTool Power Data Recovery Free Edition
MiniTool Software offers MiniTool Power Data Recovery Free Edition, which allows you to recover no more than 1GB of files without paying any cent. It can run on a Windows computer that can boot normally.
MiniTool Power Data Recovery FreeClick to Download100%Clean & Safe
If you want to recover more data or use MiniTool Power Data Recovery Boot Disk to rescue files, you need to use a full edition.
How to Factory Reset Windows 10/11 from Boot?
In general, there are two available ways to reset Windows 10//11 from boot:
- Use a Windows 10/11 installation drive.
- Boot your computer into Automatic Repair.
Method 1: use a Windows installation drive to reset Windows 10/11 from boot
You can reset Windows 10 from boot using an installation drive. You can follow this guide to do this:
Step 1: Create a Windows 10 or Windows 11 installation USB drive.
Step 2: Boot your computer into BIOS and set your computer from the installation drive.
Step 3: Select your language and region to continue.
Step 4: Click Next > Repair your computer.
Step 5: Click Troubleshoot, then Reset this PC.

Step 6: Select Keep my files or Remove everything according to your situation.
- Keep my files will remove apps and settings, but keep your personal files.
- Remove everything will remove all of your personal files, apps, and settings. After that, you can use your computer as a new one. If you choose this option, you should rescue your data using MiniTool Power Data Recovery in advance.

Step 7: Follow the instructions to confirm the operation, then restart your computer.
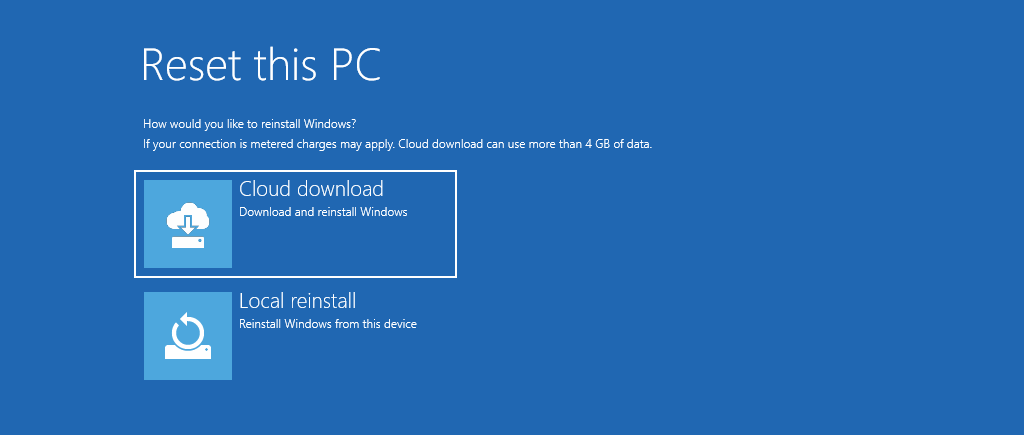
Method 2: boot your computer into Automatic Repair to factory reset Windows 10/11
You can also force your computer to Automatic Repair and then reset your Windows 10/11 computer to factory settings.
Step 1: Shut down your computer, then press the Power button to boot it, but press the Power button to force shut it down to disturb its startup. Repeat this 3 times, then your computer will show a screen saying Preparing Automatic Repair.
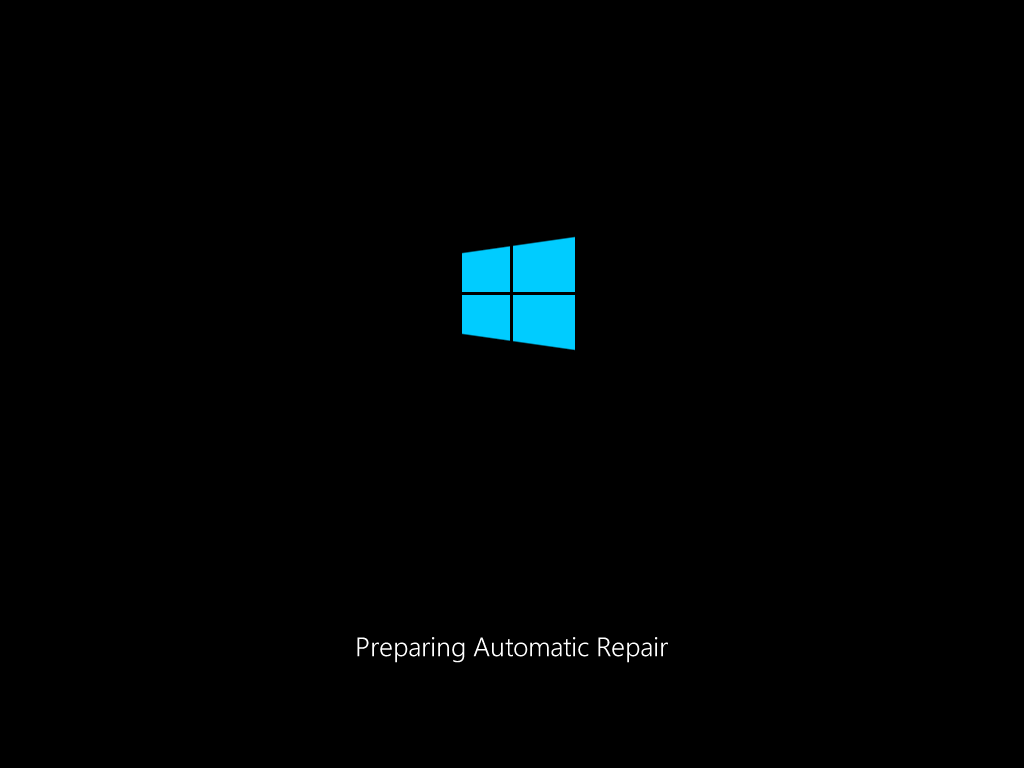
Some seconds later, you can see the Automatic Repair interface, on which you need to click the Advanced options to continue.

Step 2: Click Troubleshoot to continue.

Step 3: Click Reset this PC.
Step 4: Select Keep my files or Remove everything based on your requirements.
Step 5: Do the following to reset your Windows 10/11 to factory settings.
These are the two ways to help you factory reset Windows 10 from boot. You can select your preferred way to do this.
Recommendation: Back up Your PC
Although you can use MiniTool Power Data Recovery to recover data from an unbootable computer, we think you’d better back up your computer regularly in case data cannot be recovered due to some unexpected situations.
You can use MiniTool ShadowMaker to back up your PC.
This Windows backup software is designed to back up files, folders, partitions, disks, and systems to keep them safe. It supports files and folders sync, schedule and event trigger backup, and differential and incremental backup schemes. All in all, it is an ideal choice for data and system backup.
This data backup software has a trial edition, which allows you to experience all features for free within 30 days.
MiniTool ShadowMaker TrialClick to Download100%Clean & Safe
Bottom Line
Need to factory reset Windows 10 from boot? Need to factory reset Windows 11 from boot? No matter which Windows version you are using, you can just try these two methods introduced in this article to do the job. Don’t forget to use MiniTool Power Data Recovery to rescue your files to keep them safe if your computer won’t boot normally.
MiniTool Power Data Recovery FreeClick to Download100%Clean & Safe
Should you encounter issues when using MiniTool software, you can contact us via [email protected].
