In many situations, you need to format a USB to a Mac-supported format to make it workable on your Mac computer. Which is the best format for a USB on Mac and how to format a USB on Mac? In this post, MiniTool Software will show you the information you want to know.
When Do You Need to Format a USB Drive on Mac?
Formatting a USB drive on your Mac computer is a basic and simple operation. In many situations, you need to format a USB drive on Mac to meet your requirements:
- When you get a new USB device/thumb drive/flash drive/pen drive and want to use it on your Mac computer, you need to make sure that the file system of the USB device is supported on your Mac. If not, you need to format it to a supported format in advance.
- If you want to use a USB drive that is previously used on a Windows computer on a Mac, you may need to first format the USB to a Mac-supported file system.
- If the USB drive is inaccessible or damaged due to some reason, you need to format it to its normal state.
- If you want to use a USB drive/thumb drive/flash drive/pen drive on both Windows and Mac, you need to format it to a file system that is compatible with both Windows and Mac.
Of course, there are other situations in which you need to get a USB drive formatted. For example, if you want to delete all files in the USB drive, you can directly format the drive. We will not list all the situations in this part.
Which Is the Best Format for a USB on Mac?
No matter which situation you are facing, you need to format your USB drive to a suitable file system. Well then, which file systems do Mac support? Which is the best format for a USB drive on Mac? If you want to use the USB drive on both Windows and Mac, which file system should you use?
Let’s talk about these questions one by one.
Which File Systems do Mac Support?
Disk Utility is a Mac snap-in hard disk management tool. The file systems supported by Disk Utility are the formats supported on Mac.
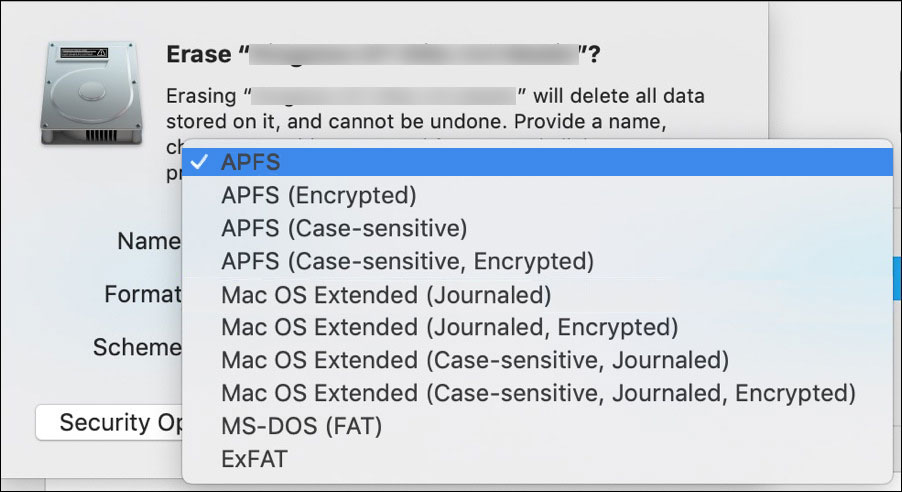
Disk Utility supports the following file system formats:
- Apple File System (APFS): the file system that is available on macOS 10.13 (High Sierra) or later.
- Mac OS Extended (HFS+): the file system that is available on macOS 10.12 (Sierra) or earlier.
- MS-DOS (FAT) and exFAT: the file systems that are compatible with both Windows and Mac
Which Is the Best File System for USB on Mac?
If you want to know which the best file system is for USB on your Mac computer, you need to know the best applicable scenarios for these file systems.
Let’s go:
Apple File System (APFS)
Apple File System (APFS) is the default file system for a Mac computer that is running macOS 10.13 (High Sierra) or later. This format features strong encryption, space sharing, snapshots, fast directory sizing, and improved file system fundamentals.
APFS is optimized for the flash or SSD storage used in recent Mac computers. But you can also use it on older systems with traditional hard disk drives (HDD) and external, direct-attached storage. Bothe bootable volume and data volume can be formatted as APFS on macOS 10.13 or later.
APFS has four formats in Disk Utility:
- APFS
- APFS (Encrypted).
- APFS (Case-sensitive).
- APFS (Case-sensitive, Encrypted)
Mac OS Extended (HFS+)
Mac OS Extended is also known as HFS+/HFS Plus or HFS Extended. It is using on macOS 10.12 (Sierra) or earlier. Mac OS Extended was the primary Mac OS X file system until it was replaced with APFS.
Mac OS Extended has four formats in Disk Utility:
- Mac OS Extended (Journaled)
- Mac OS Extended (Journaled, Encrypted)
- Mac OS Extended (Case-sensitive, Journaled)
- Mac OS Extended (Case-sensitive, Journaled, Encrypted)
MS-DOS (FAT)
This format is used for volumes that don’t exceed 32 GB.
exFAT
This format is used for volumes that exceed 32 GB.
Sum up
If you want to use the USB drive on both Windows and Mac, exFAT is a good choice. However, if you have no special requirements, APFS is a good choice for a Mac that is running macOS 10.13 (High Sierra) or later and Mac OS Extended is a good choice for a Mac that is running macOS 10.12 (Sierra) or earlier.
How to Format a USB Device on Your Mac Computer?
Step 1: Back up Your Data on the USB Drive
If there are important files on the USB drive that needs to be formatted, you need to back up the data on it beforehand. There are two backup methods: using copy & paste and using backup software.
Copy & Paste
No matter you are using Windows or Mac, you can just use copy and paste to move all files in the USB drive to another location to keep them safe.
It is very simple to do this: select the files you want to back up, and copy & paste them to the destination folder or drive.
Here are two related articles:
- How to copy and paste on Windows 10 | Copy and Paste Shortcut
- How To Copy And Paste On Mac: Useful Tricks And Tips
Backup Software
Copy and paste files on Windows or Mac may cost you a lot of time if the total size of the files is too large. To save time, you can use professional data backup software to perform a USB backup.
- If you want to back up the USB drive on your Windows computer, you can use MiniTool ShadowMaker, dedicated backup software for Windows, to back up your USB drive.
- If you want to back up the USB drive on your Mac computer, you can use Time Machine, a Mac built-in backup software, to perform a USB backup.
Step 2: Use Disk Utility to Format a USB to exFAT on Mac
Unlike Windows operating system, the Mac Disk Utility app doesn’t have a disk management feature called Format. But it has an alternative: it is Erase. You can use this feature to format a USB drive to your needed file system.
Now, we will show you how to use Disk Utility to format a USB drive to exFAT on Mac. If you want to format a thumb drive on Mac, erase a USB drive on Mac, or wipe a flash drive on Mac, this guide is also what you want.
- Connect the USB drive to your Mac computer via a USB port.
- Go to Applications > Utilities.
- Click Disk Utility to open it.
- Go to View > Show All Devices.
- The Disk Utility app will show you all the devices that are connected to your Mac in the left sidebar. You need to find the USB drive that needs to be formatted and select it to continue.
- Click the Erase button from the top toolbar.
- The Erase dialogue will pop up, in which you can click the Scheme drop-down menu to select a partition scheme.
- Open the Format drop-down menu and select ExFAT.
- Type a name for the USB drive. The maximum length for the name is 11 characters.
- Click Erase to start formatting the USB drive.
- Click Done when the USB formatting process ends.
After these steps, the USB drive is formatted to the format you want to use and all files in it are gone. That is, you can use the USB drive as a new one.
How to Recover Data from a Formatted USB Drive on Mac?
If you lose your important files because you format your USB drive by mistake, do you know how to get these formatted files back?
You can use third-party Mac data recovery software to recover data from USB on Mac. You can try Stella Data Recovery for Mac, a free Mac data recovery tool.
This software is specially designed to recover lost and deleted files on a Mac computer. It can work under different situations like Mac not turning on, Mac white screen of death, Mac black screen of death, and more. If your files are formatted by mistake, you can also use this Mac data recovery software to get them back.
You can first use the trial edition of this software to scan the USB drive you want to recover data from and then check whether this tool can find your needed files. If yes, you can use a full edition to recover them to a safe volume. You can get this software from the MiniTool official download center.
Now, you can follow this instruction to scan the USB drive for your needed files:
1. Connect the USB drive to your Mac.
2. Open the software.
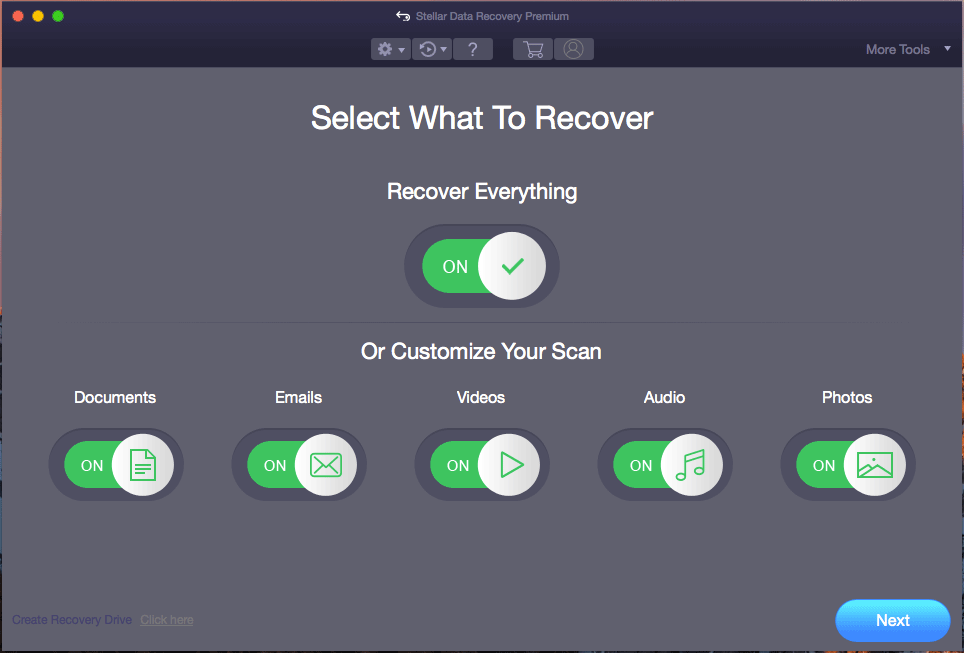
3. Turn on the button of Recover Everything. Of course, if you only need to recover some specific types of files, you can only select them to continue.
4. Click the Next button to continue.
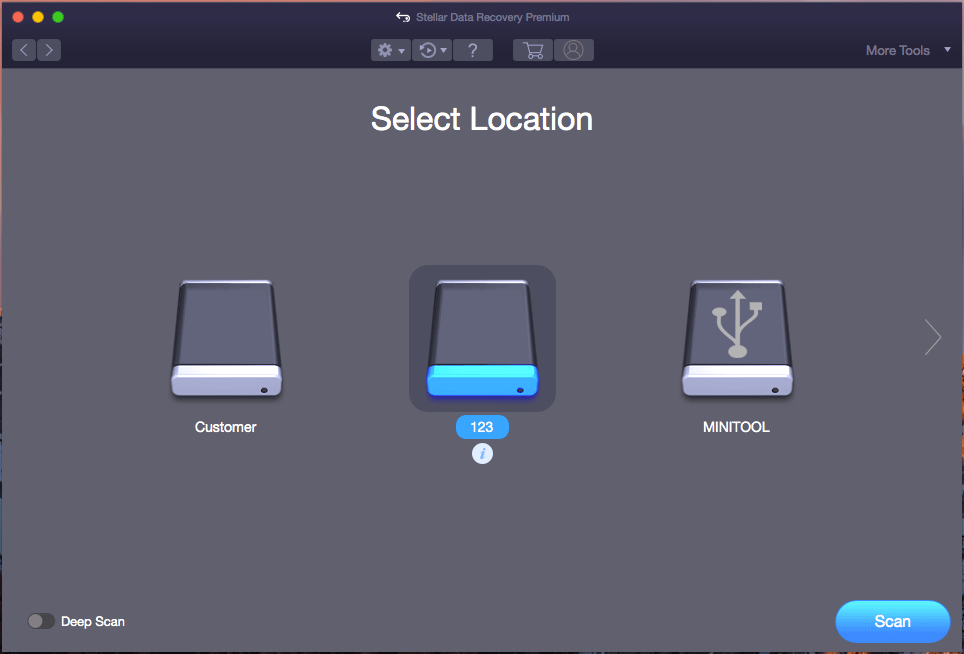
5. This software will show you the drives it can detect. You need to choose the target USB drive in this interface. If you want to perform a deep scan, you should turn on the button next to Deep Scan (on the bottom-left corner).
6. Click the Scan button to start the scanning process.
7. After scanning, you will see the scan results. You can open each path to find the files you want to rescue.
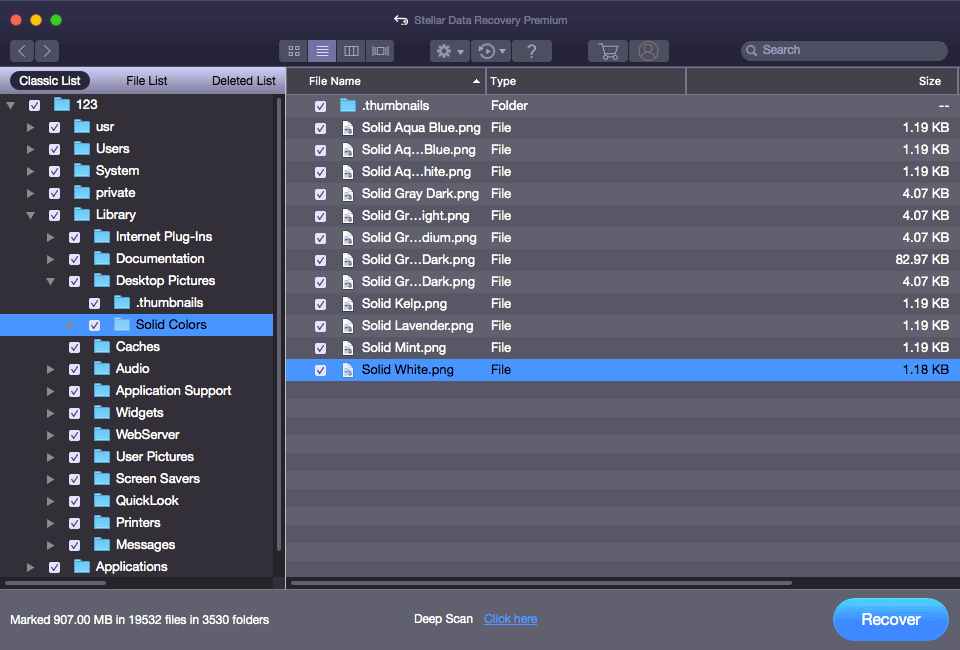
If you want to use this software to recover all your needed files, you can upgrade this software to a full edition, select the files you want to recover, click the Recover button, and choose a suitable location to save them. You should not save the selected files to the original USB drive. Otherwise, the formatted files may be overwritten and become unrecoverable.
Wrapping Things Up
You should know how to use the Disk Utility app to format a USB drive on your Mac computer. Remember to back up the files in the USB drive if they are important for you because formatting a USB drive will remove all files in it. Besides, if you need to retrieve files from a mistakenly formatted USB, you can try Stellar Data Recovery for Mac.
Should you have any other issues or suggestions, you can let us know in the comments. You can also contact us via [email protected].
How to Format a USB on Mac FAQ
- Connect your USB drive to your Mac.
- Go to Applications > Utilities > Disk Utility
- Go to View > Show All Devices.
- Select your USB drive from the left sidebar.
- Click the Erase button from the top toolbar.
- Select a partition scheme from the Scheme drop-down menu.
- Select MS-DOS (FAT) from the Format drop-down menu.
- Input a name for the USB drive.
- Click Erase.
- Click Done.
