The Start menu in Windows operating systems has been always offering quick accesses to lots of apps, files, settings, etc. But the good thing is that Microsoft allows users to customize their Start menu according to their actual needs. This post shows users how to add or remove folders on the new Windows 11 Start menu.
Windows 11 Start Menu
Before talking about the exact steps to add or remove folders on Windows 11 Start menu, I’d like to introduce what is a Start menu and what’s included in the new Windows 11 Start menu.

What Is a Start Menu
To put it in a simple way, the Start menu is actually a graphical user interface element to provide quick accesses to lots of tasks and apps installed on a computer. Start menu is an important part of the Windows operating system since Windows 95.
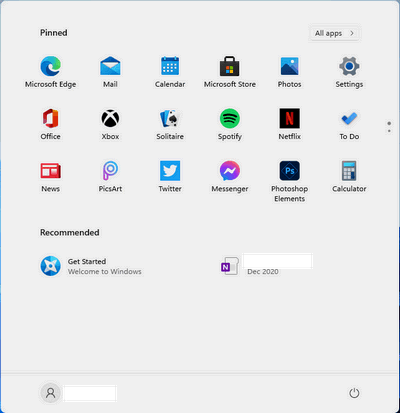
What’s Contained in Windows 11 Start Menu
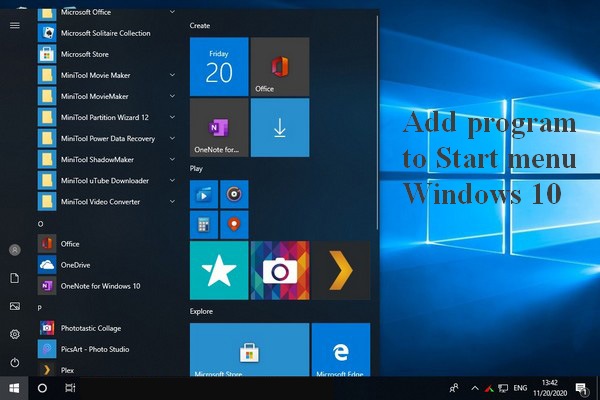
The Start menu in Windows 10 and the previous versions of operating systems contains lots of things: lists of programs, most recently opened documents, system settings, etc. However, the Windows 11 Star menu has changed a lot; it is centered in the middle of the computer screen and only contains the following sections:
- Pinned section: a list of apps icons that are used frequently by users.
- Recommended section: the icons of recommended apps and files that users are most likely to need.
- User account: there’s a profile picture and a user name to display which is the active user account. You can choose to sign out of current account, switch user account, or lock your system.
- Power button: there’s a power icon in the upper right corner of the Windows 11 Start menu; it provides options to restart, shut down, or put computer to sleep.
How To Get Back The Classic Start Menu In Windows 11?
MiniTool Power Data Recovery TrialClick to Download100%Clean & Safe
How to Add or Remove Folders on Windows 11 Start Menu
As before, Microsoft also allows you to customize the Start menu in Windows 11. You can choose which folder shortcut to add to or remove from the Start menu for faster access to locations you want. Please decide what folder icons appear or disappear (next to the power icon) in the lower right corner of the Start menu.
Steps to Add Folders to Windows 11 Start Menu
- Click on the Start button (Windows logo icon) in the taskbar at the bottom of the desktop screen to open the Start menu.
- Select Settings from the list. Also, you can press Windows + I to open Settings directly.
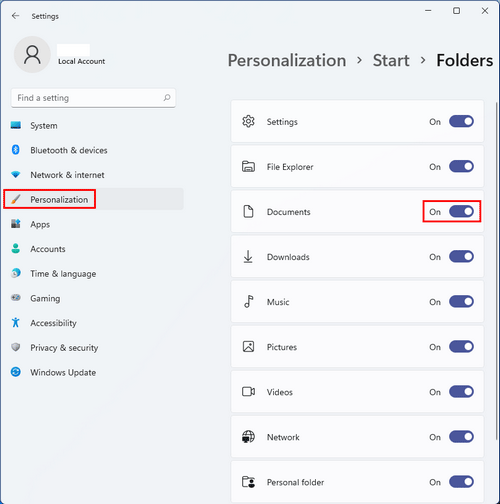
- Look for the Personalization option from the left pane and click on it.
- Go to the right pane and scroll down until you find the Start option from the list.
- In the Start pane, please scroll down and click Folders (These folders appear on Start next to the Power button).
- There will be a list of folder shortcuts that you can add to the Start menu: Settings, File Explorer, Documents, Downloads, Music, Pictures, Videos, Network, and Personal folder.
- Please toggle the switch to On after the folders you’d like to add to your Windows 11 Start menu.
There’s another way to go to Personalization window easily: right click on the blank area on your desktop -> select Personalize from the context menu.

How To Fix When Windows 10 Start Menu Won’t Open/Not Working?
Steps to Remove Folders from Windows 11 Start Menu
How to remove folders from Windows 11 Start menu? Of course, you can repeat the above steps to access Settings -> Personalization -> Start -> Folders and choose which folder shortcuts you want to remove & turn them off.
Besides, there’s another way to remove folders from the Start menu quickly:
- Open the Start menu.
- Right click on the shortcut list and select Personalize this list.
- Turn Off the folders you don’t want anymore.
That’s all I want to talk about the methods and steps to add or remove folders on Windows 11 Start menu.
