When you can’t change the background for different virtual desktops, you can refer to this post on MiniTool. Here are some feasible and useful solutions. Now, keep on reading to get more details.
I am unable to change wallpapers on different virtual desktops. I am trying to have different pictures on different desktops but somehow whenever I try to change the background, it changes for all the desktops.
I have tried changing it by clicking the desktop from the task view, but it doesn't work. When I try to use the personalize option and right-click to set to a particular desktop, nothing happens and the wallpaper doesn't change.Microsoft
Now, let’s see how to fix the “can’t change the background for different virtual desktops” issue.
Fix 1: Run SFC and DISM
The first method you can use to fix the “fails to change the background for different virtual desktops” issue is using the System File Checker (SFC) utility and DISM tool. Here is how to do that:
1. Type cmd in the Search box, and then right-click the Command Prompt app and select Run as administrator.
2. Type sfc /scannow. This process may take you much time to scan, please wait patiently.
3. If the SFC scan doesn’t work, you can run the following commands one by one and press Enter after each one.
- Dism /Online /Cleanup-Image /CheckHealth
- Dism /Online /Cleanup-Image /ScanHealth
- Dism /Online /Cleanup-Image /RestoreHealth
Once done, reboot your PC and check if the issue gets fixed.
Fix 2: Use Registry Editor
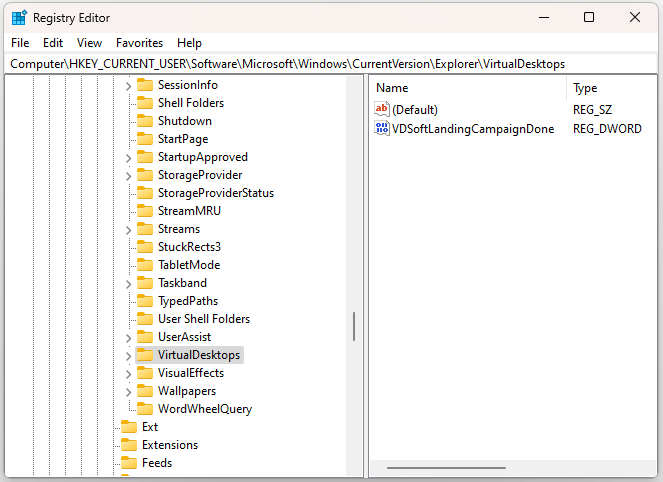
When you can’t set the background for different virtual desktops, you can use Registry Editor to fix it. Here is how to do that:
1. Press the Windows + R keys together to open the Run dialogue box. Type regedit in it.
2. Go to the following path:
Computer\HKEY_CURRENT_USER\Software\Microsoft\Windows\CurrentVersion\Explorer\VirtualDesktops\

3. Then, you can consider deleting the VirtualDesktops registry key.
Fix 3: Downgrade Windows 11 23H2 to 22H2
If you still can’t change the background for different virtual desktops, you can roll back Windows 11 23H2 to 22H2. Many users have proven that is helpful. Here is how to do that:
If you only use Windows 11 23H2 for 10 days from the date that you upgraded to the latest build, you can roll back it to 22H2 via Settings.
1. Press the Windows + I keys together to open Settings.
2. Go to System > Recovery and click Go back under Recovery options.
3. Select a reason for uninstalling 23H2 to continue. Click No, thanks and CLICK Next several times.
4. At last, click Go back to earlier build.
If the Go back button is not available after 10 days, how to go from 23H2 to 22H2/21H2? The only way you can try is to perform a clean install.
MiniTool ShadowMaker TrialClick to Download100%Clean & Safe
1. Go to the Windows 11 download page to download Windows 11 22H2 ISO.
2. Download and install Rufus from its official website. Then, burn the ISO file and create a bootable drive.
3. Connect the bootable drive to the target computer. Then, restart your PC to enter BIOS and change the boot order to let Windows run from the USB drive.
4. Follow the on-screen instructions to finish the installation.
5. Then, you need to choose language, time and current format, and keyboard or input method. After choosing them click Next to continue.
6. In the next window, click Install Now. Follow the on-screen instructions to install it.
Final Words
What to do when you can’t change the background for different virtual desktops? You can try the above methods one by one until the issue gets fixed. I hope that this post will be useful to you.