Live Kernel Memory Dump is a new feature introduced in newer versions of Windows 11 (Moment 3 update or later). It does not require taking the operating system offline and can be done while the OS is running and the problem occurs. Windows 11 now allows you to create live kernel memory dump file using Task Manager to capture memory information for unusual conditions.
These dump files contain consistent snapshots of kernel memory (optionally including user-mode memory and hypervisor memory), minidumps (with auxiliary data), and additional information to examine system state, non-fatal errors, driver issues, and BSODs.
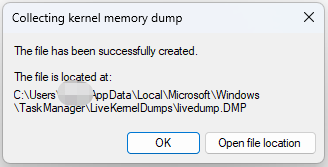
By default, the live kernel memory dumps are saved at the following location:
C:\Users\Username\AppData\Local\Microsoft\Windows\TaskManager\LiveKernelDumps
MiniTool ShadowMaker TrialClick to Download100%Clean & Safe
Create Live Kernel Memory Dump File Using Task Manager
Here is how to create live kernel memory dump file using Task Manager.
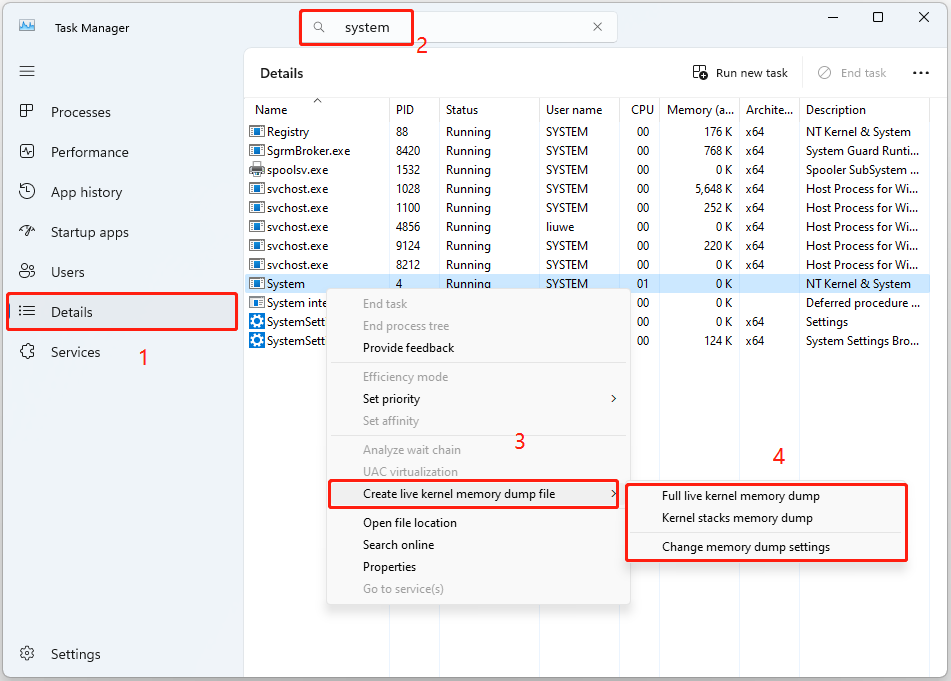
1. Type Task Manager in the Search box to open it.
2. Under the Details tab, type system in the search bar and press Enter to find it.
3. Right-click the System item to choose the Create live kernel memory dump file option. Then, you can click Full live kernel memory dump or Kernel stacks memory dump.
- Full live kernel memory dump: This option creates a dump file that contains active kernel memory as well as options to capture other types of memory, including user-mode memory and hypervisor memory.
- Kernel stacks memory dump: This option creates a smaller file that contains the kernel processor state and all kernel thread stacks.
4. Then, you will receive a message telling you the file has been successfully created and the file location of it. You can click OK to turn off the window or click Open file location to find the file path in File Explorer.
Also see: How to Fix the Live Kernel Event 193 Error on Windows 10?
Change Memory Dump Settings
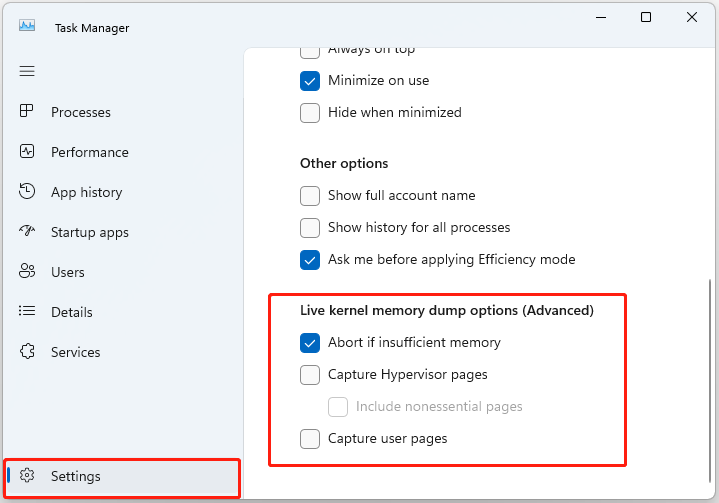
Windows 11 also allows you to control the features that create live kernel memory dump file. You can click the Settings button in Task Manager and go to the Live kernel memory dump options (Advanced) part. Then, you will get the following options to customize the live kernel memory dump file:
- Abort if insufficient memory: Check this option to stop the live dump process when there’s insufficient memory.
- Capture Hypervisor pages: Check this option to capture memory regions used by the hypervisor to support Hyper-V and virtual machines. Select the Include nonessential pages option to capture non-essential hypervisor memory pages.
- Capture User Pages: Check this option if the issue you’re diagnosing requires user-mode memory.
Final Words
How to create live kernel memory dump file using Task Manager? This post provides a step-by-step guide for you. I hope that this post can be useful to you.
About The Author

Position: Columnist
Having been an editor at MiniTool since graduating college as an English major, Daisy specializes in writing about data backups, disk cloning, and file syncing as well as general computer knowledge and issues. In her free time, Daisy enjoys running and going with friends to the amusement park.