Is your DirectX 12 stuttering, lagging, or FPS dropping? These problems can be very annoying when playing games. Fortunately, in this post, MiniTool will give you 6 fixes to this issue. Now, let’s keep reading and take them.
Issue: DirectX 12 stuttering and lagging
DirectX 12 is a Windows software component that makes software and games work with your video and audio hardware efficiently. However, experiencing DirectX 12 stuttering and lagging when you are in the middle of an intense game session can be so frustrating. When this problem happens, you can feel obviously that the DirectX 12 game frame drops dramatically.
MiniTool ShadowMaker TrialClick to Download100%Clean & Safe
Solutions to DirectX 12 Stuttering Issue
Here are 6 practical solutions for you to fix the DirectX 12 high ping issue. Take them and try them out to improve your gaming performance.
Fix 1: Check Your Internet Connection
In most cases, a weak internet connection is the culprit of DirectX 12 FPS dropping. The first thing is to make sure that the internet connection is stable enough. Or, you can run the Internet Connections troubleshooter to fix the problem.
To do so, navigate to Settings > Update & Security > Troubleshoot > Additional troubleshooters > Internet Connections > Run the troubleshooter. If you want more information to fix your internet, refer to this guide: 11 Tips to Troubleshoot Internet Connection Problems Win 10.
Fix 2: Remove DirectX Shader Cache
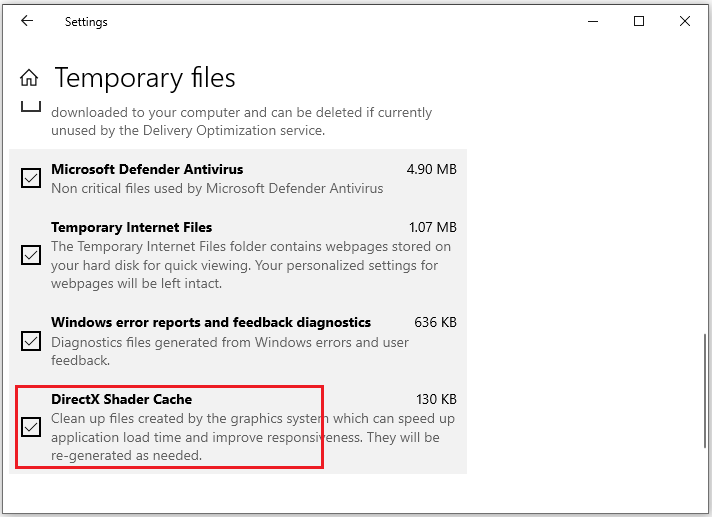
Some corrupted shader cache may lead to DirectX 12 lagging. Therefore, you can delete them. Then the game will be forced to rebuild them, which can resolve the DirectX 12 stuttering problem.
Step 1: Press Win + I to open Settings.
Step 2: Navigate to System > Storage > select the drive where the game is installed > click Temporary files.
Step 3: Check DirectX Shader Cache and click on Remove files.

Fix 3: Disable Control Flow Guard (CFG)
Many users report that disabling Control flow guard of the game’s executable file can fix the lagging and stuttering issue and the game runs smoother. To do so, here are the details:
Step 1: Type Exploit protection in the search bar and hit Enter to open it.
Step 2: Select Programs settings, click the + icon next to Add program to customize, and then hit Choose exact file path.
Step 3: Navigate to the folder where your game is installed, select the DX12 executable (.exe) file, and then click Open.
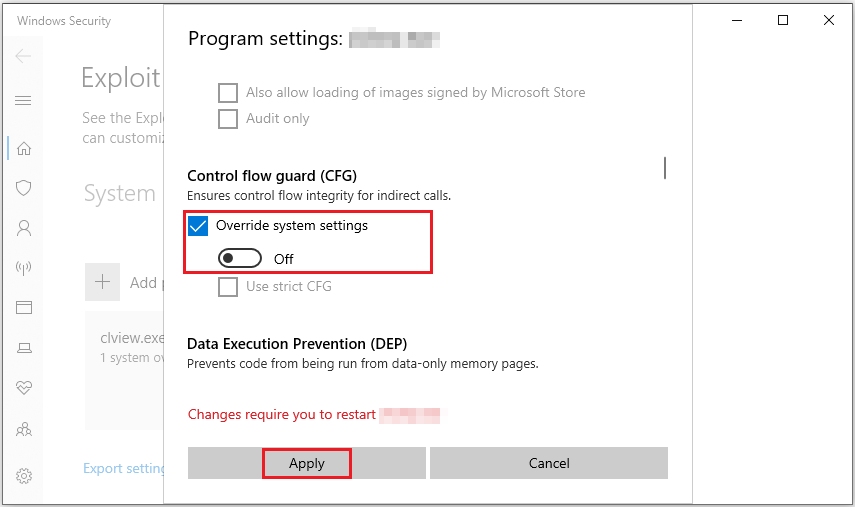
Step 4: In the Program settings window, scroll down to find Control flow guard (CFG), check Override system setting, and turn it off.
Step 5: Click Apply and restart your computer.

Fix 4: Allow the Game Through the Firewall
If the game is blocked by Windows Defender Firewall, the DirectX 12 stuttering issue will happen. Then you need to allow the game through the Firewall.
Step 1: Click on the Start icon and select Settings to open it.
Step 2: Navigate to Update & Security > Windows Security > Firewall & network protection > click Allow an app through firewall.
Step 3: In the pop-up window, hit Change settings and make sure your game is checked both in Private and Public.
Fix 5: Set DPI Scaling to Application Controlled
Display scaling mismatches are also responsible for the stuttering problem. Setting DPI scaling to be controlled by the game itself can fix it. Here’s how to do it:
Step 1: Right-click your game’s executable file to select Properties.
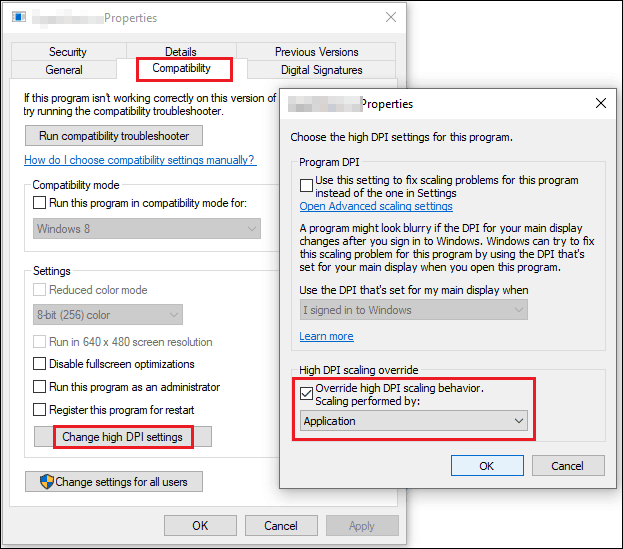
Step 2: Go to the Compatibility tab and click Change high DPI settings at the bottom.
Step 3: Check Override high DPI scaling behavior, and choose Application under the Scaling performed by menu.

Step 4: Click OK > Apply > OK to save your settings.
Fix 6: Disable DWM for Full-Screen Games
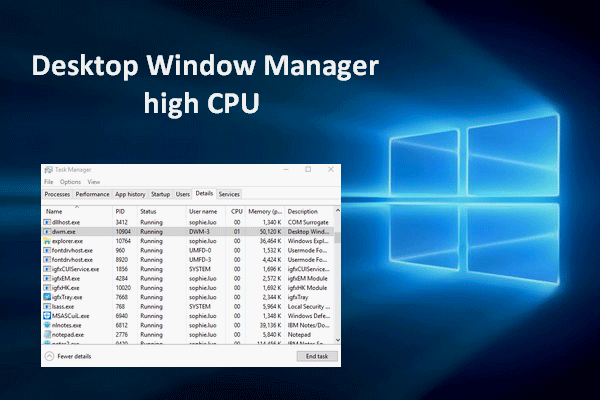
DWM (Desktop Window Manager) is a practical utility for rendering the visual effects on the user interface and runs in the background as dwm.exe. It can sometimes cause performance issues with full-screen games, so disabling it can reduce stuttering. To do so, follow the steps:
Step 1: Press Win + R to open the Run box, type regedit and hit Enter to open Registry Editor.
Step 2: Navigate to the following folder, you can copy and paste it:
HKEY_LOCAL_MACHINE\SOFTWARE\Microsoft\Windows\DWM
Step 3: Right-click on the right panel to select New > DWORD (32-bit) Value, and then name it DisableDWM.
Step 4: Right-click the new key to select Modify, and set its value data to 1.
After that, restart your computer and check if the DirectX 12 lagging problem is solved.
Bottom Line
This post is all about how to repair the DirectX 12 stuttering problem and improve your gaming performance. After reading it, hope you can successfully solve this issue. Have a nice day!
