If you want to turn off Auto arrange in folders but you don’t know how to do, then you need to read this post written by MiniTool. It will show you 2 useful methods to do this work. You can try to use Registry Editor or you can sort your files and folder depending on different criteria in File Explorer.
In earlier versions of Windows, you can freely arrange icons inside a folder. However, you can’t find this option any more from Windows 7 and all other versions that came after Windows 7.
If your Windows 10 doesn’t have this feature, you can try to disable Auto arrange in folders on Windows 10.
How to Disable Auto Arrange in Folders with Registry Editor?
Here is a guide to disabling Auto arrange inside a folder.
Step 1: Press the Windows key + R key to open the Run utility. Next, type regedit in the input field and press Enter to open Registry Editor.
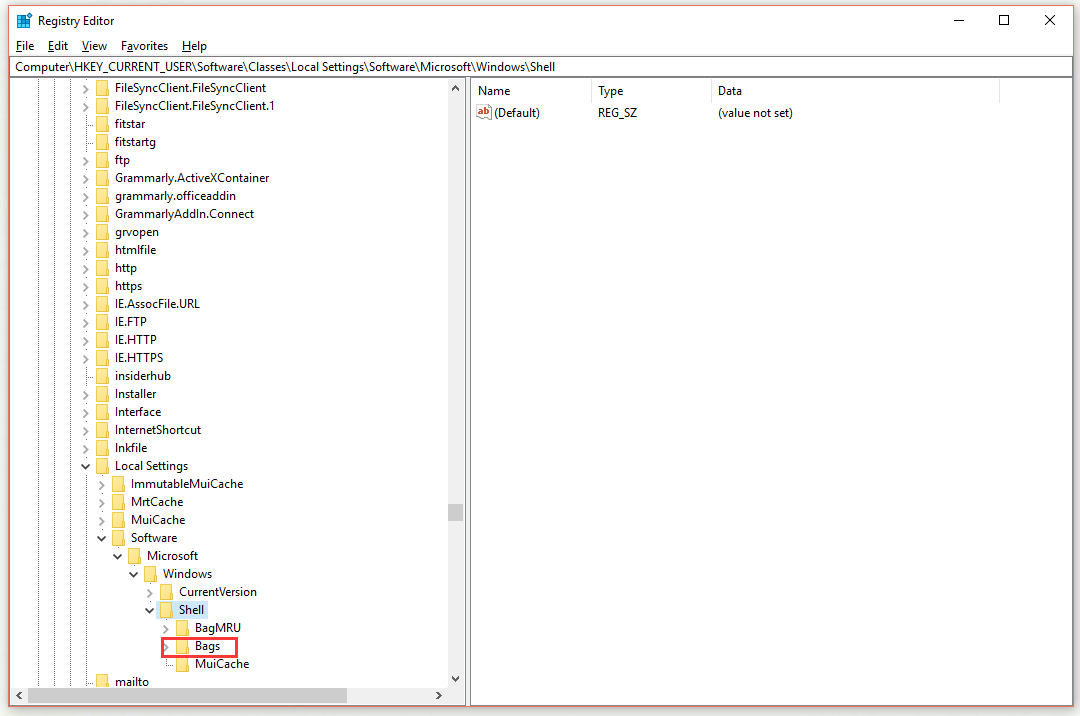
Step 2: Navigate to this key on the left panel: HKEY_CURRENT_USER\Software\Classes\Local Settings\Software\Microsoft\Windows\Shell
Step 3: Find the Bags subkey, right-click it and then choose Delete.
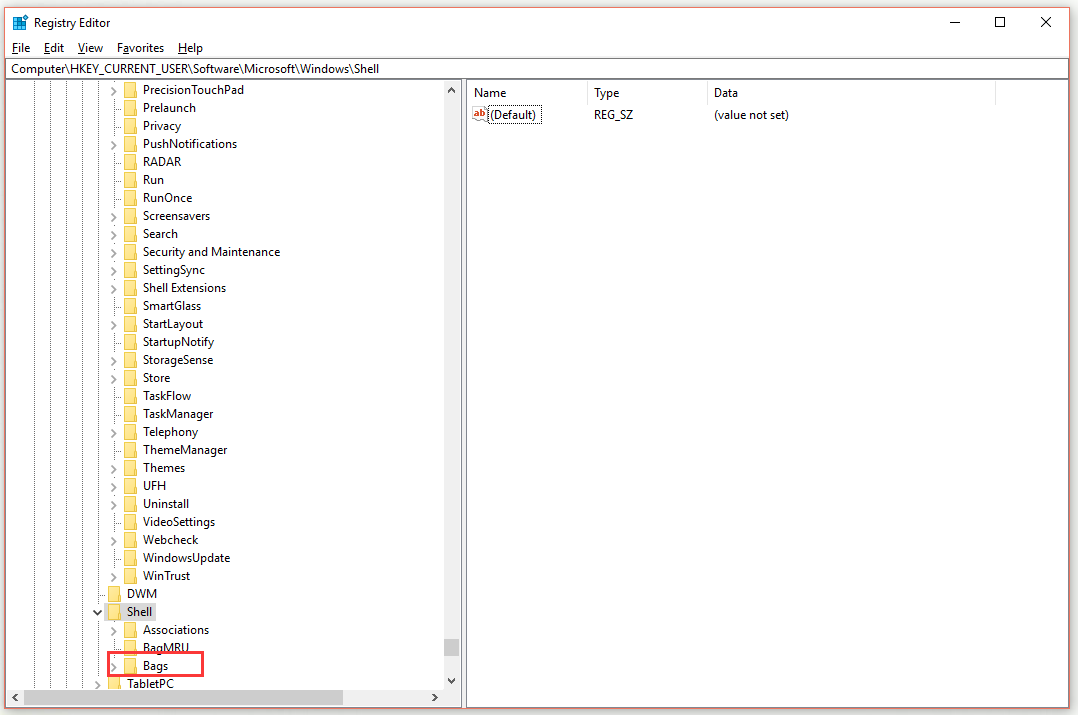
Step 4: Then navigate to this key: HKEY_CURRENT_USER\Software\Microsoft\Windows\Shell
Step 5: Find the Bags subkey again, right-click it and then choose Delete.
Step 6: Navigate to this key: HKEY_CURRENT_USER\Software\Microsoft\Windows\Shell\NoRoam
Step 7: Delete the Bags subkey here as well and then close Registry Editor.
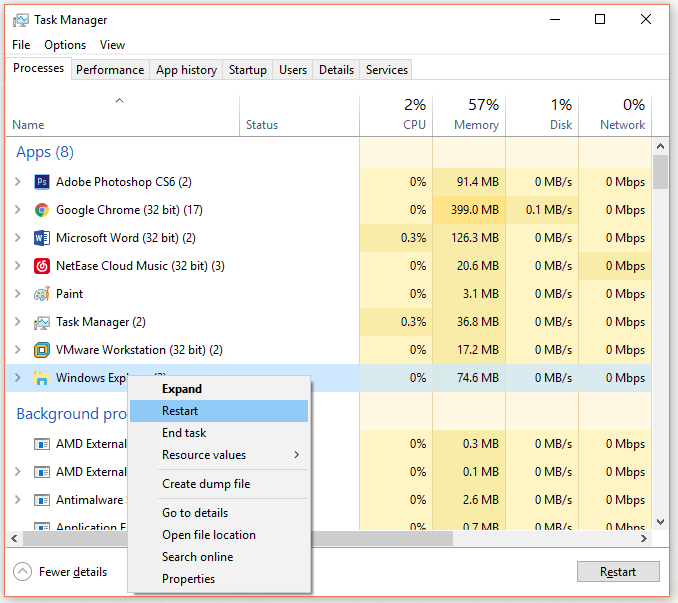
Step 8: Press the Ctrl + Shift + Esc keys to open Task Manager. Find Windows Explorer under the Processes tab, right-click it and then click the Restart button.
Step 9: Download disable-auto-arrange.zip and then extract the files from the archive you just downloaded. Run disableautoarrange.reg to add it to your registry.
Step 10: Open This PC and close it.
Step 11: Now repeat Step 8 to restart Windows Explorer.
After you finish all the steps above, you should successfully disable Auto arrange in folders now.
How to Disable Auto Arrange in Folders with File Explorer
In order to disable Auto arrange in File Explorer, follow this guide.
Step 1: Open any folder in File Explorer and right-click the empty space.
Step 2: Navigate to View and make sure that the Auto arrange option is unchecked. If the option is disabled, you can easily arrange items in any way you want.
There is another way to sort files and folders in File Explorer. Here is a quick guide.
Step 1: Navigate to the files and folders in File Explorer.
Step 2: Click View, then click Sort by. Right now, you can sort your files and folder depending on different criteria, such as Name, Date, Type, and so on.
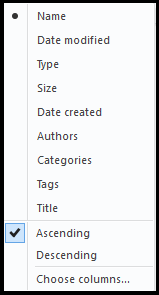
After you finish all the steps above, you should successfully sort your files and folder depending on different criteria in File Explorer.
Bottom Line
To sum up, that’s all the information about methods to disable Auto arrange in folders. If you want to do this job, you can try the two methods mentioned in this post. Hope this article could be helpful to you.
