Have you once allowed someone to get access to your computer with credentials? Do you know enabled remote assistance in Windows 10 may bring you malicious attacks? Therefore, this post will offer you three ways to disable remote assistance in Windows 10. You can adopt one of them if needed.
Three Ways to Disable Remote Assistance in Windows 10
When it comes to remote assistance Windows 10, what springs to your mind first may be its advantages: it helps you perform telecommuting; it allows others to get access to your computer to do troubleshooting work; it allows computer administrators to install and configure software for remote computers through remote control technology and so on.
But behind these, have you ever noticed its potential threats? Enabled remote assistance in Windows 10 may give an opportunity that can be made use of by another to your disadvantage. For example, hackers can get illegal access to your computer so as to filch your confidential data and files or black out your computer to interrupt your hand work.
As a result, it is of importance for you to disable remote assistance in Windows 10 in time after you finish remote tasks. You may ask: “How to prevent remote access to my computer?”
If you have no idea about this question, this post will offer you three easy-to-use ways to disable it.
Disable Remote Assistance in Windows 10 in Control Panel
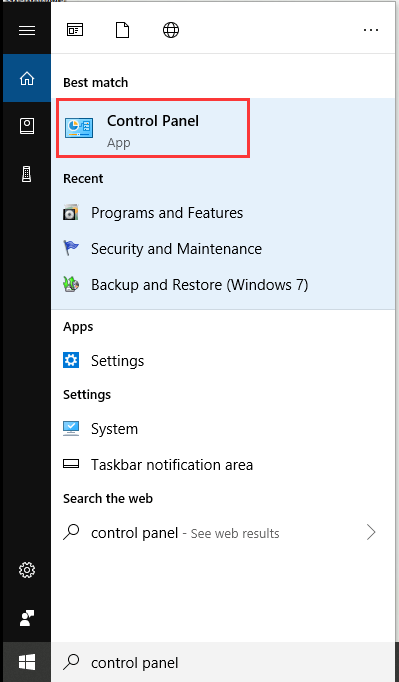
Step 1: Search Control Panel in the Windows search box and click it to run.
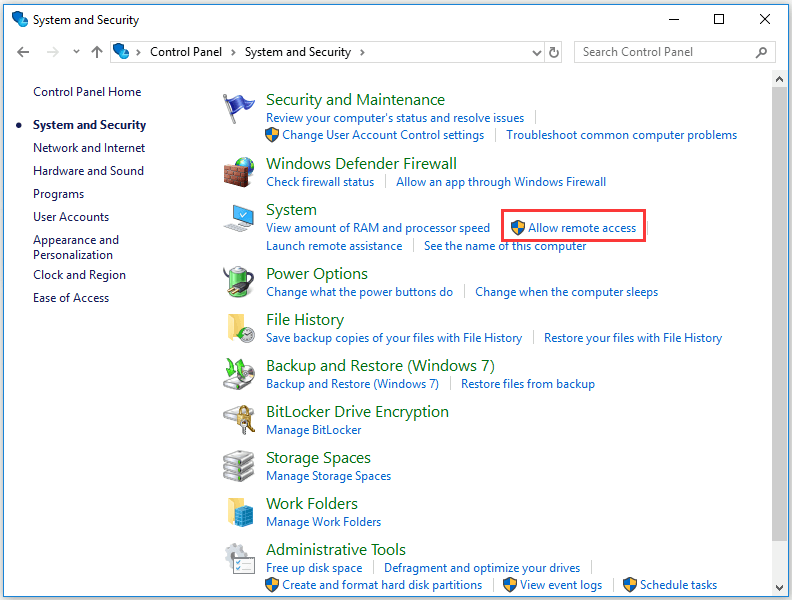
Step 2: Go to System and Security (by category) > System > Allow remote access.
Step 3: Under Remote tab, please uncheck Allow Remote Assistance connections to this computer. Then click Apply and OK in sequence.
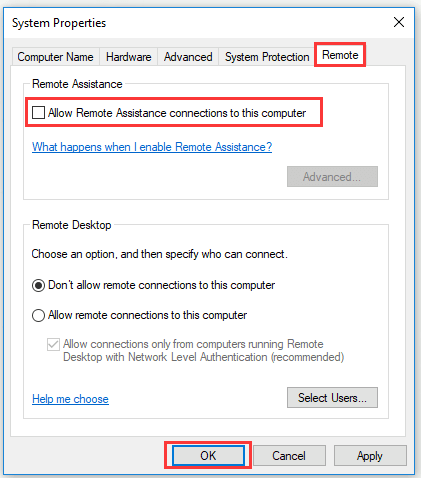
In this way, you are able to disable remote assistance in Windows 10.
Disable Remote Assistance in Windows 10 in Run Box
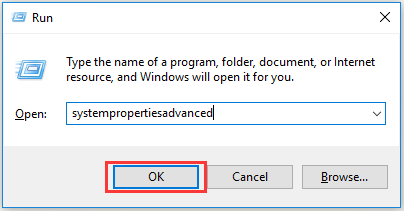
Step 1: Press “Windows + R” to open Run box. Then type “systempropertiesadvanced” in the box and click OK.
Step 2: On the System Properties page, please turn to Remote tab. Then uncheck Allow Remote Assistance connections to this computer. You can click Apply and OK in sequence to confirm this operation.
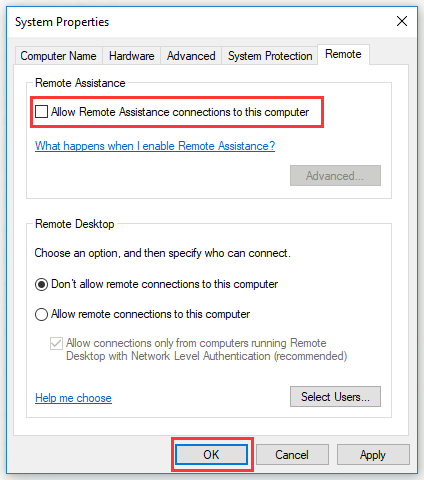
Hence you can disable remote assistance in Windows 10.
Disable Remote Assistance in Windows 10 in Windows Registry Editor
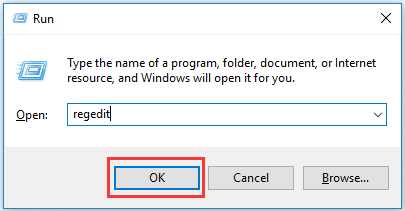
Step 1: Please Press “Windows + R” to open Run box. Then type “regedit” in the box and click OK to run Windows registry editor.
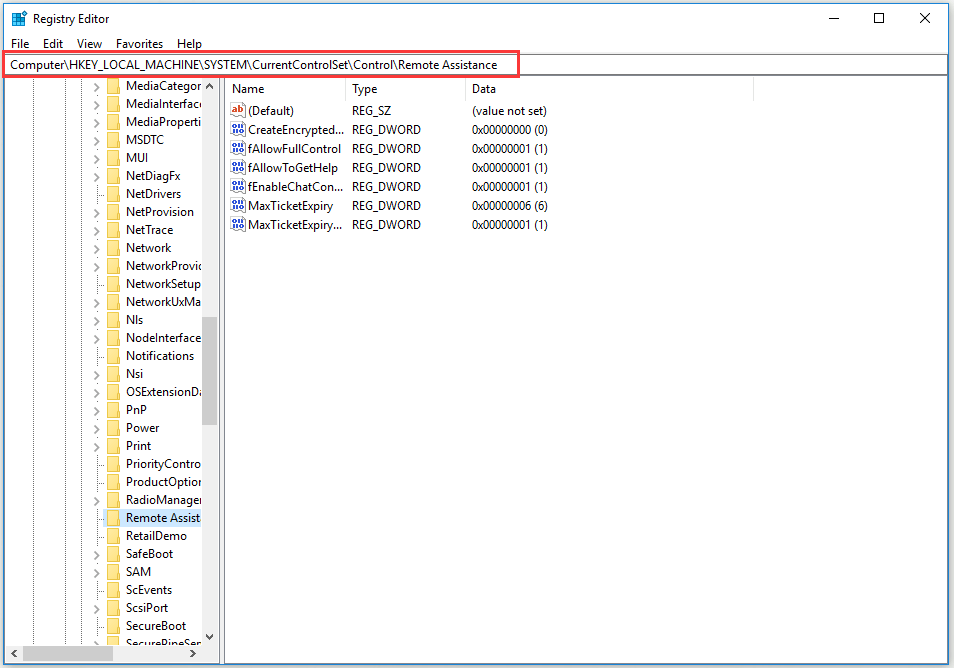
Step 2: Please navigate to HKEY_LOCAL_MACHINE > SYSTEM > CurrentControlSet > Control > Remote Assistance.
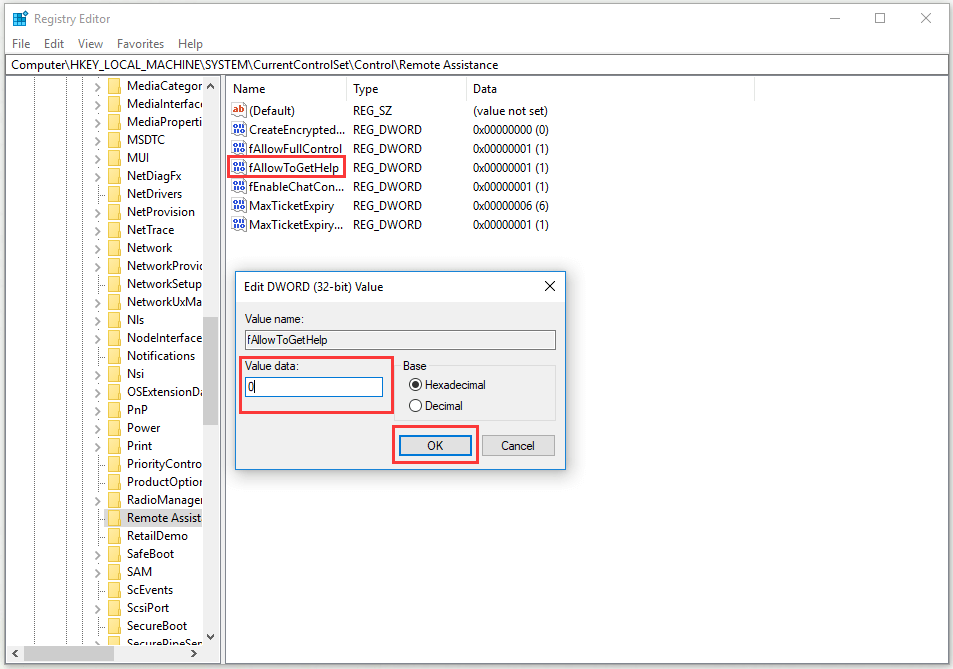
Step 3: Please double click fAllowToGetHelp and set its Value data from l to 0. Then click OK.
Step 4: Restart your computer to apply this change completely.
By doing so, you are able to disable remote assistance in Windows 10.
Conclusion
It is necessary for you to know how to disable remote assistance in Windows 10 for the sake of keeping data safe. This post has listed three ways for this issue and you can select each of them as you like.