If you find you are unable to change the security settings with commands or you want to add an extra protection layer, do you know what to do? Now, in this post, we will show you a guide on how to manage Windows Security Tamper Protection on Windows 10.
Windows Security is an experience on Windows 10. It contains the settings to manage all of the snap-in security feature like Windows Defender Antivirus, Windows Firewall, online security, and more.
Now, Windows 10 May 2019 Update (version 1903 or 19H1) has been released for a while. If you are running this new Windows 10 version, you will discover that Windows 10 comes with a new feature: Tamper Protection.
This feature is designed to prevent the Windows Security app from the unauthorized changes that are not got directly through the experience. Windows Security Tamper Protection is a welcome addition that can add an extra layer of protection on Windows 10.
However, we have to admit that this new feature can cause some issues when you want to manage security settings via some other applications or command line tools like PowerShell or Command Prompt.
It is lucky that you can manage Windows Security Tamper Protection to meet your needs. For example, you can enable or disable it in the Windows Security updated version if you want to improve the system security, or you need to manage security settings by using anther app.
How to manage Windows Security Tamper Protection? In the following content, we will walk you through the detailed steps to enable and disable the Tamper Protection feature included with the Windows Security app since Windows 10 May 2019 Update.
How to Manage Windows Security Tamper Protection on Windows 10?
In the following content, we will divide the guide into two parts:
- How to Disable Tamper Protection on Windows Security
- How to Enable Tamper Protection on Windows Security
You can go to see the needed part directly.
How to Disable Tamper Protection on Windows Security
If you want to disable the Tamper Protection feature on Windows 10, please follow these steps:
1. Click Start.
2. Type in Windows Security and choose the first search result.
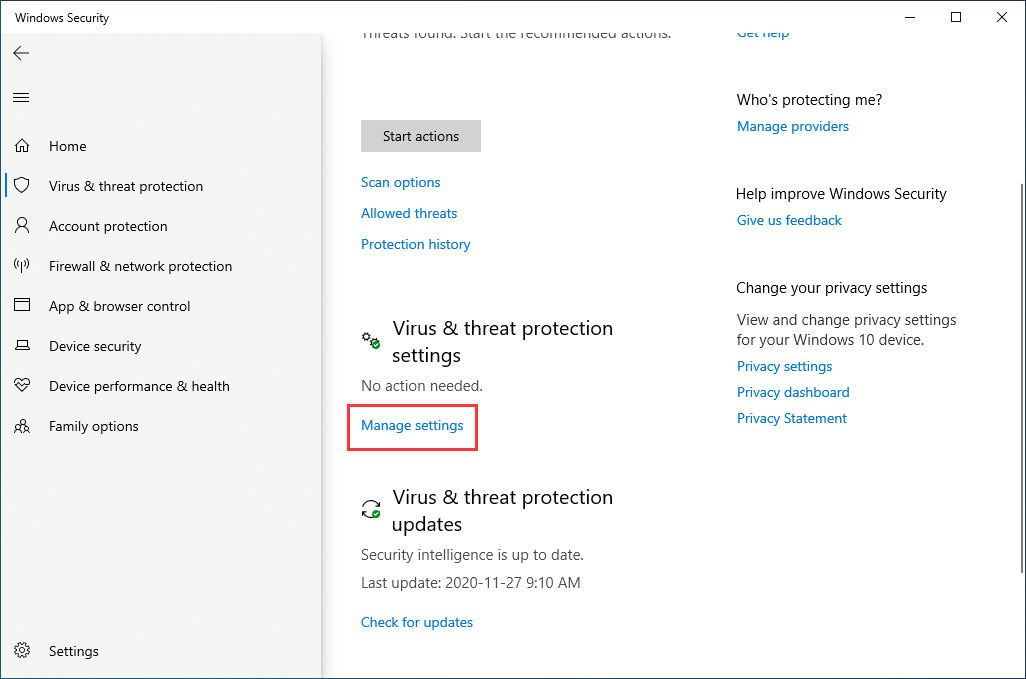
3. Choose Virus & threat protection.
4. Click on the Manage settings option under the Virus & threat protection section

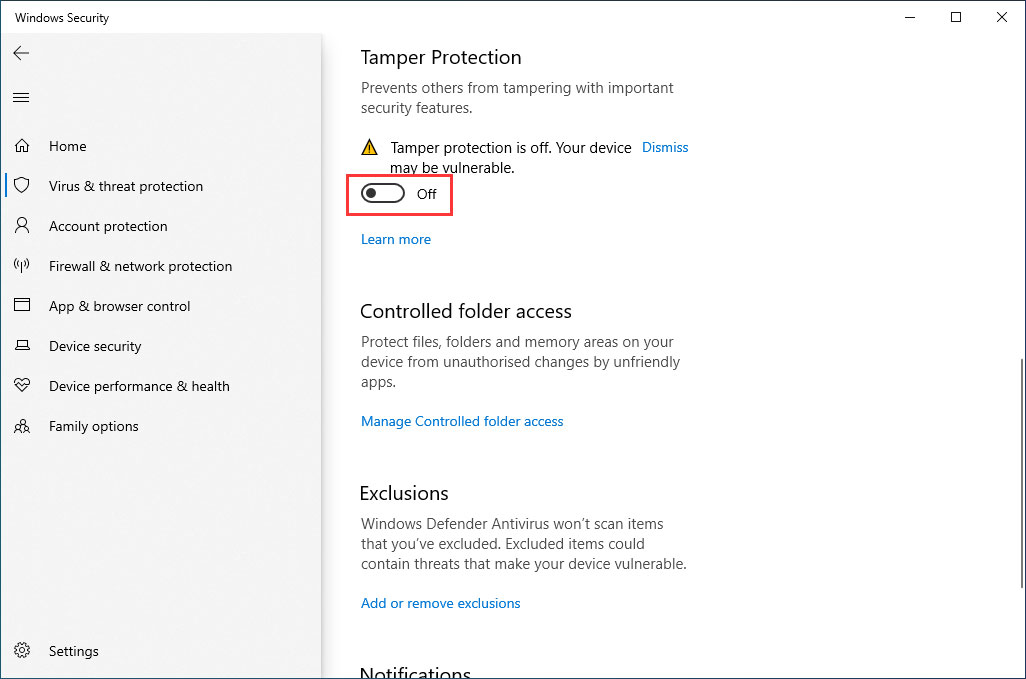
5. Switch the button from On to Off under the Tamper Protection section.

After using these steps, you will be able to change the settings of Windows Security with command lines or other app.
How to Enable Tamper Protection on Windows Security
If you want to avoid the unauthorized setting change on the Windows Security app and the Tamper Protection feature is disabled, you can follow these steps to enable it:
1. Click Start.
2. Input Windows Security into the search box and choose the top search result.
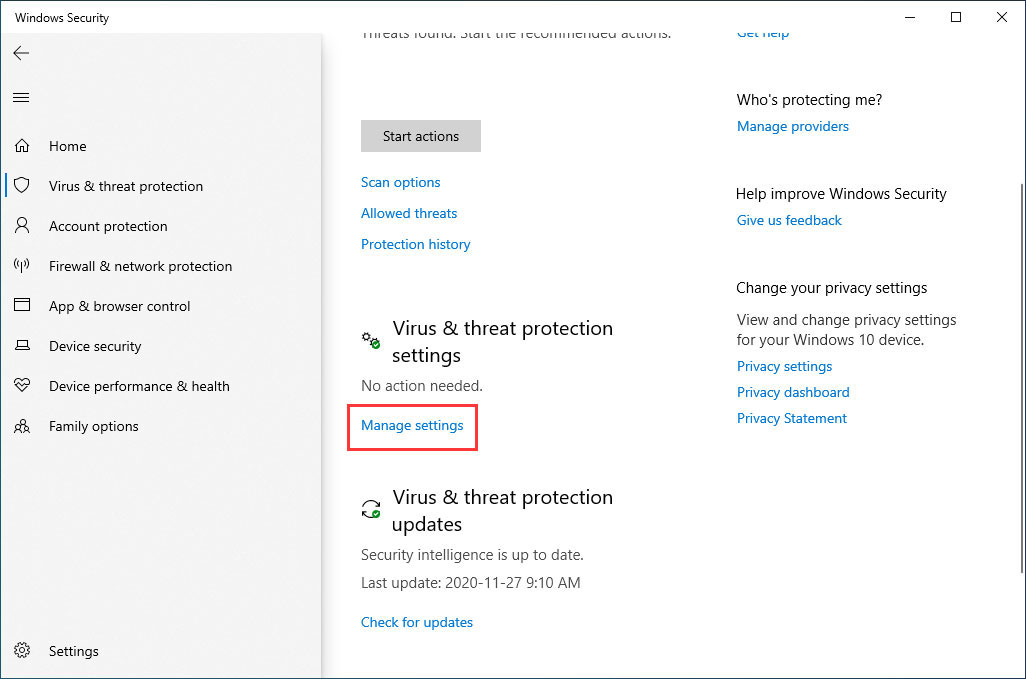
3. Press Virus & threat protection.
4. Choose the Manage settings option under the Virus & threat protection section.

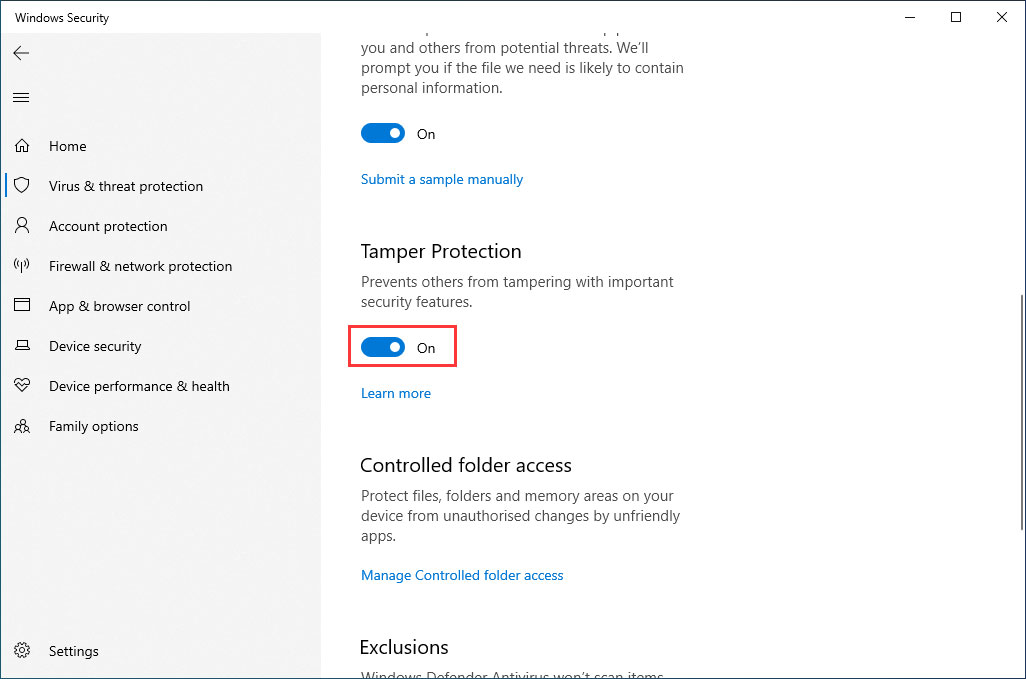
5. Switch the button from Off to On.

After using these steps, Windows 10 will be able to protect your computer’s information safety when some users or malicious apps want to change some important settings, such as real-time protection, cloud-delivered protection, behavior monitoring, and more on your computer,
Reading here, you will know how to manage Windows Security Tamper Protection on Windows 10. Now, try it yourself.
![[SOLVED] Windows Defender Deleted Files, How To Get Back Easily](https://mt-test.minitool.com/images/uploads/2018/08/restore-files-from-windows-defender-thumbnail.png)