If your Windows PC encounters a serious problem, such as being unable to access the operating system, you can use a recovery drive to access the Windows Recovery Environment (WinRE). This post from MiniTool introduces how to create a Windows 11 recovery drive as we all how to use it.
If you encounter some sticky issues on your Windows 11 computer, you can use the recovery drive to enter the Windows Recovery Environment (WinRE), which can help you resolve the issue even if your PC won’t boot. The following part introduces how to create a Windows 11 recovery drive.
2. While restoring the device via the recovery drive, the original disk partition data on the system drive may be deleted.
How to Create a Windows 11 Recovery Drive
To use a recovery drive, you must first create a Windows recovery drive by preparing an empty USB flash drive (with at least 16GB of space). Now, let’s see how to create a USB recovery drive for Windows 11.
Way 1: Via Windows 11 Built-in Tool
How to create a Windows 11 recovery USB? First, you can try the Windows 11 built-in tool – Recovery Media Creator. Here is how to use it:
1. Connect the prepared USB flash driver to your Windows 11 computer.
2. Type Recovery Drive in the Search box and you will see a User Account Control window. Click Yes to continue.
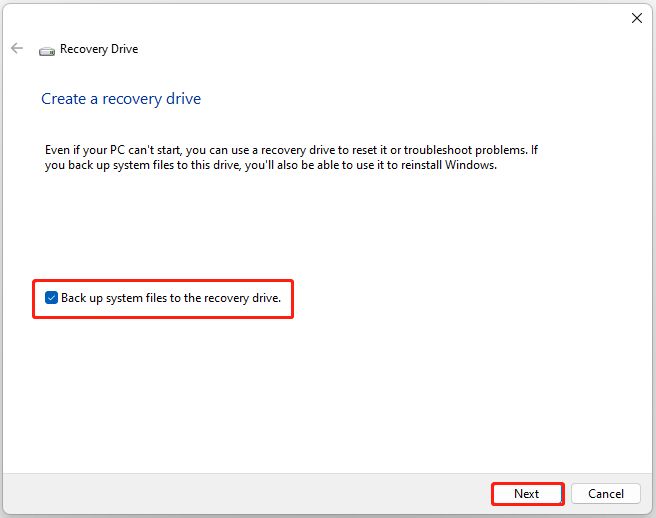
3. Check the Back up system files to the recovery drive box and click Next.

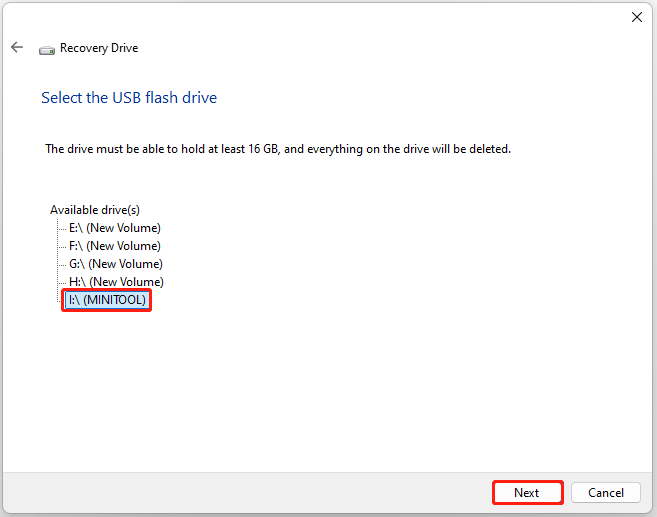
4. Select the prepared USB, and click Next.

5. You will receive a prompt that everything on this drive will be removed. Thus, if there are any important data on this drive, you had better back up them in advance. Then, click Create to start the process.
Way 2: Via MiniTool ShadowMaker
Windows 11 built-in tool does not back up personal data or applications. As to this, the best backup software – MiniTool ShadowMaker is more suitbale for you. It offers you a feature named Media Builder, enabling you to create a bootable disc or USB drive.
1. Download and install MiniTool ShadowMaker.
MiniTool ShadowMaker TrialClick to Download100%Clean & Safe
2. Launch it and click Keep Trial to continue.
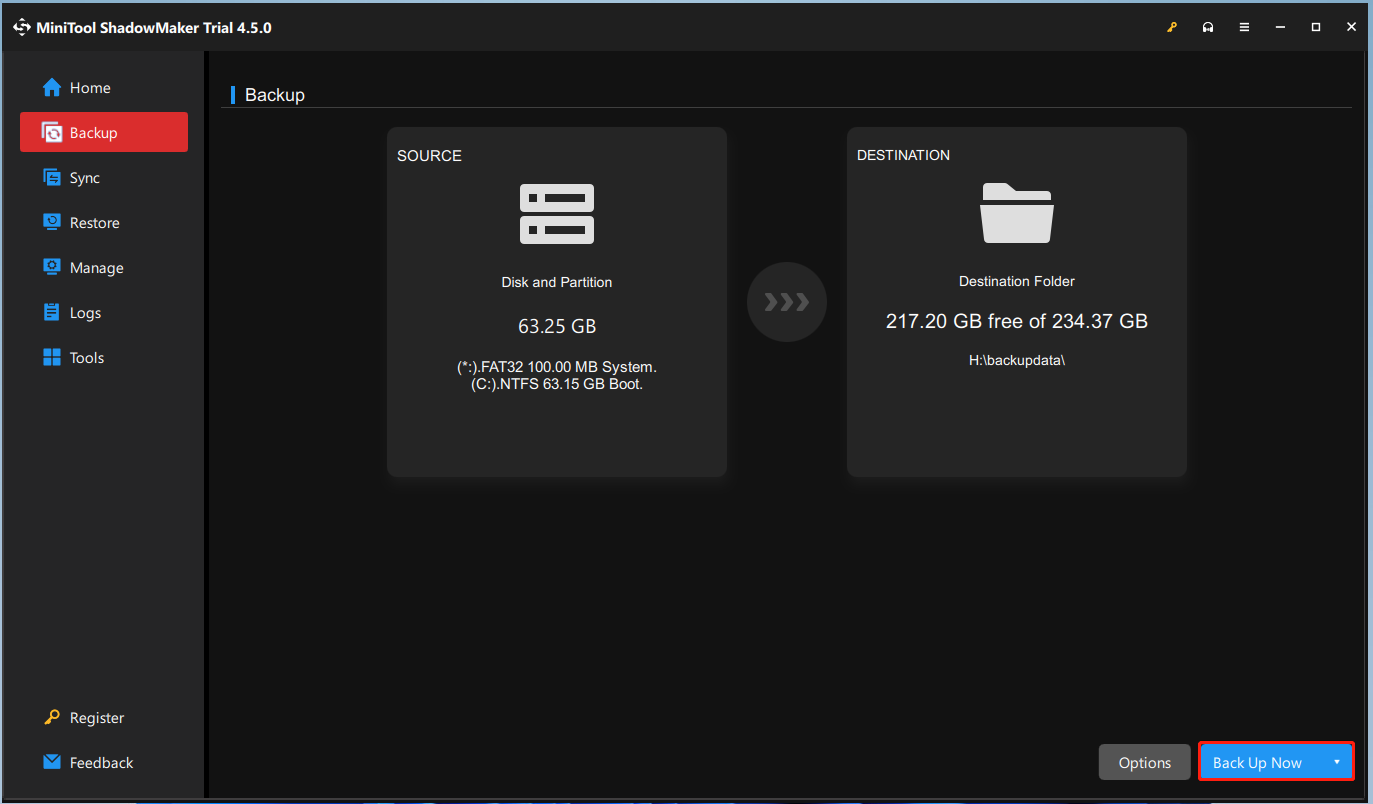
3. All system-related partitions including System Reserved Partition and C drive have been chosen by default. You can choose a destination.
4. Then, click Back Up Now.

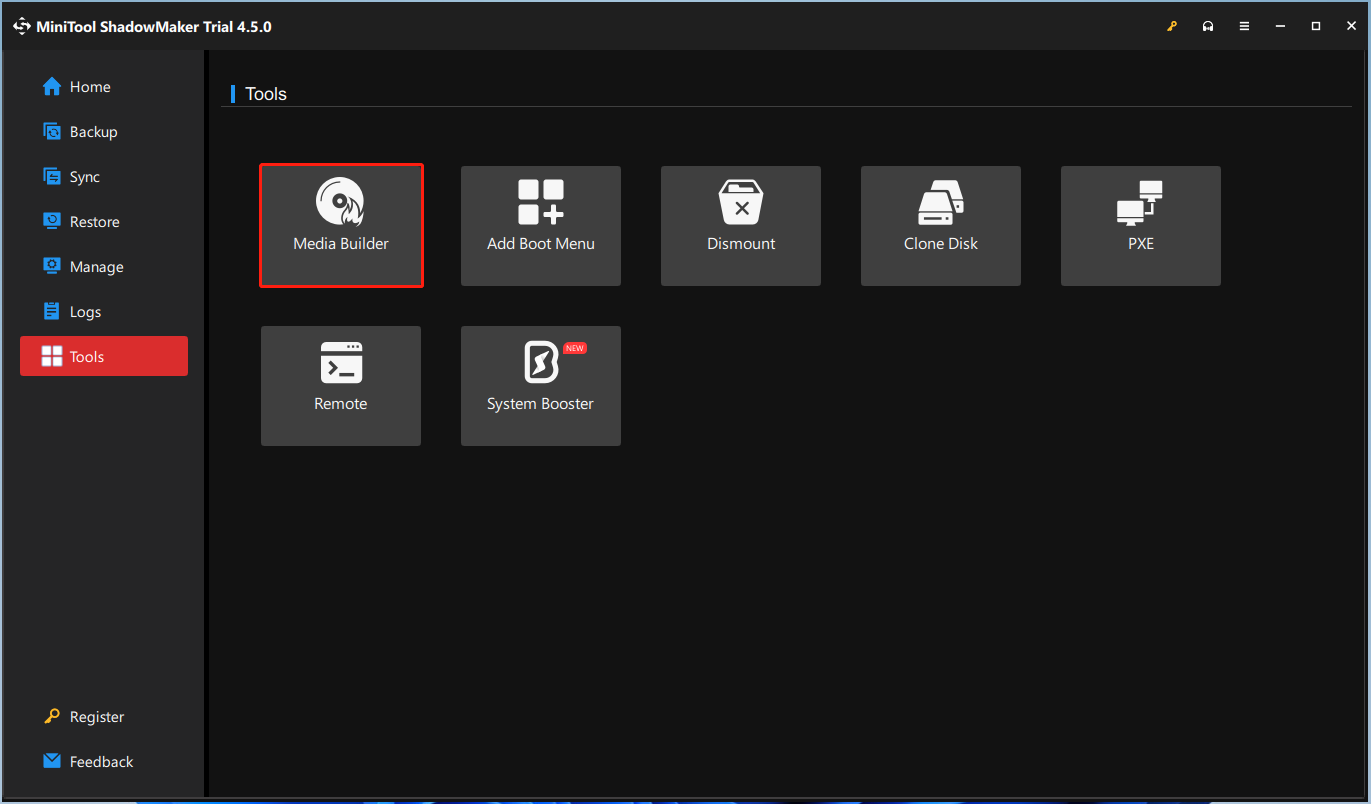
5. Go to the Tools tab, and click the Media Builder feature to create the bootable media.

6. Choose WinPE-based media with MiniTool plug-in and choose your USB drive to start creating the bootable USB drive.
How to Use the Windows 11 Recovery Drive
How to use the Windows 11 recovery drive? Here are the details.
1. Plug the recovery USB into the computer.
2. Press the certain key to enter BIOS and make your PC boot from the recovery USB.
3. Choose a language to continue.
4. Now, you can see the Choose an option screen. Here, you can click Troubleshoot to try out tools to fix your system issues. You can also click the Recover from a drive option.
Final Words
How to create a Windows 11 recovery USB? How to use the Windows 11 recovery drive? This post provides a full guide for you. I hope that this post will be useful to you.