Do you know how to screenshot on Windows 11 after you upgrade your computer to this new Windows version? In this post, MiniTool Software will show you some different methods to do this job. No matter you want to take a rectangular snip, a freeform snip, a window snip, or a fullscreen snip, you can always find a suitable method here.
As a new Windows version, Windows 11 has many new features and improvements. After upgrading to Windows 11, you may don’t know how to screenshot on PC. We write this post to show you how to print screen on Windows 11 and help you find a suitable method to take a screenshot on your Windows 11 computer.
Windows 11 Screenshots Classification
Windows 11 screenshots have many types. For example, you may want to take a full screen or part of the screen on your device. Or you may just want to screenshot the window you open.
A simple classification, there are 4 types of screenshots on Windows 11:
- Rectangular snip
- Freeform snip
- Window snip
- Fullscreen snip
In the following part, we will show you how to screenshot Windows 11 based on different requirements.
How to Screenshot on Windows 11?
Generally speaking, Windows 11 has these three screenshot keyboard shortcuts and a snap-in tool to help you print screen:
- The PrtSc (Print Screen) key: after clicking this key, you will get four modes to print your Windows 11 computer screen. The screenshot will be saved to the clipboard.
- Win+PrtSc: using this keyboard shortcut will print the whole screen of your Windows 11 computer. The screenshot will be saved to Pictures > Screenshots.
- Win+Shift+S: it works like the PrtSc key.
- Snipping Tool: it is a new tool in Windows 11, supporting rectangular snip, freeform snip, window snip, and fullscreen snip, as well as delayed screenshot.
Next, we will show you how to take a screenshot on Windows 11 using these tools.
How to Take a Full Screenshot on Windows 11?
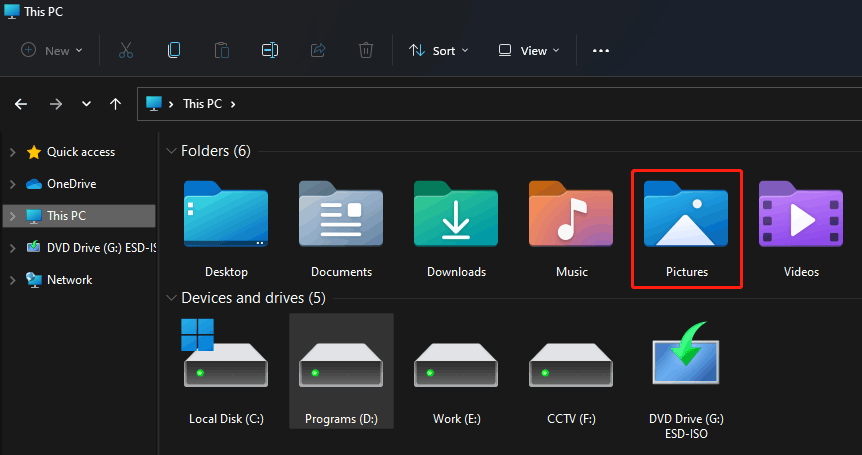
You can just press Win+PrtSc to take a full screenshot of your computer screen. The screen will flash once after you press these two keys. This means that the operation is successful. To view the screenshot, you can go to This PC > Pictures > Screenshots.

On the other hand, you can also press PrtSc or Win+Shift+S and click the Fullscreen Snip icon (the fourth option on the tool) to take a full screenshot on Windows 11. After that, you need to paste the screenshot to an app that can paste an image.

How to Take a Rectangular Screenshot on Windows 11?
You can press PrtSc or Win+Shift+S to call out the screenshot tool. This tool will appear on the top section of the screen. The first icon is Rectangular snip. Click it, left-click your mouse, and then drag your mouse to select the rectangular area you want to taket. After that, you can paste the screenshot to your chat window, or Word, or PowerPoint, or any app that can receive a pasted picture.

How to Take a Freeform Screenshot on Windows 11?
You can press PrtSc or Win+Shift+S and then click the Freeform Snip icon (the second icon on the tool). Next, you can select the area you want to print. After that, you can paste the screenshot to the app that accepts the picture.

How to Take a Window Snip on Windows 11?
Likewise, you can press PrtSc or Win+Shift+S, click the Window Snip icon (the third icon), and move your mouse to the target window to take a screenshot. After that, you can paste the screenshot to an acceptable app.

How to Take a Delayed Screenshot on Windows 11?
Windows 11 has an updated Snipping Tool. It is as powerful as keyboard shortcuts. Besides, it has a feature that is not included in the keyboard shortcuts. This tool supports delayed screenshots.
Here is a guide on how to take a delayed screenshot on your Windows 11 computer using Snipping Tool.
1. Click the search icon on the taskbar and search for snipping tool.
2. Select Snipping Tool from the result to open it.
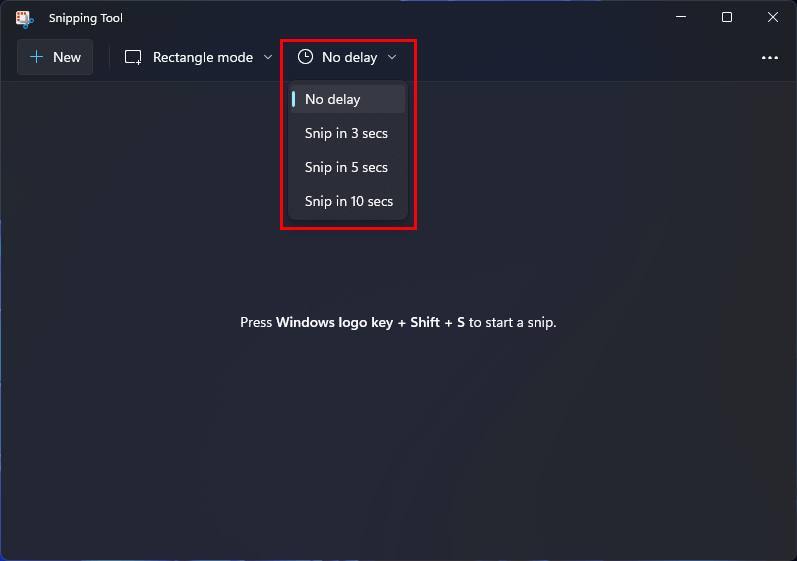
3. Expand No delay. You will see 3 more options: Snip in 3 secs, Snip in 5 secs, and Snip in 10 secs. Select one of them, then click New. Next, open the window or screen you want to print.

4. Open the window or screen you want to print. When the time is up, a tool will appear on the top. Select the snip method you want to use and choose the area you want to take. The selected area will immediately show up in Snipping Tool. You can use the tools listed on the top to edit the screenshot if necessary.
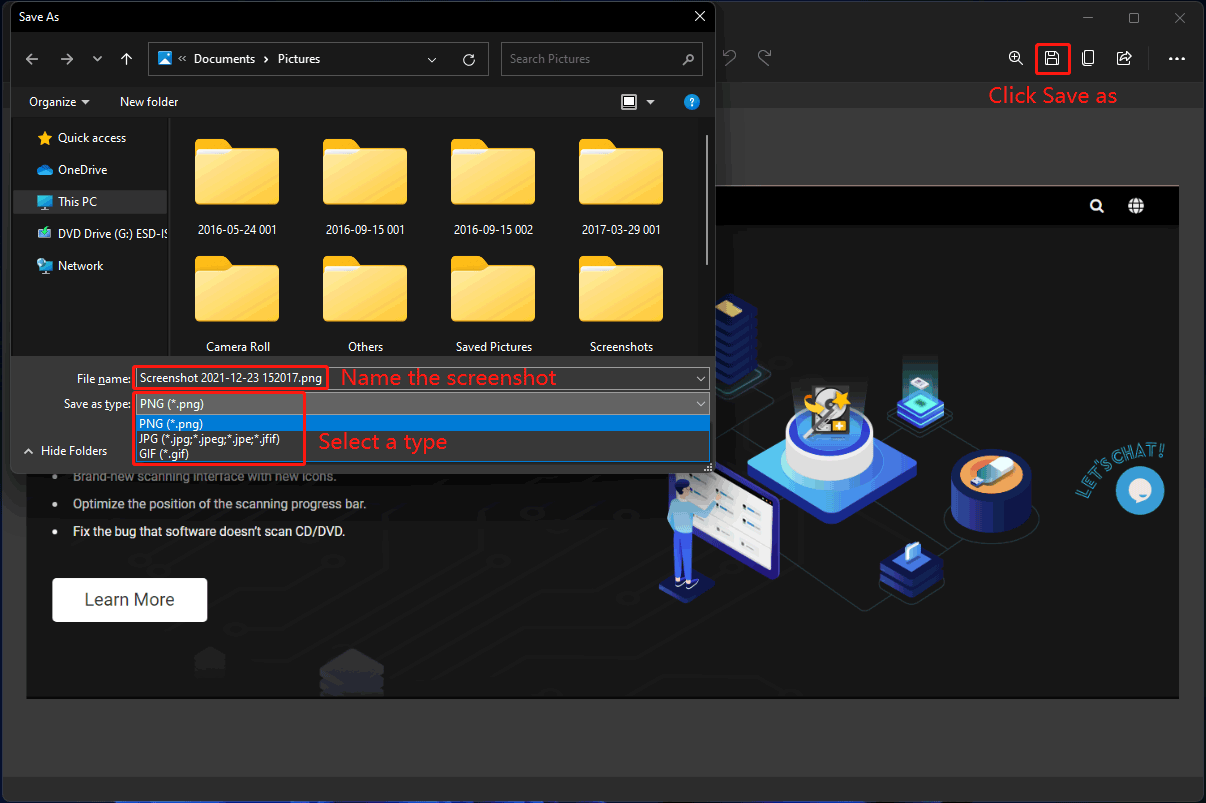
5. Click the Save as button on the top-right corner.
6. Select a destination location.
7. Rename the picture and select the type you want to save.
8. Click Save.

Recover Your Lost Images on Windows 11
If you delete your Windows 11 screenshots by mistake and want to get them back, you can use MiniTool Power Data Recovery to do the job. This data recovery software can recover all kinds of files from hard drives, SD cards, memory cards, and any other data storage devices.
MiniTool Power Data Recovery TrialClick to Download100%Clean & Safe
Don’t know how to screenshot on Windows 11? This post can help you. If you are bothered by other related issues, you can let us know in the comments.

![How to Recover Lost and Deleted Files in Windows 11? [6 Ways]](https://mt-test.minitool.com/images/uploads/2021/08/how-to-recover-deleted-files-windows-11-thumbnail.jpg)