With the release of Counter-Strike 2, many CS:GO players who have a profile want to transfer that profile to CS2 to enjoy the game. This post from MiniTool elaborates on how to transfer CS:GO config to CS2.
Configuration files are files placed in a location relevant to the game files. This file will automatically run the commands you put into it (such as HUD parameters, keybindings, etc.) every time you run the game. Using a CS2 configuration allows you to have one file that contains all your personal settings.
If you already have a CS:GO configuration, you can transfer it to CS2. The following part introduces how to transfer CS:GO config to CS2.
How to Transfer CS:GO Config to CS2
Step 1: Locate the CS:GO Config File
The first step is to find your CS:GO configuration. It’s located in the Steam folder and the following is the common default CS:GO configuration paths:
C:\Program Files (x86)\Steam\userdata\<your Steam ID>\730\local\cfg
In the cfg folder, you can find your configuration and copy them.
Step 2: Find the CS2 Configuration Directory
Then, you need to find the CS2 configuration directory and the complete path is as follows:
Program Files (x86)\Steam\steamapps\common\Counter-Strike Global Offensive\game\csgo\cfg
Next, paste the configuration in CS:GO into the cfg folder in CS2.
Step 3: Set up a Specific .cfg File
If you just copy-paste the CS:GO configuration into CS2, some bindings will fail because CS2 uses different code commands. As a result, player movement, mouse movement, and walking will be blocked after the transfer. Therefore, you need to set up a specific .cfg file to fix your CS:GO configuration.
You’ll need just another config file to fix this CS2 movement problem. For example, name it fix_csmoney.cfg. Open it up with Notepad and type:
- bind “X_AXIS” “rightleft”
- bind “Y_AXIS” “!forwardback”
- bind “MOUSE_X” “yaw”
- bind “MOUSE_Y” “pitch”
- bind “U_AXIS” “yaw”
- bind “R_AXIS” “pitch”
- bind “a” “+left”
- bind “s” “+back”
- bind “d” “+right”
- bind “w” “+forward”
- bind “shift” “+sprint”
Save this CS2 config just where your other CS2 configs are.
Step 4: Activate CS:GO configuration in CS2
To complete the CS:GO to CS2 configuration transfer, you need to launch CS2 and open the console. ~ is used by default. You must first start the CS:GO configuration using the exec command through the console.
- exec csmoney.cfg
- exec fix_csmoney.cfg
How to Back up CS:GO/CS2 Files
If you want to protect your CS:GO/CS2 files, you’d better back up the files to another location. MiniTool ShadowMaker supports backing up specific folders. You can try it back up the CS:GO/CS2 file.
If your CS:GO/CS2 saves get lost, you can restore them with this program. This program also supports backing up data automatically. This software can run on Windows 11, Windows 10, Windows 8/8.1, and Windows 7.
Now, let’s see how to back up CS:GO/CS2 saves with MiniTool ShadowMaker.
1. Click the below button to download MiniTool ShadowMaker. Then, install and launch it.
MiniTool ShadowMaker TrialClick to Download100%Clean & Safe
2. Click Keep Trial to continue.
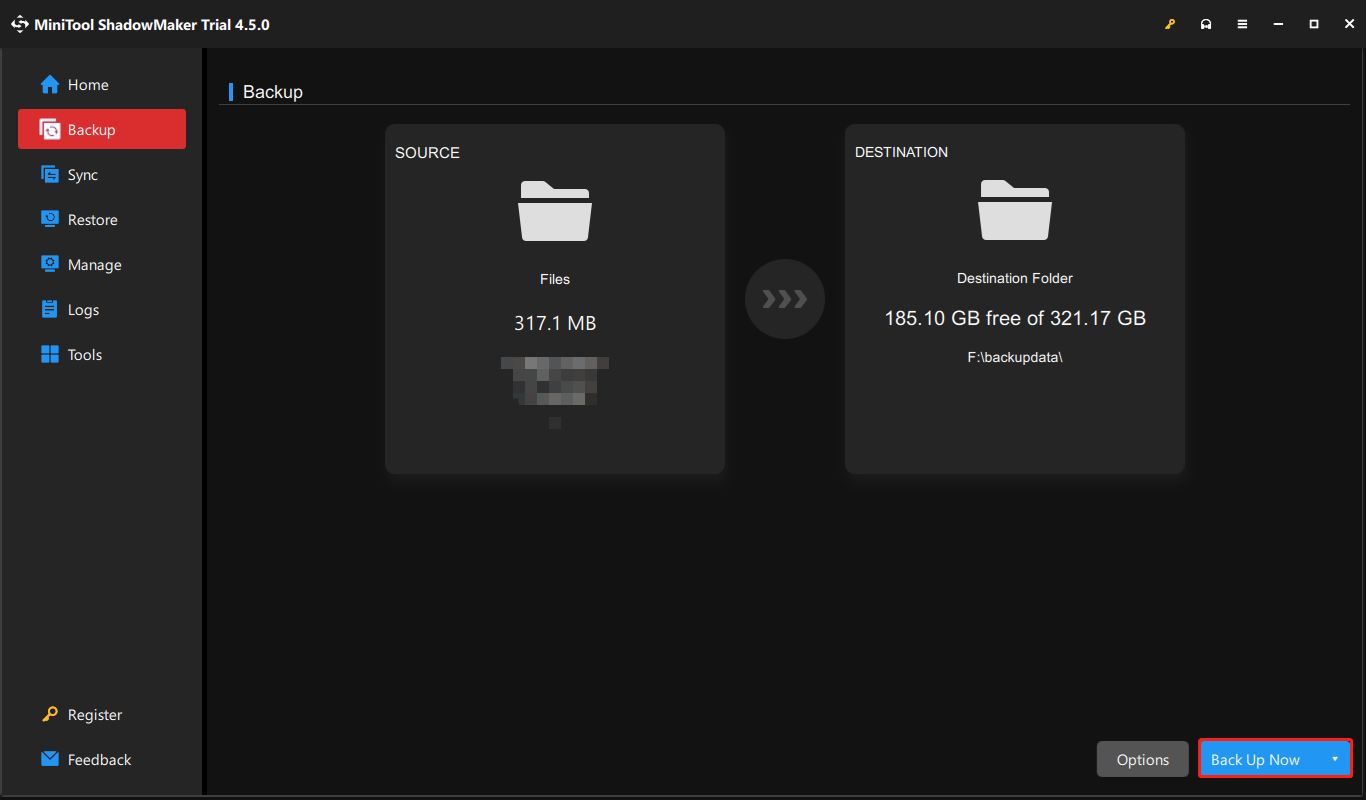
3. Click the Backup tab and go to the SOURCE part. Choose Folders and Files, then find the CS:GO/CS2 save or config location and select it.
4. Click the DESTINATION part to choose an external drive as the backup destination.
5. Click Back Up Now to start the backup process.

Final Words
How to migrate your CS:GO config to CS2? This post provides a full guide for you. Besides, you had better back up the CS:GO/CS2 files to protect them.
