Can’t Install Unsigned Drivers Windows 10
Hardware drivers are necessary for all the hardware devices that are attached to your Windows computer so that they could work properly. Because of the access to the kernel, the drivers need to be signed officially.
If the drivers you have got are not signed by Microsoft, they are not allowed to install on your computer. This is a protection move for your PC since you can clearly know some information on the software publisher, release time, etc. This way can avoid malware attack to a certain degree.
Usually, when installing unsigned drivers on Windows 10, Windows pops up a warning saying Windows can’t verify the publisher of this driver software.
If you still need to install unofficial drivers, old drivers with no digital signature or unsigned drivers, you need to spend some time. How to install unsigned driver on Windows 10 in this way? Follow these methods given below now.
How to Install Unsigned Drivers Windows 10
Method 1: Use the Advanced Boot Menu
This is a temporary way to let driver signature enforcement disabled. It will become enabled the next time you reboot Windows 10 unless you try this way again. The following are the instructions:
Step 1: Click the Start button, choose the Power button, press Shift and click Restart.
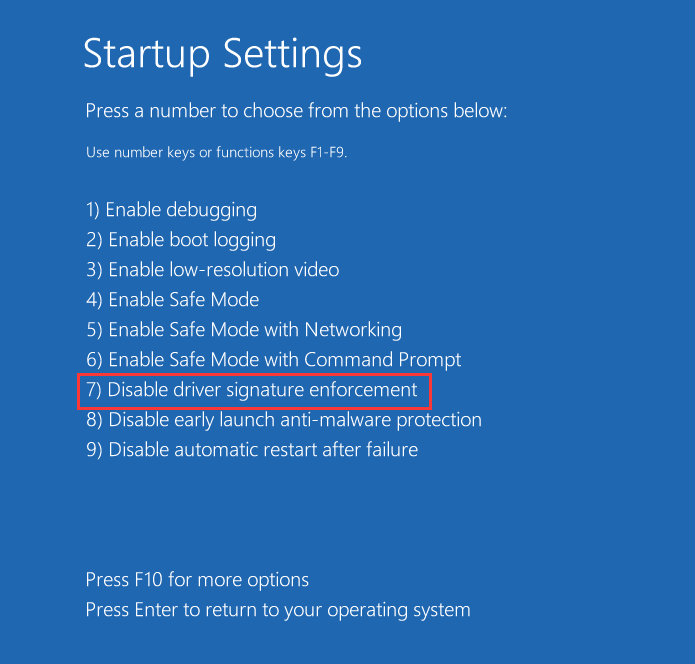
Step 2: After Windows enters WinRE, go to Troubleshoot > Advanced options > Startup Settings >Restart.
Related article: A Detailed Introduction to Windows RE
Step 3: To install driver without digital signature, press F7 to choose the Disable driver signature enforcement option.

Step 4: The system will boot to Windows and then you can install any driver that is not signed. After installation, you can restart Windows to let the option get enabled automatically.
Method 2: Enable Test Mode Windows 10
In Windows, there is a mode feature called Test Mode. If you enable it, driver signature enforcement will be turned off until you leave this mode. This is a permanent method and you can install unsigned drivers in Windows 10 easily in this mode.
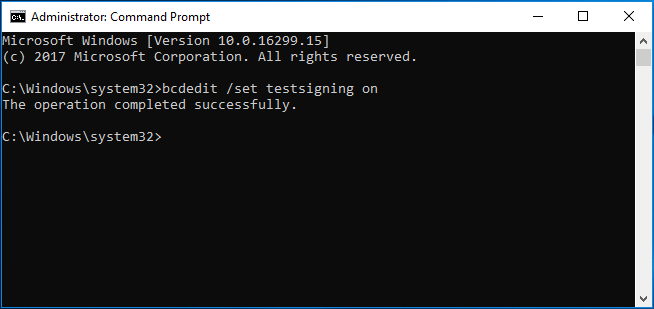
Step 1: Run Command Prompt as administrator.
Step 2: Input the command in the window: bcdedit /set testsigning on and press Enter.

Step 3: Restart your Windows and then you will find a watermark appearing at the bottom right corner of your desktop to tell you that you are in Test Mode. Just install your unsigned drivers.
Method 3: Disable Integrity Checks
To install driver without digital signature in Windows 10, you can choose to disable the integrity checks. The operations are very simple by following the guide below.
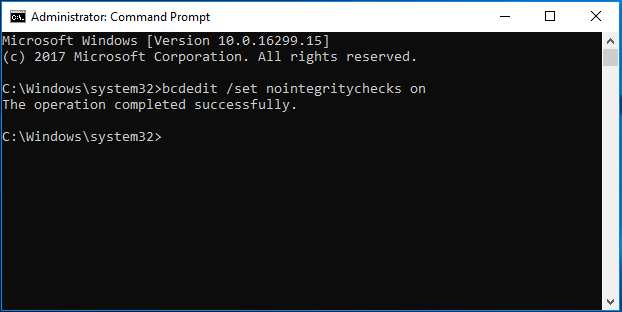
Step 1: Similarly, run Command Prompt as admin.
Step 2: Type the bcdedit /set nointegritychecks off command and press Enter.

Step 3: Restart your operating system and then you can perform an installation for the unsigned drivers.
Final Words
Right now, we have shown you 3 methods to install unsigned drivers Windows 10. If you have a need, just try one of these methods. But you should note that the drivers that are not signed are not really safe, so you had better only install unsigned drivers from trusted sources. If not necessary, install the driver from the official websites.
Besides, we recommend that you back up your operating system regularly with the professional Windows backup software – MiniTool ShadowMaker to avoid system breakdown caused by virus attacks, mistaken operations, and more.