Some Windows users who use Windows 10 or earlier Windows 11 want to upgrade to Windows 11 23H2 but their devices are not supported. This post from MiniTool introduces how to install Windows 11 23H2 on unsupported hardware.
Windows 11 version 23H2 is now available for download and includes many neat improvements and new features. In our previous posts, we have introduced how to avoid problems when installing Windows 11 23H2 and how to disable safeguard block to upgrade to Windows 11 23H2. Today, let’s see how to install Windows 11 23H2 on unsupported hardware.
MiniTool ShadowMaker TrialClick to Download100%Clean & Safe
There are two different situations, you need to choose one of them based on your need to upgrade Windows 11 23H2 on unsupported hardware.
Situation 1: Upgrade from Windows 10 to Windows 11 23H2 on Unsupported Hardware
Both of the methods need a USB drive that at least has 8 GB and you need to connect it to your PC.
Way 1: Via Windows 11 23H2 Installation Media
1. Go to Microsoft’s Windows 11 23H2 official download page to download the Windows 11 Media Creation Tool on your PC.
2. Double-click the exe file to run it. Then click Accept on the license terms page.
3. Choose language and edition. Then, click Next to continue.
4. Select USB flash drive and click Next.
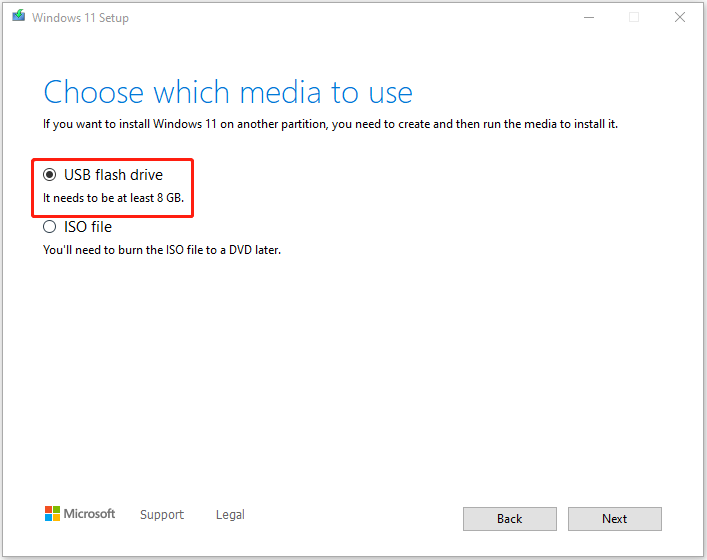
5. Select the connected USB flash drive and click Next. Then, it will start downloading Windows 11 23H2 to your USB.
6. Shut down your PC and start it in BIOS. Then, change the boot order to make it boot from the USB that contains Windows 11 23H2 media.
7. Once you get the error screen that your device does not support Windows 11 23H2, press Shift + F10 together to open Command Prompt.
8. Type regedit in it and press Enter to open Registry Editor.
9. Go to the following path:
Computer\HKEY_LOCAL_MACHINE\SYSTEM\Setup
10. Right-click the Setup key, then, choose New and click Key. Name it as LabConfig.
11. In the right panel, right-click the space and choose New > DWORD (32-bit) Value to create the following values one by one and change their value data to 1:
- BypassTPMCheck
- BypassCPUCheck
- BypassRAMCheck
- BypassSecureBootCheck
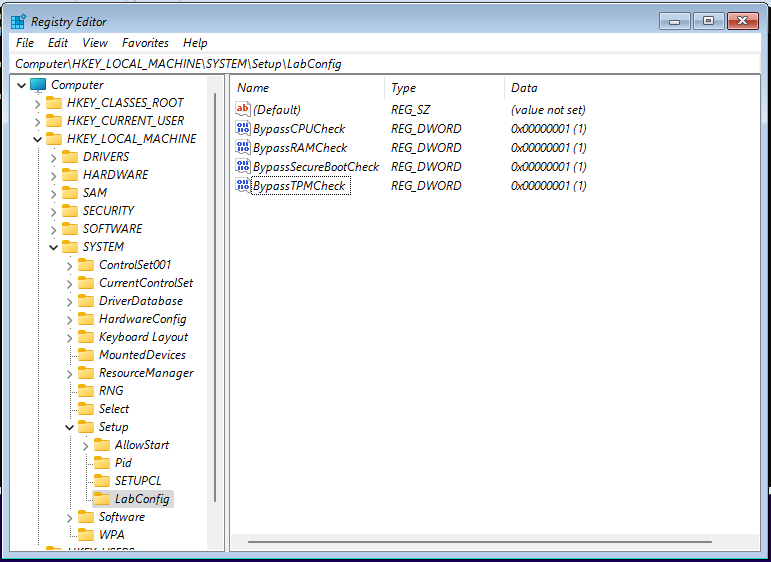
12. Close Registry Editor and type exit in Command Prompt. Then, you can continue to install Windows 11 23H2 on unsupported hardware successfully.
Way 2: Via Rufus
If you think the previous method is a little difficult, there is another method for you – via Rufus.
1. Download Rufus from the official website. Then, run it to enter its main interface.
2. In the Boot selection part, click the dropdown and select DOWNLOAD.
3. Then, you need to choose the version, release edition, language, and architecture. Click Download.
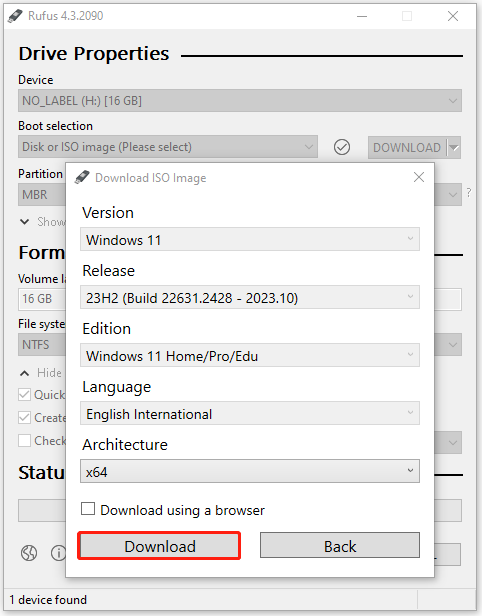
4. Once the download completes, the boot selection will be automatically the ISO file that just downloaded and you can click START to continue.
5. Then, it will ask you to customize Windows installation. You need to check the Remove requirement for 4GB+ RAM, Secure Boot and TPM 2.0 option.
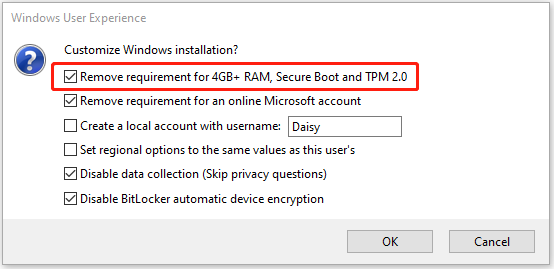
6. After creation is finished. You need to boot the PC from the USB drive and follow the on-screen instructions to upgrade Windows 11 23H2 on unsupported hardware.
Situation 2: Upgrade from Earlier Windows 11 Version to 23H2 on Unsupported Hardware
If you intend to upgrade from the earlier Windows 11 version to 23H2 on unsupported hardware, the steps are easier.
1. Go to the Microsoft Update Catalog to download the KB5031455 update.
2. Install it on your PC.
3. Go to the Microsoft Update Catalog again and download the KB5027397 update.
4. Then, install the enablement package for Windows 11 23H2.
Final Words
Here is how to install Windows 11 23H2 on unsupported hardware. Choose the corresponding method to install it based on your original operating system.
