When there are some problematic files on your computer, you may consider running a System File Checker scan to repair them. What to do if prompted by an error message saying that Windows Resource Protection found integrity violations error? In this post from MiniTool Website, we try our best to find some solutions to you.
Integrity Violation Error
Windows 10/11 comes with a powerful utility called System File Checker to check corrupted system files and then repair them with the cached copy. To do so, you need to run sfc /scannow in an elevated Command Prompt. After that, you might receive one of the following messages:
- Windows Resource Protection did not find any integrity violations.
- Windows Resource Protection found corrupt files and successfully repaired them.
- Windows Resource Protection could not perform the requested operation.
- Windows Resource Protection found corrupt files but was unable to fix some of them.
The last integrity violations error message indicates that you failed to fix your issue via an SFC scan. In this case, you need to address this issue manually. In the second part, we list some effective solutions for you.
MiniTool ShadowMaker TrialClick to Download100%Clean & Safe
How to Fix Integrity Violation Error on Windows 10/11?
Fix 1: Run DISM Command to Repair Corrupted System Files
DISM, also known as Deployment Image Servicing and Management, is a command-line tool designed to prepare, modify, and repair system image. When SFC detects integrity violations error that it cannot fix, you can utilize DISM to repair these corruptions. Here’s how to do it:
Step 1. Type cmd in the search bar to locate the Command Prompt.
Step 2. Right-click on it to select Run as administrator.
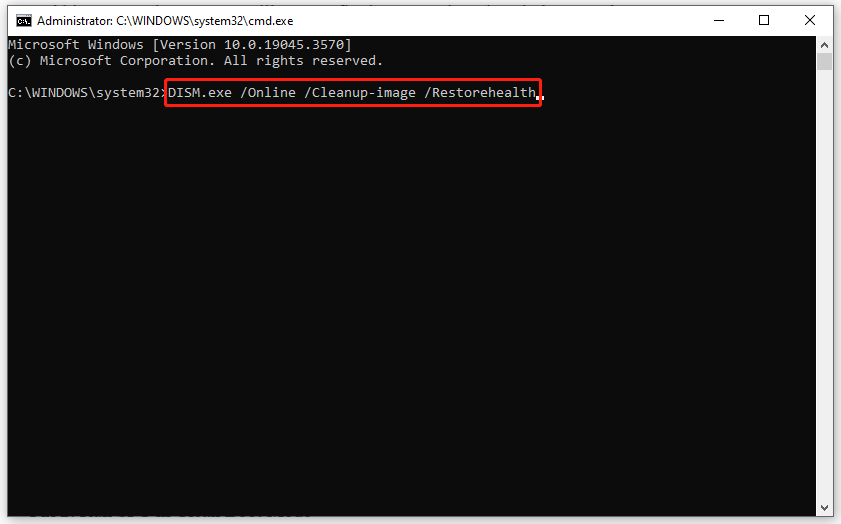
Step 3. In the command window, type DISM.exe /Online /Cleanup-image /Restorehealth and hit Enter. Then, DISM will start to fix the corruption via Windows Update.

If the Windows Update client is broken, you need to boot from a bootable USB drive to enter Windows Recovery Mode and then run the following command in Command Prompt. Remember to replace C:\RepairSource\Windows with the location of your repair source.
DISM.exe /Online /Cleanup-Image /RestoreHealth /Source:C:\RepairSource\Windows /LimitAccess
Step 4. After the repairing process is complete, run sfc /scannow in an elevated Command Prompt again to see if integrity violations error disappears.
Fix 2: Run SFC in Clean Boot Mode
Chances are that third-party software might be the culprit of integrity violations error. In this case, you need to start your computer in a clean boot state to exclude the interference of third-party software and then fix your issues with SFC and DISM. To do so:
Step 1. Press Win + R to open the Run box.
Step 2. Type msconfig and hit Enter to open System Configuration.
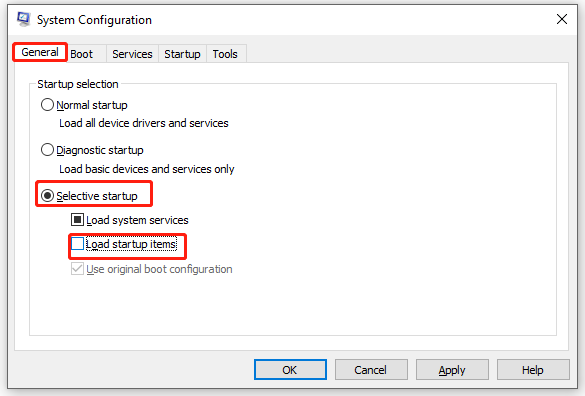
Step 3. In the General tab, tick Selective Startup > uncheck Load startup items > hit OK.

Step 4. In the Services tab, check Hide all Microsoft services and hit Disable all.
Step 5. In the Startup tab, click on Open Task Manager.
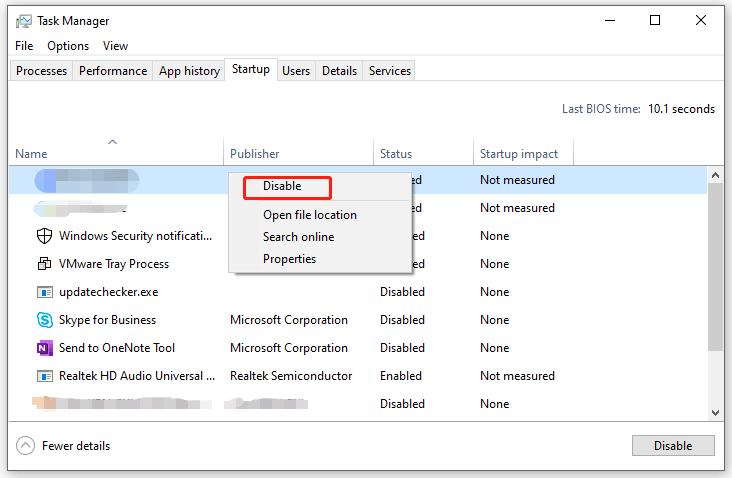
Step 6. Then, right-click on each enabled item and hit Disable.

Step 7. Go back to the Services tab of System Configuration, click on Apply & OK to save the changes.
Step 8. Reboot your computer to boot into a clean boot mode.
Step 9. Finally, run the following two commands one after another:
sfc /scannow
DISM.exe /Online /Cleanup-image /Restorehealth
Final Words
Now, you are not bothered by integrity violations error anymore. More importantly, we introduce a convenient tool called MiniTool ShadowMaker to back up your files in advance so as to keep your data safe. If you need to add an extra protection layer for your data, you can have a try.

