What is Local Security Authority? Some of you might be bothered by Local Security Authority missing. Don’t worry! Follow the guidelines on MiniTool Website, everything will be easy. Scroll down to get more details now!
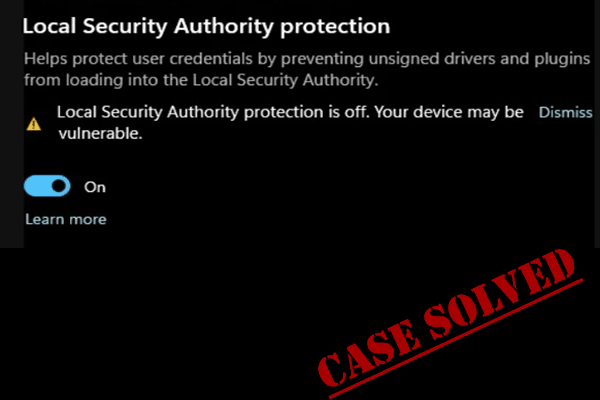
Local Security Authority Missing
Local Security Authority Protection refers to the process that Windows verifies your identity. It is advisable to keep this feature enabled because it is designed to protect your login credentials and handle authorization. However, like other features on Windows, there might be some errors or glitches in Local Security Authority.
If you find your Local Security Authority not available at the moment, then this guide is for you! Without further ado, let’s jump into it right now!
If LSA missing appears, you cannot ignore it! Any security vulnerability it causes might trigger severe problems like data loss or system crashes. Therefore, it is of necessity to develop a habit of backup. Once something is wrong with your computer, you can restore your data with the backup image files. Speaking of backup, the Windows backup software MiniTool ShadowMaker is highly recommended. Hit the button below to try it for free now!
MiniTool ShadowMaker TrialClick to Download100%Clean & Safe
How to Fix Local Security Authority Missing on Windows 10/11?
Fix 1: Modify the Registry
To fix Local Security Authority missing, you can tweak the corresponding registry in Registry Editor. Follow these steps:
Before making any changes to Windows Registry, you should make a backup of Windows Registry in case something goes wrong during the editing process.
Step 1. Type run in the search bar and hit Enter to open the Run box.
Step 2. In the Run dialog, type regedit.exe and hit Enter.
Step 3. Navigate to the location below:
Computer\HKEY_LOCAL_MACHINE\SOFTWARE\Policies\Microsoft\Windows Defender
Step 4. In the right-side pane, find the value named RunAsPPL and double-click on it to set its value data to 1.
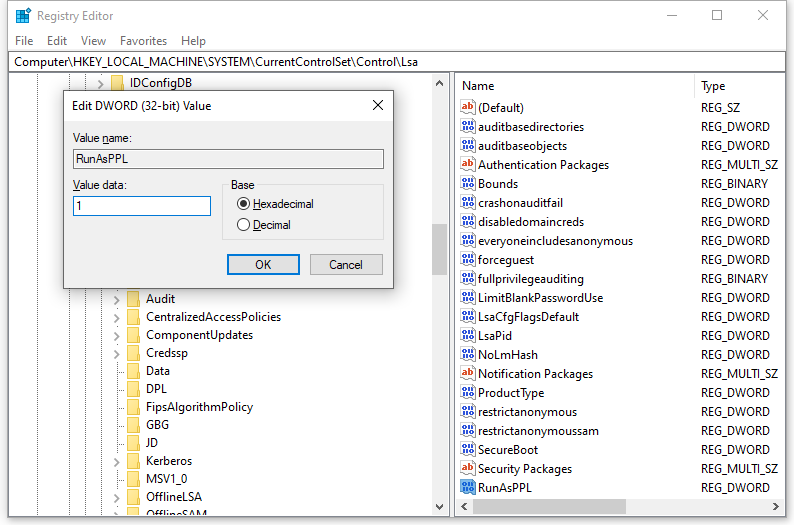
If you cannot find the RunAsPPL value, you need to create it manually: right-click on the empty space in the right-side pane > select New > DWORD (32-bit) Value > rename it as RunAsPPL.
Step 5. Save the changes and restart your system.
Fix 2: Enable LSA via Local Group Policy
Another way to address Local Security Authority option missing is to enable LSA via Local Group Policy Editor. Follow these instructions:
Local Group Policy Editor is not available in Windows 10/11 Home Edition. If you are a Windows Home user, please skip this solution.
Step 1. Press Win + R to evoke the Run dialog.
Step 2. Type gpedit.msc and hit Enter.
Step 3. Navigate to the following path:
Computer Configuration > Administrative Templates > System > Local Security Authority
Step 4. In the right-side pane, right-click on the policy named Configure LSASS to run as a protected process and hit Edit.
Step 5. Under Configures LSA to run as a protected process, tick Enabled. Click on the drop-down icon under Configure LSA to run as a protected process and select Enable with UEFI Lock.

Step 6. Quit Local Group Policy Editor and implement the changes.
Fix 3: Update Windows Security Manually
There might be a security bug in the older versions of Windows Security and this bug might lead to Local Security Authority missing. Luckily, Microsoft releases an update that contains corresponding bugs. Here’s how to download and install the update:
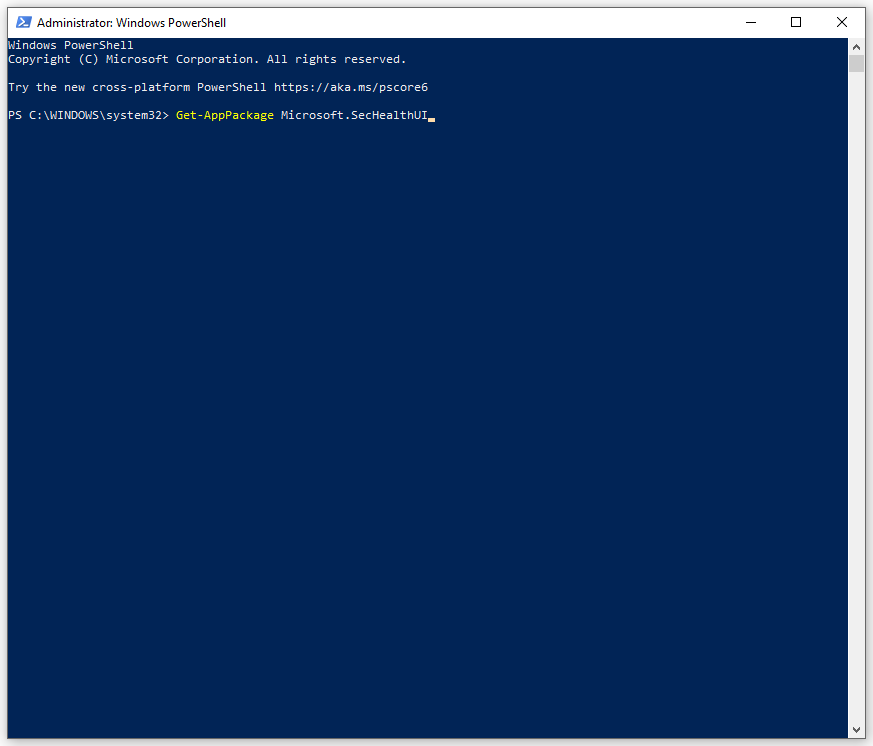
Step 1. Right-click on Start icon and select Windows PowerShell (Admin) from the quick menu.
Step 2. Type the following command and hit Enter.
Get-AppPackage Microsoft.SecHealthUI
About The Author

Position: Columnist
Aurelie is a passionate soul who always enjoys researching & writing articles and solutions to help others. Her posts mainly cover topics related to games, data backup & recovery, file sync and so on. Apart from writing, her primary interests include reading novels and poems, travelling and listening to country music.