LockAppHost.exe is released by Microsoft to handle the Windows system's lock screen. However, there are cases that it takes up a lot of CPU usage. Do you know how to fix it? In this post from MiniTool, we will give you some solutions to the LockAppHost.exe high CPU usage issue.
What is LockAppHost.exe?
LockAppHost.exe (also called LockApp.exe) is a service on the Windows system to display the login screen image and other related features. This includes the display of time, date, and notifications from certain apps. The LockApp.exe file is located in a subfolder of C:\Windows\SystemApps\Microsoft.LockApp_cw5n1h2txyewy.
Actually, LockApp.exe doesn’t do any work most of the time. It only shows what you want to see on the lock screen. However, the LockAppHost.exe high CPU usage issue might happen due to certain reasons. Thus, you need to fix it. Please keep reading this post and find solutions.
5 Fixes: LockAppHost.exe High CPU Usage
Before proceeding with the methods in this section, we recommend you to take the following simple steps:
- Lock and unlock your PC – when locking the screen, the processes get refreshed and stop consuming your memory. You can simply press Win + L to instantly lock your PC, and then use the password to unlock it.
- Restart your computer – restarting your computer can clear some system cache and fix memory issues. Thus, it’s a good choice to restart your computer to fix the LockAppHost 100% CPU usage issue.
To safeguard your computer, you’d better back up all your important files. Because the LockAppHost.exe high CPU usage issue might lead to a system crash, resulting in data loss. Here, we recommend MiniTool ShadowMaker.
It is a PC backup software with powerful features, such as backing up files, disks, partitions and the operating system. With the backup image of files, you can restore them easily after data loss.
MiniTool ShadowMaker TrialClick to Download100%Clean & Safe
Fix 1: Restart LockAppHost Service
To deal with the LockAppHost.exe high CPU usage problem, the first thing you need to do is to restart the LockAppHost service. To do so, follow the steps:
Step 1: Press the Win + R keys to open the Run box.
Step 2: Input services.msc in the box and hit OK to locate Services.
Step 3: Navigate to LockAppHost, right-click on it > select Properties > Stop > Start again.
Step 4: Restart your computer to see whether LockAppHost continues to consume too much memory.
Fix 2: Disable Windows Lock Screen
If restarting the LockAppHost service can’t work, you can disable the lock screen in Windows 10/11. To do so, follow the guide below:
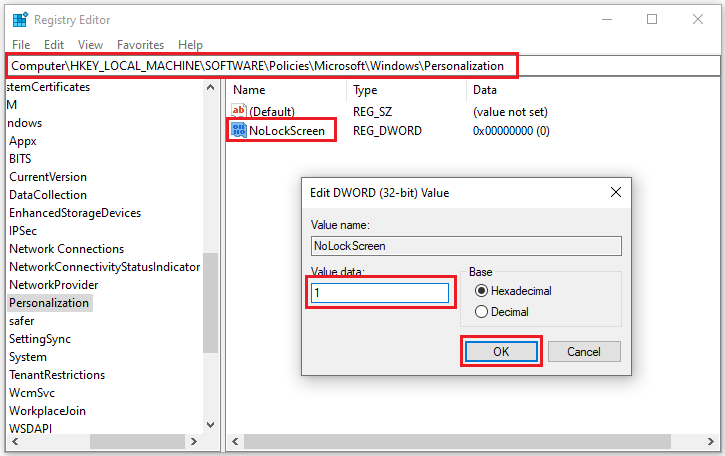
Step 1: Press Win + R to open the Run box, input regedit and hit Enter to launch Registry Editor.
Step 2: Navigate to the following path:
HKEY_LOCAL_MACHINE > SOFTWARE > Policies > Microsoft.
Step 3: Right-click Windows > select New > Key.
Step 4: Input Personalization and hit Enter.
Step 5: Right-click the new key you created, select New > DWORD (32-bit) Value > rename it NoLockScreen.
Step 6: Double-click NoLockScreen to change its value data to 1 and click OK.

Then, exit Registry Editor and reboot your computer to check if the LockAppHost.exe high CPU usage issue is solved.
Fix 3: End LockAppHost.exe
The third method is to end the LockAppHost.exe task from Task Manager. This may temporarily resolve the issue, because the process will most likely spawn again upon waking the computer from sleep.
Step 1: Hit Win + X > locate Task Manager > go to the Details tab.
Step 2: Right-click on LockAppHost.exe and choose End task.
If ending the task spawns the process again, you can also right-click LockAppHost.exe and choose End process tree.
Fix 4: Perform A Virus Scan
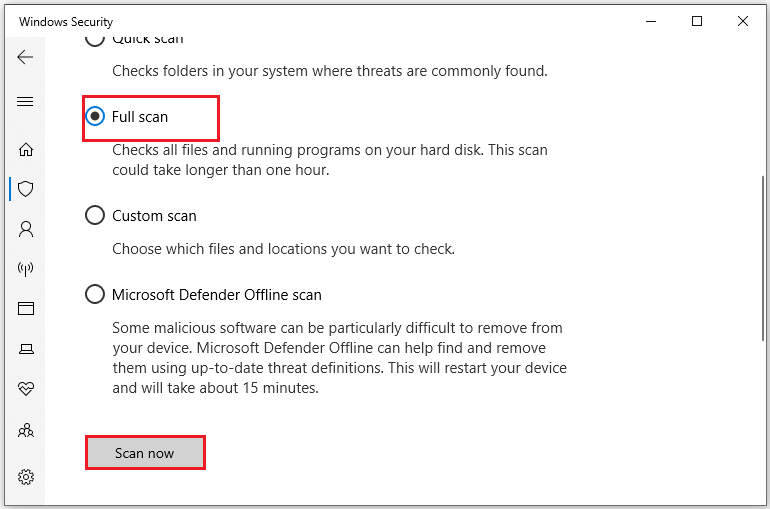
Malware infections are one of the major causes of the LockAppHost.exe high disk usage issue. Therefore, you can run Windows Defender or a third-party antivirus software to completely scan your system for any suspicious activities. To perform a virus scan using Windows Defender, go to Settings> click Update & Security > Windows Security > Virus & threat protections > Scan options > choose Full scan > Scan now.

Fix 5: Run SFC Scan
If scanning your computer for malware does not help, you can try to use System File Checker (SFC) to fix the Windows LockAppHost.exe high memory issue. It can scan the system for corrupted or missing files and repair them. To run the SFC scan, here are the instructions:
Step 1: Input cmd in the search box to locate Command Prompt and choose Run as administrator.
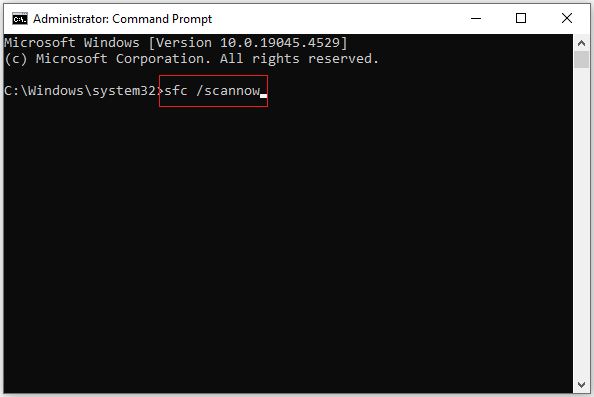
Step 2: Type sfc /scannow and hit Enter.

Step 3: It will take a few moments, so you need to wait for the scan to complete and reboot your PC.
Final Words
That’s all about the overview of LockAppHost.exe and fixes to the LockAppHost.exe consuming high CPU usage issue. After reading this post, you should know how to cope with it. Hope you can successfully get rid of it.
