An SD card is a popular data storage device used in mobile phones, digital cameras, multimedia players, and so on. However, due to its small storage and vulnerability to data loss, people choose to save files and pictures on their computers. Here are three methods for you to move pictures from an SD card to a computer. You can read the following content and choose one method that suits your situation.
Way 1: Move Pictures via Copy and Paste
You can move pictures from an SD card to a computer by copying and pasting. Most of you must be familiar with this operation. If you just need to move a few photos, this way can be your choice.
Step 1: Connect your SD card to the computer first, then press Win + E to open Files Explorer.
Step 2: You can head to your SD card and select the photos you want to move on the right pane.
Step 3: Press Ctrl + C to copy then navigate to the destination and press Ctrl + V to paste.
Way 2: Transfer Photos Using Backup Software
If you need to transfer a large number of photos, copying and pasting is not a good choice since it will be time-consuming and possibly cause duplicate files. We advise you to transfer photos from a memory card to a computer with backup software, like MiniTool ShadowMaker. The professional backup software will securely store your files to the destination and you can make use of the features to avoid duplicate files.
To start the transfer process, you need to get this software by clicking the download button below first. MiniTool ShadowMaker provides you with a 30-day free trial. You can experience the backup features to back up files and folders.
MiniTool ShadowMaker TrialClick to Download100%Clean & Safe
Step 1: Connect your SD card to the computer and launch the software.
Step 2: Click Keep Trial to enter the main interface.
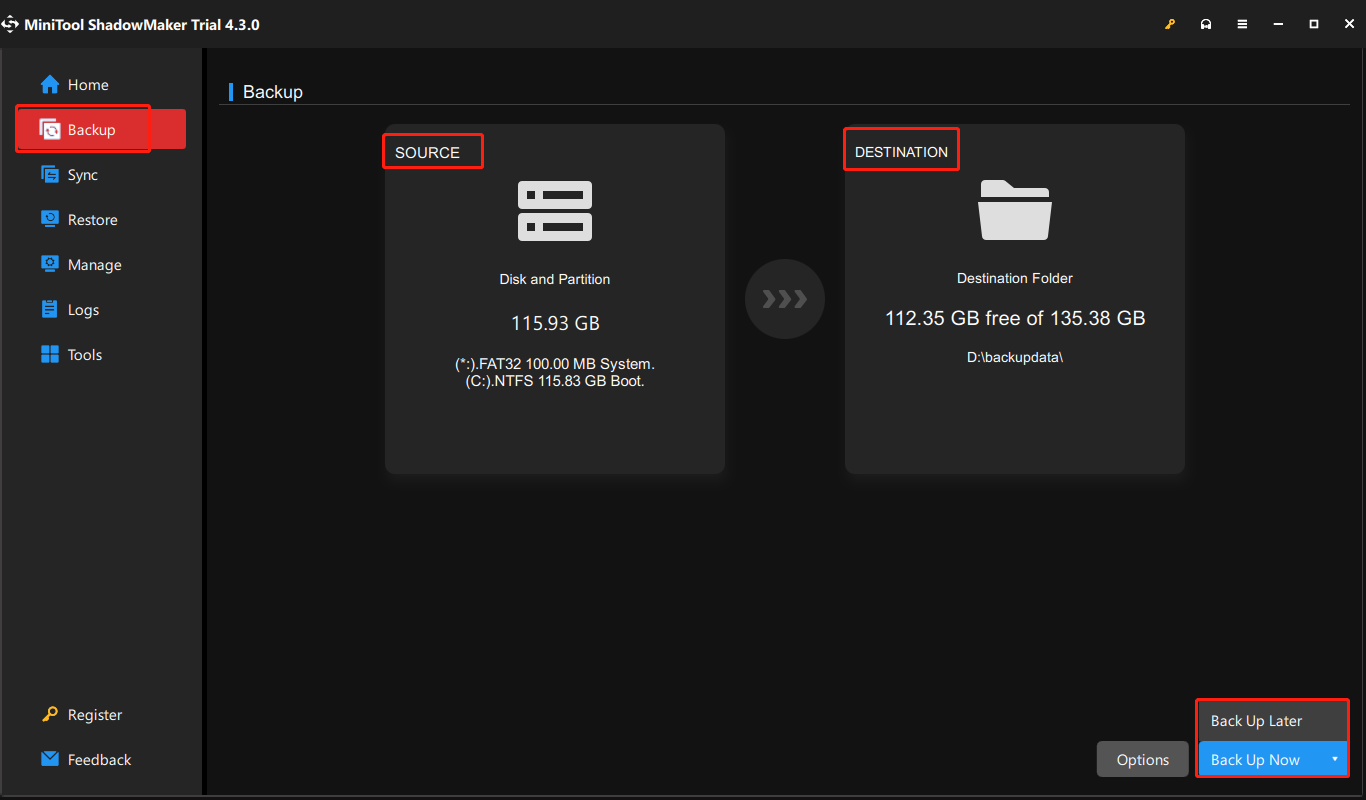
Step 3: Navigate to the Backup tab on the left pane.
- Click SOURCE to choose the backup content: Folders and Files or Disk and Partitions. Then navigate the directory to find the photos you need to move and click OK to confirm.
- Click DESTINATION to choose a location to save the backed-up photos and click OK to return the main interface.
Step 4: Click Back Up Now to start the process. You can choose Back Up Later and manage the process in the Manage section where you can choose to perform a full/incremental/differential backup.

Way 3: Import Photos with Photos App
The last method is using Windows Photos App. Using this tool will save the chosen photos to the Picture folder, but you can change the destination via Settings > Change the import destination. The following steps will show you how to transfer photos from an SD card to a Windows PC.
Step 1: Connect the SD card to your computer.
Step 2: Press Win + S to type Photos and hit Enter to open the Photos window.
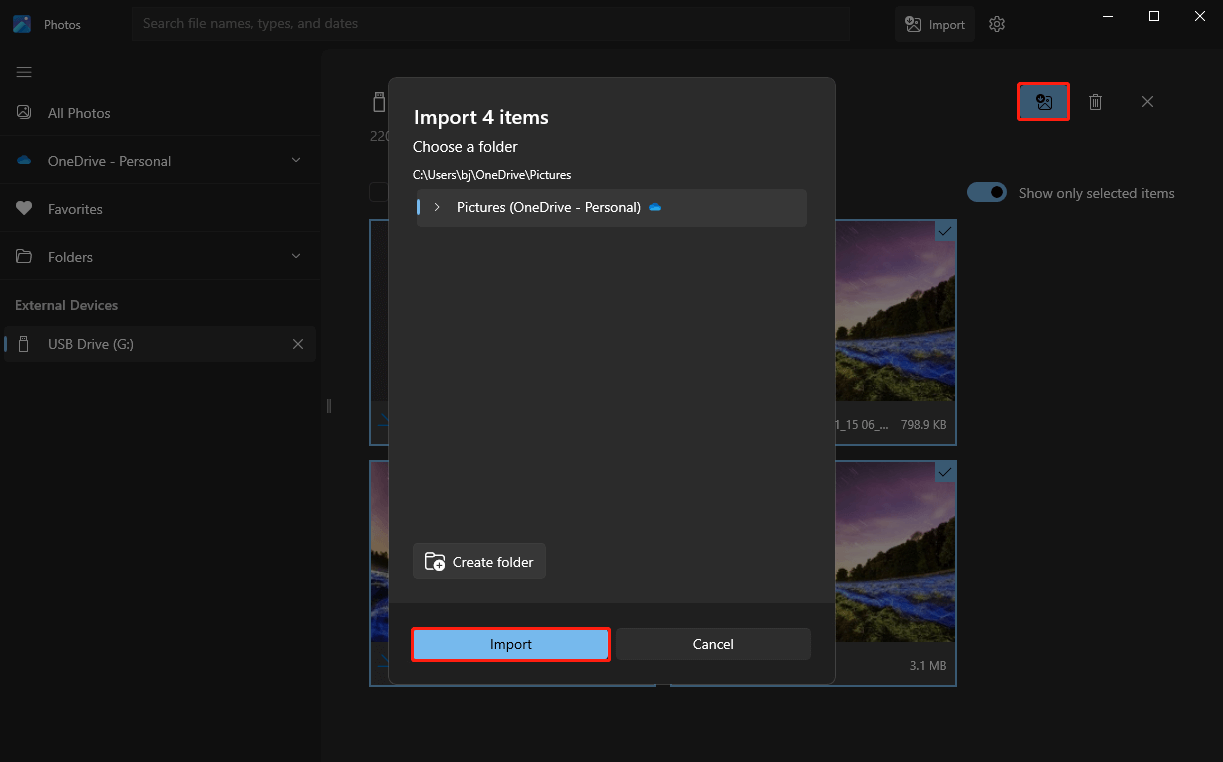
Step 3: Click on the Import button and choose the USB Drive to load photos on your SD card.

Step 4: Choose the download image button and click Import.

Apart from the above three methods, you can also download pictures from the cloud drive if the wanted pictures are synced to a cloud drive.
Bonus Tip: Recover Photos Lost During Transferring
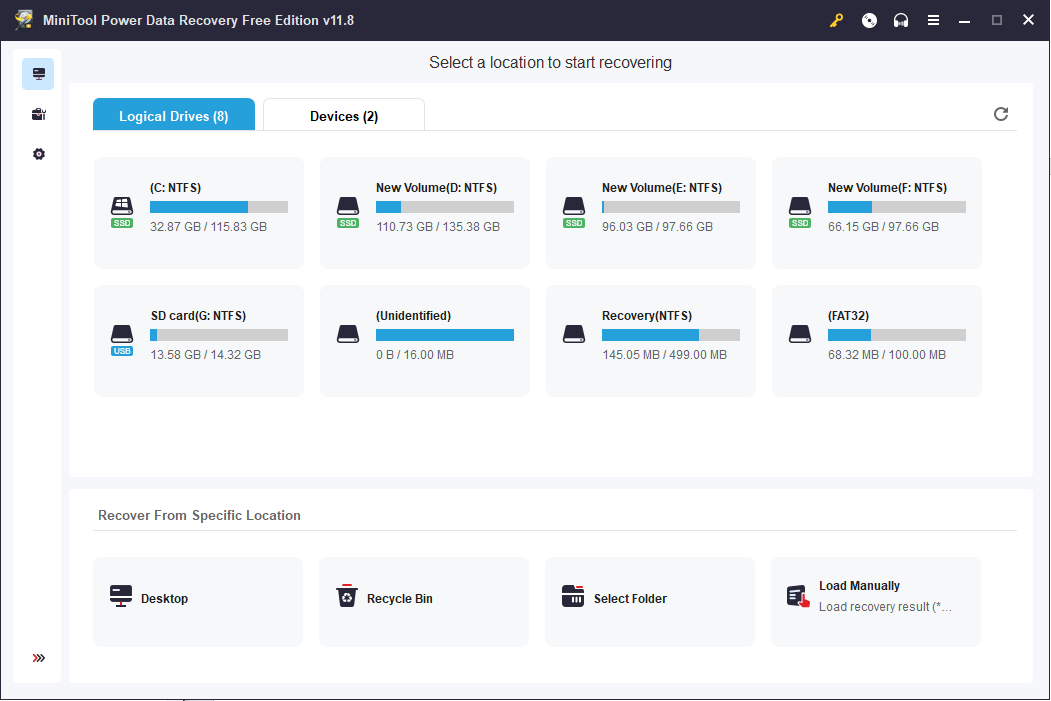
You should always pay attention to data security, checking files after the transfer process is completed. If there are photos lost during transferring, please recover the lost files as soon as possible. How can you find the lost photos? MiniTool Power Data Recovery can help you.
This filer recovery software is able to restore different types of pictures in various data loss scenarios. Additionally, it allows you to preview files before saving them. You can try MiniTool Power Data Recovery Free first to deep scan the SD card and recover 1GB of files for free.

MiniTool Power Data Recovery FreeClick to Download100%Clean & Safe
Bottom Line
You should know how to move pictures from an SD card to a computer after reading this post. Just choose one method you want to use. Meanwhile, data security is important. If you find any pictures or other files lost, give MiniTool Power Data Recovery a try!

