If you meet the NVIDIA Output not plugged in error on Windows, you need to read this post. It will show you two scenarios in which the problem occurs and the corresponding solution in each scenario. Right now, you can get these two useful solutions from the MiniTool website.
Solution 1: Update the NVIDIA Graphics Driver
This error may be due to outdated drivers that do not work well with your device or due to the latest drivers. You can try updating the NVIDIA graphics driver to resolve this error
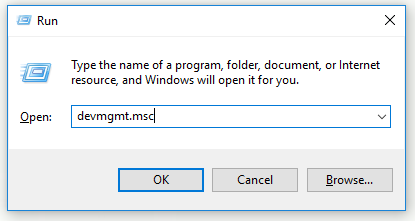
Step 1: Press the Windows + R keys combination to open the Run dialog box. Type devmgmt.msc and click OK to run Device Manager.

Step 2: Expand the Display adapters part, right-click your graphics card and choose Uninstall device to uninstall your graphics adapter.
Step 3: Verify all dialogs or prompts that may require you to verify the uninstallation of the current graphical device driver and wait for the process to complete.
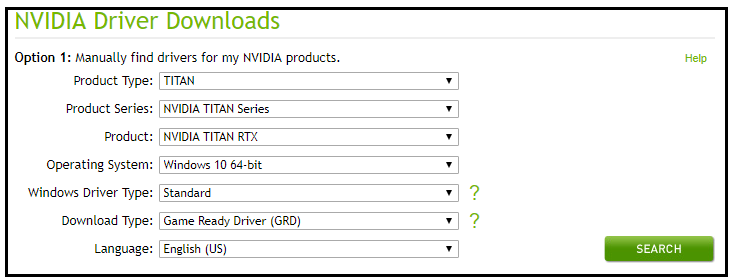
Step 4: Find drivers for your NVIDIA products in the NVIDIA Driver Downloads part. Type all required information and click SEARCH.

Step 5: Click the required entry and click the Download button. Save it to your computer, open it, and follow the instructions.
Step 6: In the Installation Options window, choose the Custom (Advanced) option, check Perform a clean installation and then click NEXT to install the driver.
Now check to see if the NVIDIA Output not plugged in error has been resolved.
Alternative: Roll Back the Driver
If the NVIDIA Output not plugged in error occurs after you have installed the latest drivers for the graphics card, you can try to roll back the graphics card driver.
Step 1: Uninstall the driver you currently have installed on your machine.
Step 2: Press the Windows + R keys combination to open the Run dialog box. Type devmgmt.msc and click OK to open Device Manager.
Step 3: Expand the Display adapters section, right-click on the display adapter you want to rollback and choose Properties.
Step 4: Switch to the Driver tab and find Roll Back Driver. If this option is grayed out, it means that the device has not been updated recently or has no backup files to remember the old driver. If the option is not gray, follow the instructions to proceed with the process.
Solution 2: Enable NVIDIA Output Port in the NVIDIA Control Panel
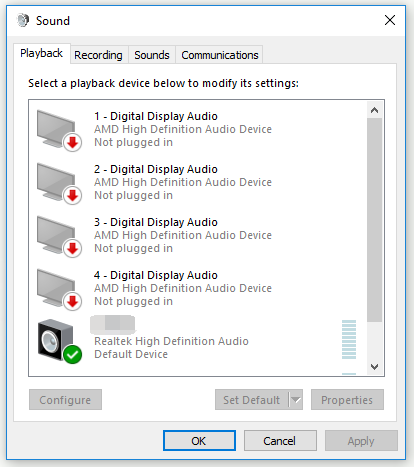
If you don’t set the correct settings in the NVIDIA Control Panel, the HDMI port could be set up to not broadcast audio. When you view playback devices connected to your computer, you will see the NVIDIA Output not plugged in error.
You can try enabling NVIDIA Output port in the NVIDIA Control Panel to fix this error.
Step 1: Right-click on the blank desktop with no icon and click NVIDIA Control Panel.
Step 2: Expand the Display section and choose the Set Up Digital Audio option.
Step 3: Find the name of your graphics card and find the HDMI entry in the list. Choose the device you are connected to.
Step 4: Right-click the volume icon in the bottom right corner of the screen, click Sounds and switch to the Playback tab.

Step 5: The NVIDIA output device that you want to set as default will appear. If it does not show up, right-click a blank area and check Show Disabled Devices and Show Disconnected Devices. Right now, your device should appear.
Step 6: Left-click the newly appeared device and click the Set Default button.
Check if the NVIDIA Output not plugged in error disappears.
Further Reading: Update Your NVIDIA GPU Display Driver Now to Fix Five Vulnerabilities.
Bottom Line
In conclusion, this post has shown you how to fix the NVIDIA Output not plugged in error on Windows with 2 workable solutions. If you encounter the same error, you can try the methods in this post.