The Nvldumd.dll bad image error message usually pops up when you are trying to launch certain programs on your computer. In this post from MiniTool, we will walk you through how to solve this annoying problem and use the related programs again.
Nvldumd.dll Bad Image Error
Nvldumd.dll refers to the DLL file associated with Nvidia Driver Loader. Usually, this file is located in the /System32/DriversStore/ folders on your computer. Once it is missing or corrupted by accident, the Nvldumd.dll bad image error message might appear whenever you open some regular inbuilt programs or other video games along with error status 0xc000012f.
This error indicates that your system lacks the complete Microsoft Visual C + + Redistributable package the related which are prerequisites of these programs. Luckily, this error is easy to tackle after applying these solutions below.
MiniTool ShadowMaker TrialClick to Download100%Clean & Safe
Fix 1: Re-register the Nvldumd.dll File
Sometimes, the Nvldumd.dll file might have been restored to your operating system. Trying re-registering the DLL file might work. To do so:
Step 1. Launch Command Prompt as an administrator.
Step 2. In the command window, type the command below and hit Enter.
Regsvr32 nvldumd.dll
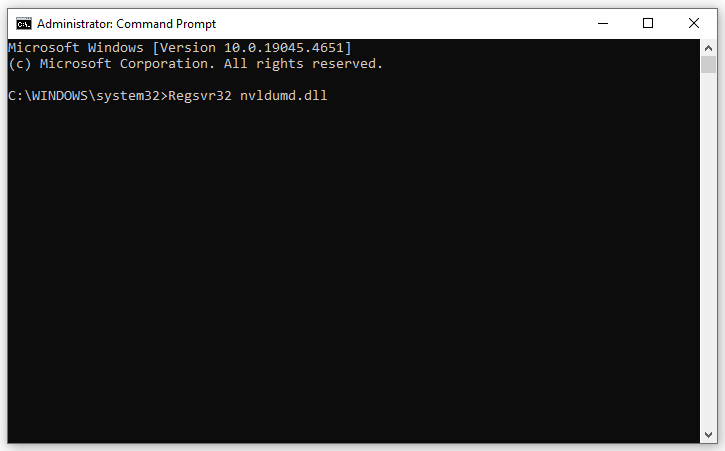
Step 3. Once done, restart your computer to see if Nvldumd.dll bad image error disappears.
Fix 2: Update GPU Drivers
Windows Optional Updates are responsible for driver updates. Therefore, you can also download and install optional updates so as to update the graphics card driver. Here’s how to do it:
Step 1. Open Windows Settings.
Step 2. Go to Update & Security > Windows Security > Check for updates.
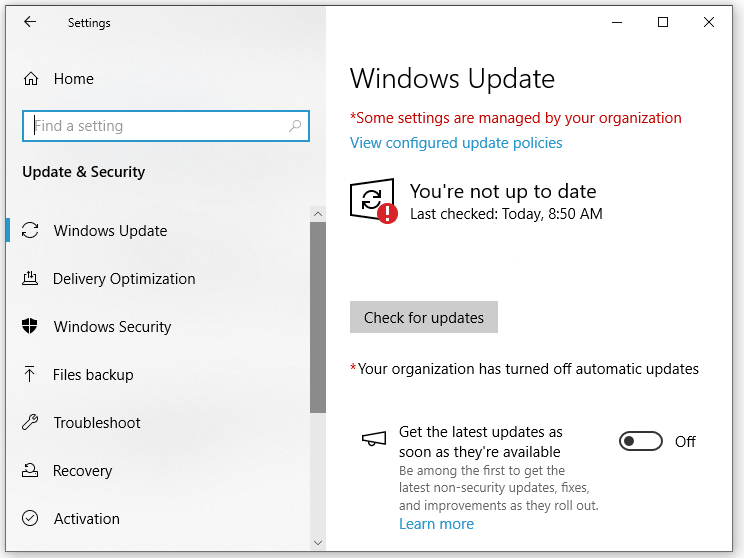
Step 3. Tap on View optional updates > tick all the checkbox under Driver updates > hit Download and install.
Step 4. Restart your computer.
Fix 3: Repair Relevant Visual C+ + Redistributable
Another solution for Nvldumd.dll bad image error is to repair the relevant Microsoft Visual C + + Redistributable packages. To do so:
Step 1. Press Win + R to open the Run dialog.
Step 2. Input appwiz.cpl and hit Enter to launch Programs and Features.
Step 3. In the program list, locate the related Microsoft Visual C + + entries and right-click on it to choose Change.
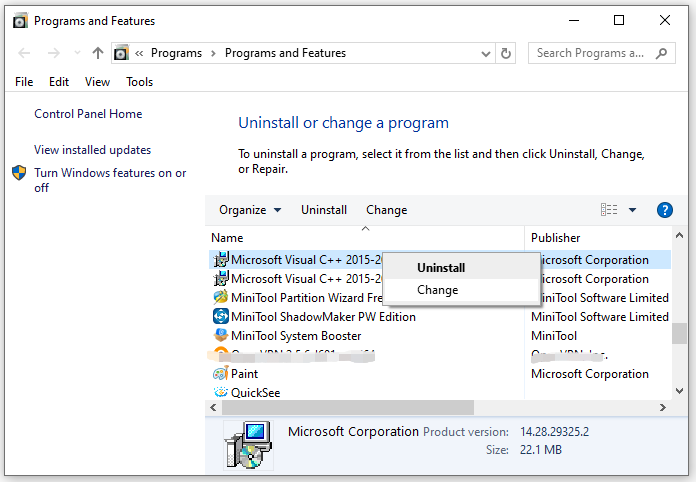
Step 4. In the Modify Setup window, click on Repair. Confirm this action and then restart your computer to make the changes effective.
Fix 4: Reinstall Relevant Visual C + + Redistributable
Nvldumd.dll bad image error can also be related to the integrity of Microsoft Visual C + + Redistribute package. If you suspect the package is corrupted, follow these steps to reinstall it from scratch:
Step 1. Press Win + S to evoke the search bar.
Step 2. Type programs and features and then select the best match.
Step 3. Scroll through the program list, select the Microsoft Visual C + + Redistribute package that contains the Nvldumd.dll file, and then select Uninstall.
Step 4. After uninstallation, click here to redownload the Microsoft Visual C + + Redistribute package on your computer.
Fix 5: Repair System File Corruption
Corrupted Windows system files can also trigger Nvldumd.dll bad image error. To repair the file integrity violations, it’s a good option to run the combination of System File Checker (SFC) and Deployment Image Servicing and Management (DISM). Follow these steps:
Step 1. Press Win + R to open the Run box.
Step 2. Type cmd and press Ctrl + Shift + Enter to run Command Prompt as an administrator.
Step 3. Type sfc /scannow and hit Enter.
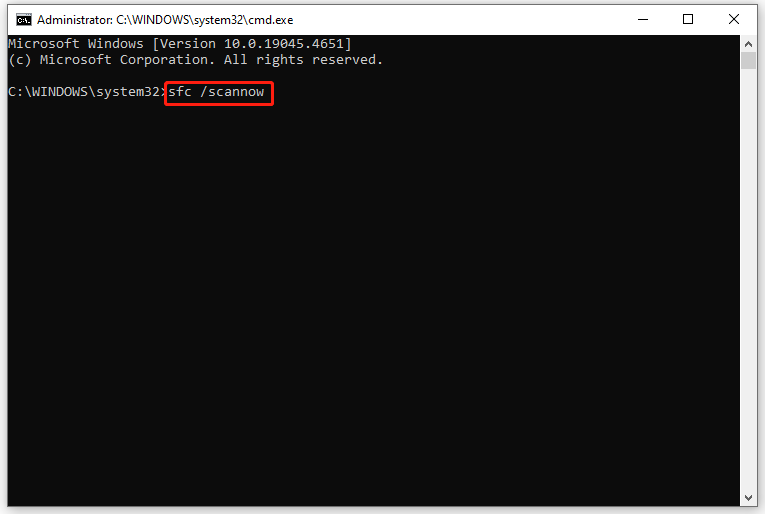
Step 4. After the process is completed, run the command below and tap on Enter:
DISM /Online /Cleanup-Image /RestoreHealth
Step 5. Restart your computer.
Fix 6: Perform System Restore
If the Nvldumd.dll bad image error occurs after making some big changes on your computer such as updating the system, installed a new program or more, reverting the OS to a previous state might do the trick. Here’s how to perform system restore:
Step 1. Press Win + R to open the Run box.
Step 2. Type rstrui and click on OK to launch System Restore.
Step 3. In the Restore system files and settings window, click on Next to continue.
Step 4. Pick a restore point according to the created time and description and hit Next.
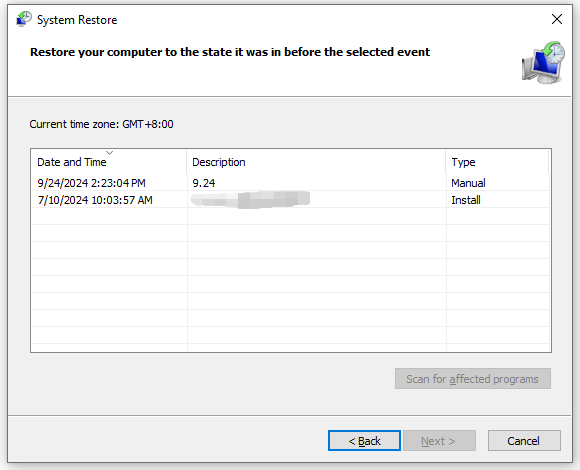
Step 5. After confirming all the details, tap on Finish to start the process.
Final Words
What is Nvldumd.dll? How to get rid of Nvldumd.dll bad image error? Now, you might have the answer. Last but not least, I always recommend you utilize MiniTool ShadowMaker to back up important data to prevent any potential data loss. Have a nice day!