Do you want to remove system Z drive? Do you know how to do that? If you don’t know, this post from MiniTool Solution is what you need. It will show you 3 useful methods. You can try to edit the registry, perform a system restore and update Windows 10. Hope these methods are useful to you.
A Z: system drive partition always shows up in Windows 10’s File Explorer after partitioning a hard drive or upgrading to Windows 10. However, if you try to open it, you will receive a message saying “You don’t currently have permission to access to this folder.”
You can try to remove but not delete the Z: drive and then you will not see it in File Explorer. Follow the instructions given below to do that.
Method 1: Edit the Registry
To remove the Z: drive in File Explorer, the safest way you can try it to add new NoDrive DWORDs or QWORDs to the registry.
To do that, follow the steps given below.
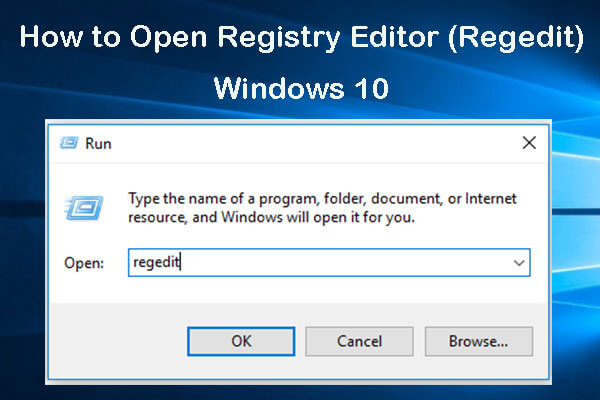
Step 1: Press the Win + R keys combination to open Run. Next, type regedit and press Enter to open Registry Editor.
Step 2: Navigate to this path:
HKEY_CURRENT_USER\SOFTWARE\Microsoft\Windows\CurrentVersion\Policies.
Simply copy it and paste it into the Registry Editor’s address bar. Then press Enter.
Step 3: In the Registry Editor window, right-click an empty area on the right side, choose New > QWORD (64-bit) Value if you have a 64-bit Windows 10 platform. If you have a 32-bit Windows platforms, choose New > DWORD (32-bit) Value.
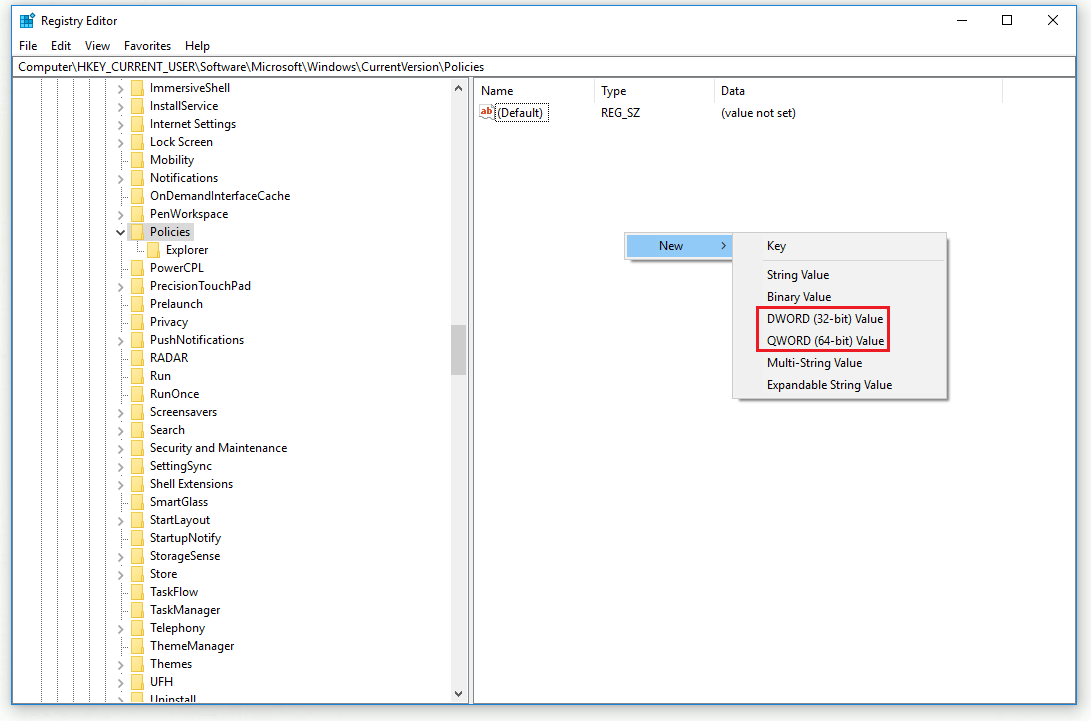
Step 4: Name the new QWORD or DWORD as NoDrives.
Step 5: Double-click NoDrives, check Decimal and change the Value data to 33554432. Now click OK.
Step 6: Now find this path in the Registry Editor’s address bar:
HKEY_CURRENT_USER\SOFTWARE\Microsoft\Windows\CurrentVersion\Explorer.
Step 7: Select the Explorer key on the left side, set up a new NoDrives QWORD or DWORD for it as you did for the Policies key.
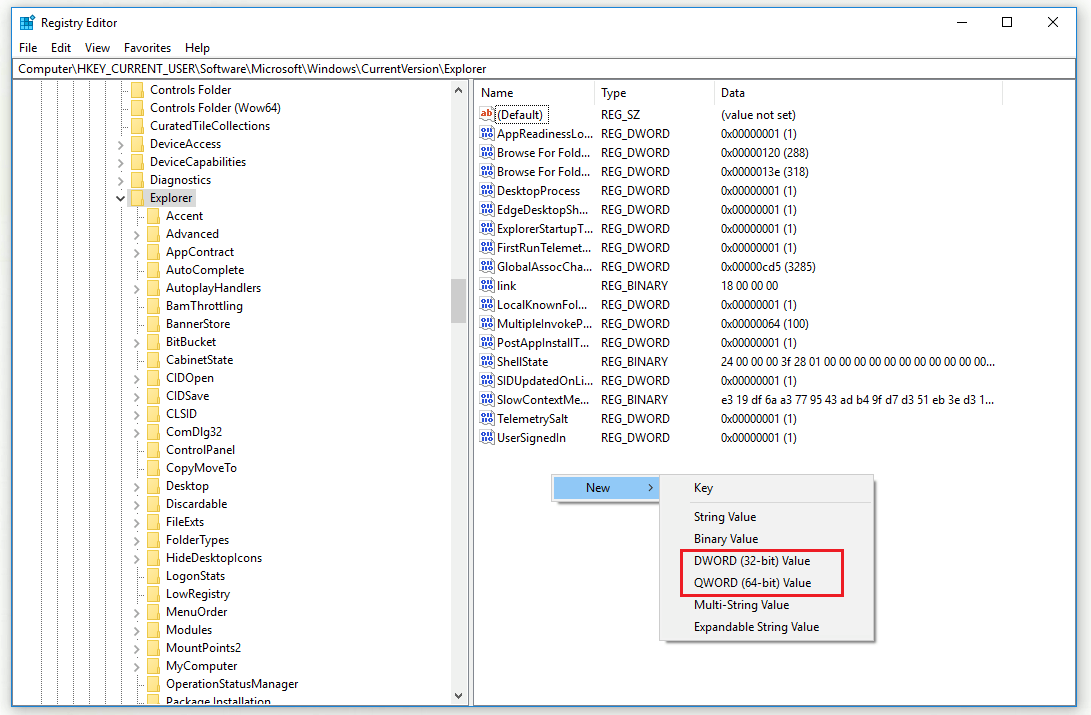
Step 8: Double-click NoDrives, check Decimal and change the Value data to 33554432. Now click OK.
Step 9: Close the Registry Editor window and restart Windows.
After finishing the steps above, you should remove system Z drive on Windows 10 successfully.
Method 2: Perform a System Restore
If you have created a system restore point in advance, now you can also try to roll Windows 10 back to a previous date to remove system Z drive. This way will remove your software installed after the selected date and undo other system changes. Here are the steps on how to perform a system restore.
Step 1: Press the Win + R key combination to open Run. Next, type rstrui and press Enter to open System Restore.
Step 2: Click Next. Select a restore point that will roll your system back to the time when the Z: drive partition didn’t appear in File Explorer and then click Next.
Step 3: Click Finish to confirm your selected restore point.
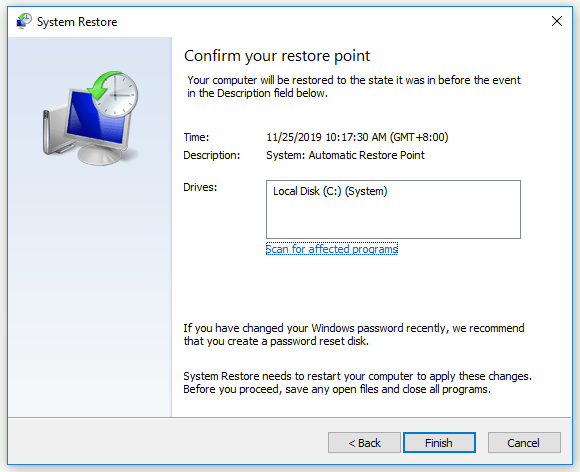
With those steps, you should remove system Z drive successfully now.
Method 3: Update Windows 10
Sometimes, system Z drive may appear if your Windows 10 updates have not completely installed. If this case is applicable, you can try to update your Windows 10 to remove system Z drive.
Here is a quick guide.
Step 1: Click the Start menu, choose Settings and then choose Update & Security.
Step 2: In the Windows Update window, click the Check for updates button on the right side.
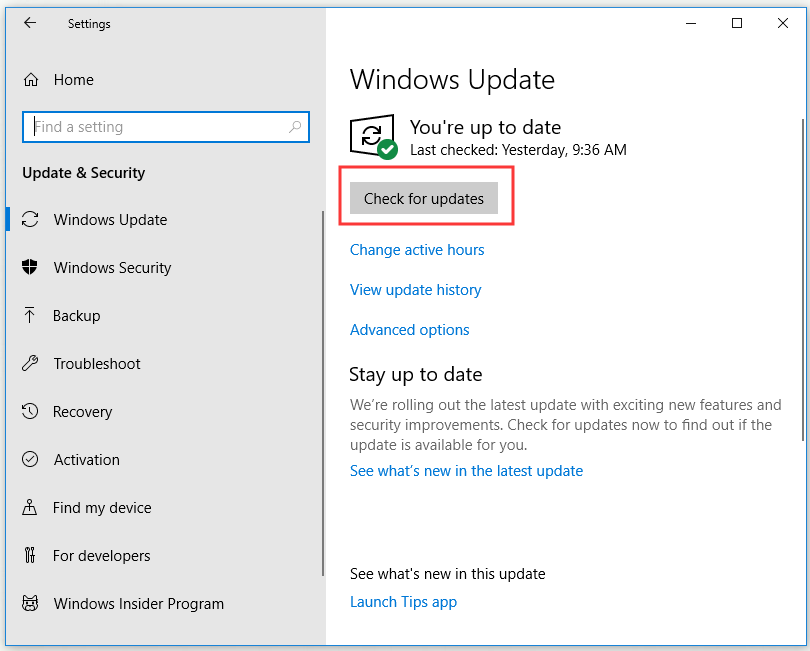
Wait for a while, if there are any available updates, they will be downloaded and installed automatically.
Step 3: Reboot your computer and check if you remove system Z drive successfully.
Bottom Line
That’s all the information about how to remove system Z drive in File Explorer. If you want to do so, try the methods mentioned above.
