Windows Search, as an integral part of the Windows system, brings great convenience for people to find items. But it might go wrong like other software. Sometimes, you can fix these problems easily by resetting Windows Search settings. This MiniTool post shows you 3 methods to do the reset.
Windows Search is a standard search program for the Windows system, used for instant search. It contains three components, Windows Search Service, Development platform, and User interface. When your Windows Search becomes slow, inaccurate, or even not working after using it for a long time, you can reset Windows Search settings to default to fix the problem.
3 Methods to Reset Windows Search Settings
Method 1: Run the Search and Indexing Troubleshooter
Step 1: Press Win + I to open Windows Settings.
Step 2: Choose Update & Security and shift to the Troubleshoot tab.
Step 3: Click on the Additional troubleshooters option.
Step 4: Scroll down to find and click Search and Indexing, then click on the Run the troubleshooter button.
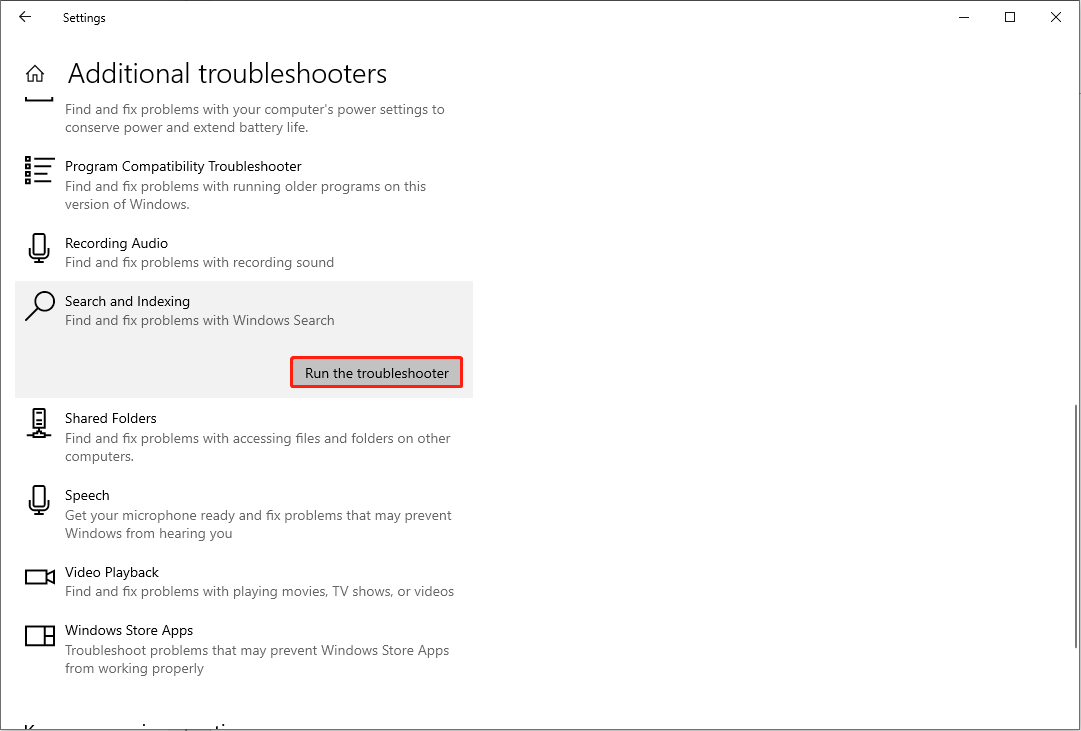
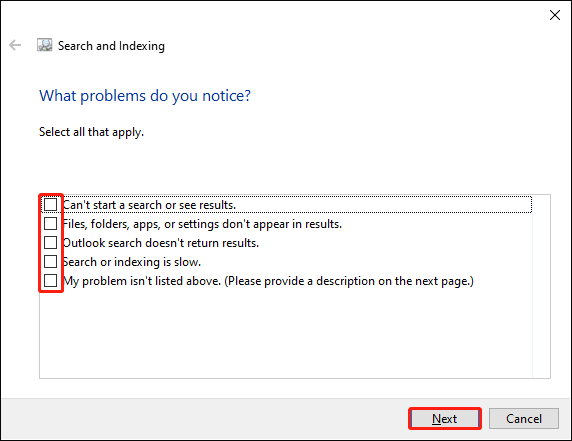
Step 5: Check the problem you meet when using Windows Search and click on Next.
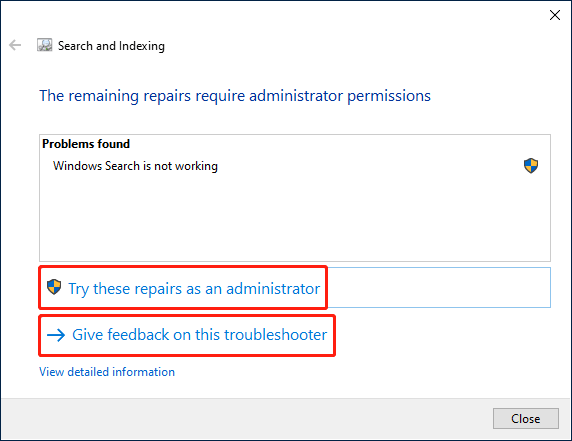
The troubleshooter will fix the problem automatically. If there are remaining problems in the window, you can choose to Try these repairs as an administrator or Give feedback on this troubleshooter.
Method 2: Reset Using Windows Registry
Step 1: Press Win + R to open the Run window.
Step 2: Type regedit into the text box and hit Enter to open the Registry Editor window.
Step 3: Navigate to HKEY_LOCAL_MACHINE > SOFTWARE > Microsoft > Windows Search.
Step 4: Right-click on the black space on the right pane, then choose New > DWORD (32-bit) Value.
Step 5: Rename the new subkey as SetupCompletedSuccessfully.
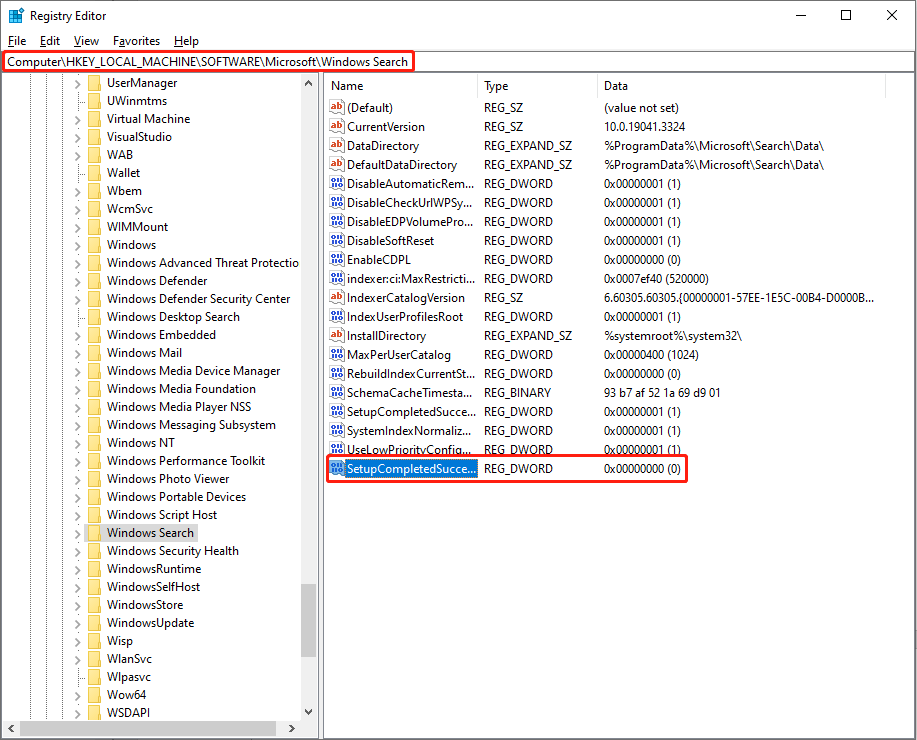
Step 6: Double-click on the subkey to check whether its Value data is 0 or not. If not, change it to 0 and click OK to save the change.
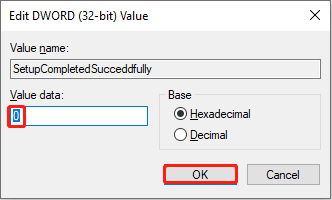
After that, you should restart your computer to fully apply the change. You reset Windows Search to default successfully.
MiniTool Power Data Recovery FreeClick to Download100%Clean & Safe
Method 3: Reset with PowerShell
Step 1: Go to Microsoft Download Center to download the ResetWindowsSearchBox.ps1 file.
Step 2: Press Win + X and select Windows PowerShell (Admin) from the WinX menu.
Step 3: Type Get-ExecutionPolicy and hit Enter.
Step 3: If the reaction is Restricted, type Set-ExecutionPolicy -Sope CurrentUser -ExecutionPolicy Unrestricted, then hit Enter.
Step 4: Press Y to confirm the change.

Step 5: Right-click on the downloaded file and choose Run with PowerShell to execute the file.

Step 6: After the resetting process is finished, type Set-ExecutionPolicy -Scope CurrentUser -ExecutionPolicy Restricted and hit Enter to restore the execution policy to the original settings.
Step 7: Press Y to confirm the change.

How to Rebuild the Windows Search Index
Windows contains an index file or folder that keeps track of everything on your computer. Thus, when you use Windows Search to find items, the computer can show the result quickly. Apart from resetting Windows Search, you can rebuild the Windows Search Index to fix the slow-performing problem.
Step 1: Press Win + S and type Indexing Options into the search box.
Step 2: Hit Enter to open the window.
Step 3: Click on the Advanced button.
Step 4: In the Index Settings tab, click on Rebuild to delete and rebuild the index.
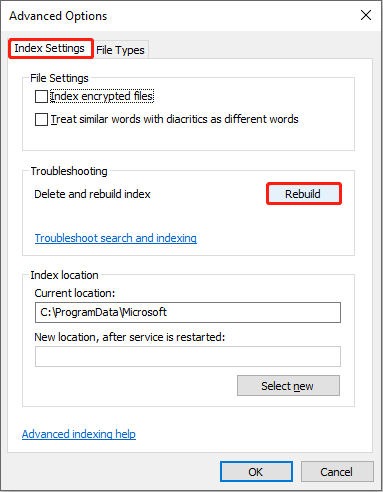
Step 5: Click OK in the popup window.
Wait for the process to complete. Your search database will be rebuilt, then you can check if your problem is rectified.
Bottom Line
Windows Search is a shortcut to find items. If you need to improve the accuracy and speed of Windows Search, you can choose to reset Windows Search settings or rebuild the Windows Search index with the instructions in this post.
![[FIXED] Windows Search Not Working | 6 Reliable Solutions](https://mt-test.minitool.com/images/uploads/2019/01/windows-search-not-working-thumbnail.jpg)

