If you want to find a solution to the “Shellexecuteex Failed” error, this post is what you need. It will show you some possible causes of the “Shellexecuteex Failed” error. In addition, it will also introduce you to several workable methods for this error. Now get these methods from MiniTool.
What Causes the “Shellexecuteex Failed” error on Windows?
Here are a few situations you might encounter:
- The application doesn’t have admin privileges
- System File Corruption
- Custom System sounds are crashing the app
- Application conflict
- Overprotective Local policy
If you want to find the methods for the “Shellexecuteex Failed” error, keep reading.
Method 1: Run the Application as Administrator
If you meet a “Shellexecuteex Failed” error when you open or install an application, it is likely to cause problems due to an unexpected application shutdown or installation of an executable because it does not have administrator access.
The following part will show you how to run an application as an administrator.
Step 1: Right-click on the application that is triggering the error, and select Properties.
Step 2: Select the Compatibility tab and check Run this program as administrator under the Settings section. Click Apply.
Step 3: Run the application again and see if the “Shellexecuteex Failed” error is fixed.
Method 2: Run DISM and SFC Scans
In some cases, the “Shellexecuteex Failure” error occurs because the installation could not be completed due to some type of system file corruption.
Follow the steps below to fix this error.
Step 1: Press Windows + R keys to open the Run dialog box. Type cmd and press Ctrl + Shift + Enter to run Command Prompt as an administrator.
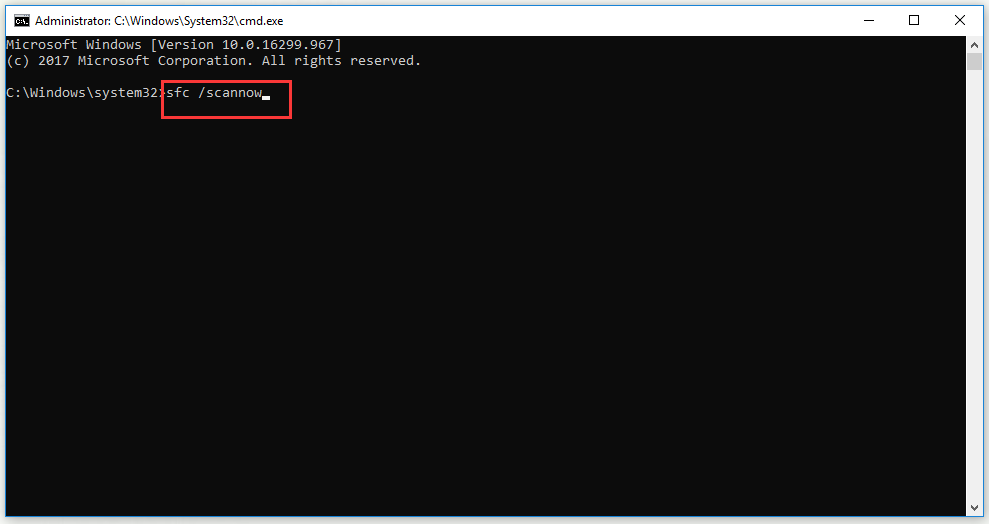
Step 2: Type sfc /scannow and press Enter to perform an SFC scan.

Step 3: After the scan is complete, restart the computer and wait for the next boot to complete. When the operating system is fully loaded, follow Step 1 to open Command Prompt again.
Step 4: Execute the commands: Dism.exe /online /cleanup-image /scanhealth and Dism.exe /online /cleanup-image /restorehealth to perform a DISM scan.
Step 5: After the DISM scan is complete, restart the computer to see if the “Shellexecuteex Failed” error is fixed.
Method 3: Revert the System Sounds to the Default
In this case, you also fix the issue by resetting all Windows sounds to the default.
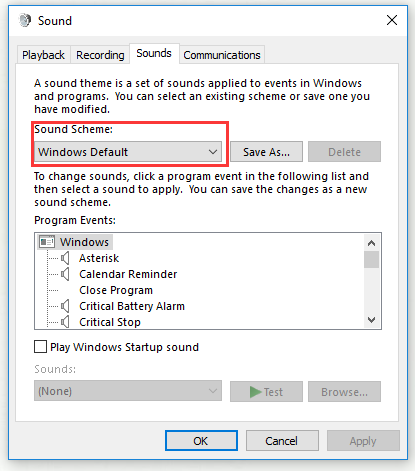
Step 1: Press Windows + R keys to open the Run dialog box. Type mmsys.cpl and click OK to open the Sound screen.
Step 2: Select the Sounds tab and then change the Sound Scheme to Windows Default. Click Apply and then click OK.

Step 3: Restart your computer to see if the “Shellexecuteex Failed” error disappears.
Method 4: Perform a Clean Boot
If the errors haven’t been fully resolved so far, you may be experiencing a “Shellexecuteex failure” error due to some kind of third-party conflict. Many potential applications could conflict with the ones that the application that is displaying the error, so your best approach to the problem is to configure your computer to start with a clean boot.
Step 1: Press Windows + R keys to open the Run dialog box. Type mscofig and click OK to open the System Configuration menu.
Step 2: Click the Services tab and then check Hide all Microsoft Services.
Step 3: Click Disable all to prevent all third party services from being started the next time your computer starts.
Step 4: Select the Startup tab and click Open Task Manager.
Step 5: Select each startup service systematically and then click Disable. This step ensures that no startup services are invoked the next time the system starts.
Step 6: Restart the computer to see if the error is still existing. If the error no longer occurs, complete the installation, then reverse engineer the steps above and re-enable the previously disabled services.
Method 5: Adjust the “Only elevate executables” Policy
In cases where the problem is caused by an improperly signed executable, in order to avoid this particular problem, you can adjust one Group policy named Only elevate executables that are signed and validated.
Step 1: Press Windows + R keys to open the Run dialog box. Type gpedit.msc and press Ctrl + Shift + Enter to open Local Group Policy Editor with admin privileges.
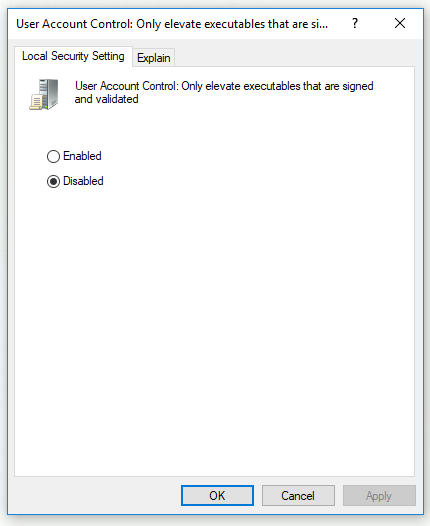
Step 2: Navigate to Computer Configuration > Windows Settings > Security Settings > Local Policies > Security Options. Double-click User Account Control: Only elevate executables that are signed and validated.
Step 3: Select the Local Security Setting tab and then ensure the policy is set to Disabled. Click Apply and then click OK.

Step 4: Restart the computer to see if the issue is fixed.
Method 6: Perform a Clean Install
If none of the above methods can solve this problem, you’re probably dealing with an underlying corruption problem that cannot be fixed by conventional means. You can only solve this problem by resetting each Windows component.
The quickest way is to perform a clean install. This process will cause you to lose any personal data.
The most effective way to take longer is to install the fix – in place install. During this process, you can retain all personal effects.
Bottom Line
In conclusion, this post has shown you some possible reasons for the “Shellexecuteex Failed” error. Meanwhile, it also shows you some useful methods to fix this problem. If you encounter this issue, you can try these methods.
