Synology NAS is created by Synology Inc. Synology Assistant is a tool for managing Synology NAS. Now, this post provided by MiniTool introduces how to download and install Synology Assistant. Now, keep on your reading.
Synology Assistant is a desktop utility that can search for Synology servers within a local area network. It allows you to search and connect to Synology servers or set up Wake-on-LAN (WOL). If you want to know how to use Synology Assistant, refer to this post – What Is Synology Assistant and How to Use It? Here Is a Guide.
In this post, we provide details about Synology Assistant download and install for Windows 10/Mac.
Synology Assistant Download
The following are the steps of Synology Assistant download.
Step 1: Go to the Synology Assistant download page.
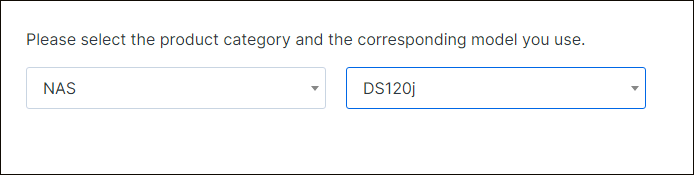
Step 2: Then, you need to select the product category and the corresponding model you use.
- Click the drop-down menu to select your product type.
- Click the drop-down menu to select your Synology product.
Step 3: Choose the operation system version by clicking the drop-down menu.
Step 4: Then, click the Desktop Utilities tab. The Synology utilities will be listed. Find Synology Assistant and click the Download button.

Step 5: Choose the document version. There are 4 versions for you – Windows (exe), Mac (dmg), Ubuntu (32 bits, deb), and Ubuntu (64 bits, deb). Then, click the Download button.

Step 6: Choose a path to save the Synology Assistant download package and click the Save button. Then, it will start to download Synology Assistant.
Synology Assistant Install
Here is how to install Synology Assistant. Follow the guide below:
Step 1: Find the Synology Assistant download package and double-click it to run the exe file.
Step 2: Select a language based on your needs and click Next.
Step 3: Read the agreement and click I Agree.
Step 4: Then, click Browse to choose a location to store the installation file. Then, click Install.
Step 5: It will ask you to install Synology Universal Serial Bus controller. You can click Install or Don’t Install. Then, click Finish.


Synology Assistant Uninstall
If you don’t want to use Synology Assistant anymore, you can choose to uninstall it. Here is how to do that:
Step 1: Open the Control Panel application and navigate to the Programs and Features section.

Step 2: Right-click Synology Assistant and click Uninstall/Change. Then click Yes to allow this app to make changes to your device. Then, you should follow the on-screen instructions to uninstall it. After that, you uninstalled this program successfully.
Step 3: Press the Windows + R keys together to open the Run box. Type %appdata% and press Enter.
Step 4: Delete any Synology Assistant Folder.

Final Words
Here is all the information about Synology Assistant download for Windows/Mac/Ubuntu. Besides, you can know how to install and uninstall it. If you want to do that, please read the above content.
About The Author

Position: Columnist
Having been an editor at MiniTool since graduating college as an English major, Daisy specializes in writing about data backups, disk cloning, and file syncing as well as general computer knowledge and issues. In her free time, Daisy enjoys running and going with friends to the amusement park.