Taking screenshots is very useful; it’s an important way to guide people through a new application/program/system, capture essential information, and record the error they met. But the question is how to take a screenshot properly. MiniTool Solution provides this post to guide users how to take a screenshot on a Mac in several different ways.
How to Take a Screenshot on a Mac in 4 Different Ways
It’s necessary to take a screenshot on your computer in the following cases:
- Record & report problems to the tech support.
- Capture the information that is important to you.
- Guide people how to use a new product/app/program/system.
- Etc.
Though there’s a straightforward Print Screen key on the keyboard of Mac computer, Apple still provides users with a number of options to capture & edit their screen. The following content focuses on how to take a screenshot on Mac (different methods and steps).
How To Take A Screenshot On Windows 8 (Or 8.1): User Guide.
Use Keyboard Commands
There are several keyboard commands for taking a screenshot on Mac. I’ll divide them into 3 types to show you how to take a photo on a Mac.
One: Capture the Entire Screen on Mac
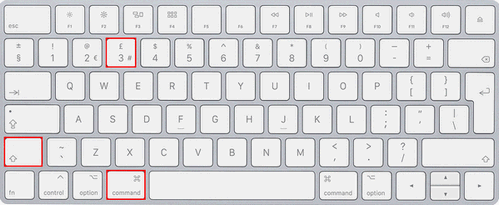
You should press Command + Shift + 3 simultaneously on the keyboard until you hear a brief camera sound. This will take a picture of the whole screen, including the dock, the toolbar (at the top), and any windows that are opening at that moment.

Where are screenshots saved? By default, the screenshot will be saved to the Mac desktop with the name format of Screen Shot [date] at [time]. png. You are allowed to change the storage location manually.
What about Mac screenshot to clipboard? You can press Command + Shift + 3 + Control at the same time.
MiniTool Power Data Recovery TrialClick to Download100%Clean & Safe
Two: Capture a Part of the Screen
This method works if you want to take a picture of a selected area on Mac screen.
How to make screenshot on Mac:
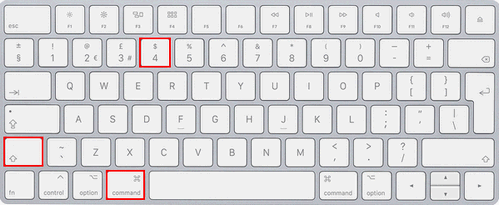
- Press Command + Shift + 4 simultaneously.
- Click and drag the mouse cursor that has become a crosshair.
- Define the area you want to screenshot.
- Release the mouse and the screenshot will be saved to the desktop.

Where do screenshots go? They’ll also be saved on the desktop by default. Likewise, if you want to get Mac screenshot to clipboard, you should press Command + Shift + 4 + Control.
Three: Capture a Window on the Screen
Sometimes, you only want to screenshot an opening window on the Mac screen. Luckily, it’s easy.
How to crop a screenshot on Mac:
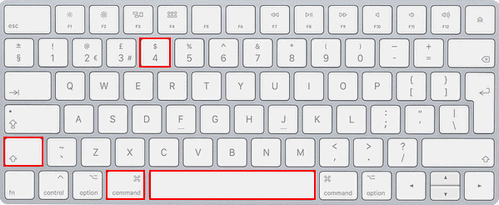
- Also, press Command + Shift + 4 and your cursor will become a crosshair.
- Press the Spacebar and the cursor will turn to camera icon
- Hover over any opening window (menu, bar, or dock) and click on the one you want to capture.
- Release the mouse.

Where do Mac screenshots go? They’re saved on the desktop.
Save Mac screenshot to clipboard: press Command + Shift + 4 + Spacebar + Control.
Is there any other ways to take a screenshot on a Mac? Of course, yes. Please move on.
How do you fix it when screenshots on Mac not working?
Take Screenshot with Preview
- Navigate to the Applications folder of the Finder -> double click on its icon to run Preview.
- Select File from the menu bar -> choose Take Screen Shot from the drop-down menu.
- Select an option: From Selection, From Window, or From Entire Screen.
- Navigate to File menu again -> choose Save.
- Give the screenshot a name -> select a location to keep it -> select a file type -> click Save.

Take Screenshot with Screenshot App
This method works for MacOS Mojave and later versions.
- Open the Other folder on the Launchpad or press Command + Shift + 5.
- Select an option from Entire Screen, Selected Window, or Selected Portion.
- Finish the rest steps and release.

How to find screenshots on Mac? You should also look for them on the desktop unless you have pressed Command + Shift + 5 + Control to save them to clipboard.
In addition, you can take a screenshot easily by using other snipping tools for Mac like Grab.