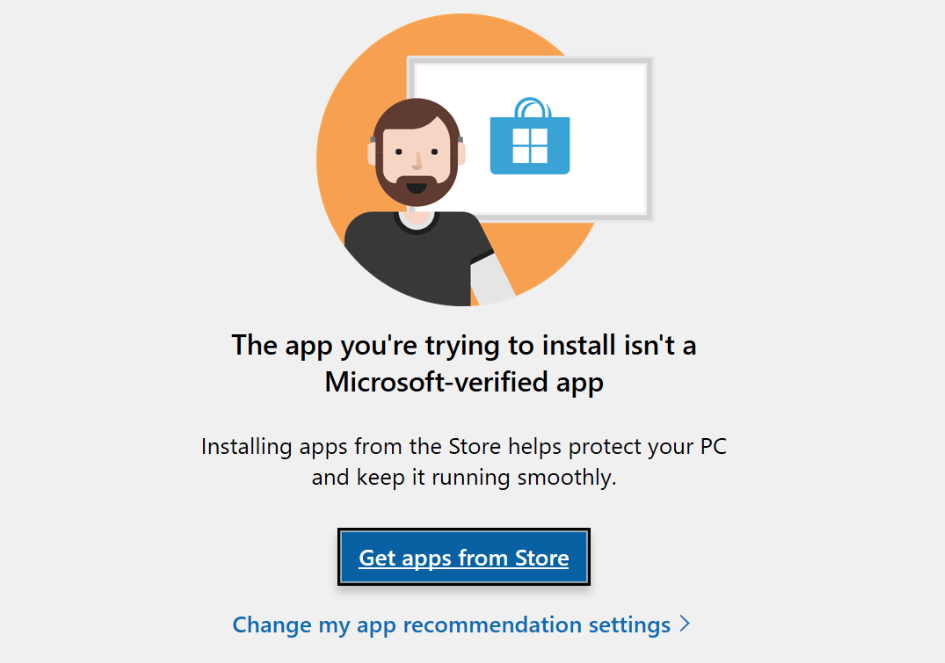
When you are trying to install an app on Windows 11/10, you may receive the “The app you’re trying to install isn’t a Microsoft-verified app” error message. This post from MiniTool provides solutions for the issue.
When you try to install software that has not been verified by Microsoft, the “The app you’re trying to install isn’t a Microsoft-verified app” message may appear. This message is part of the App Recommendations feature in Windows Defender SmartScreen, which can help you avoid downloading and installing malicious software.

Tip: Malicious software may cause your important data to get lost, thus, it’s recommended to back up regularly to provide better protection for you. There is a piece of great PC backup software for you – MiniTool ShadowMaker. You can try all the features of it with its Trail edition. Now, you can download it!
MiniTool ShadowMaker TrialClick to Download100%Clean & Safe
How to Fix The App You’re Trying to Install Isn’t a Microsoft-Verified App
How to fix the “The app you’re trying to install isn’t a Microsoft-verified app” or how to change your app recommendation settings in Windows? You can disable the app recommendation settings. There are 3 ways as follows:
Way 1: Via Settings
How to change your app recommendation settings in Windows? First, you can use the Settings app.
Step 1: Press the Windows + I keys together to open the Settings application.
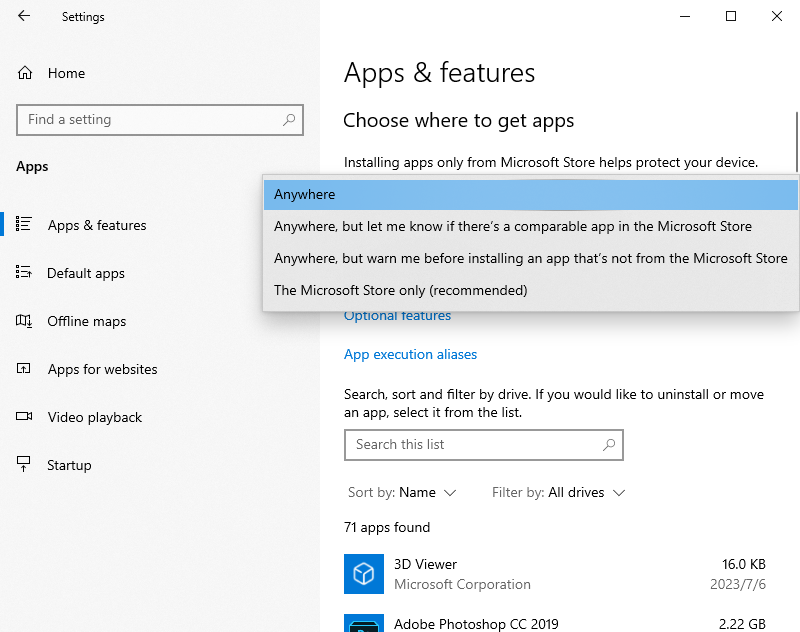
Step 2: Go to Apps > Apps & features. Then, click the Choose where to get apps drop-down menu.
Step 3: Change it from The Microsoft Store only (Recommended) to Anywhere.

Way 2: Via Registry Editor
You can also fix the “The app you’re trying to install isn’t a Microsoft-verified app” issue via Registry Editor.
Step 1: Press the Windows key + R to open the Run dialog box. Type regedit and press OK.
Step 2: Navigate to the following location:
HKEY_LOCAL_MACHINE\SOFTWARE\Policies\Microsoft\Windows Defender\SmartScreen
Step 3: Then, find the ConfigureAppInstallControl value and double-click it to change its value from StoreOnly to Anywhere.
Way 3: Via Group Policy
How to change your app recommendation settings in Windows? You can also use Group Policy.
Step 1: Press the Windows + R keys to open the Run dialog box. Type gpedit.msc and press OK.
Step 2: Go to the following location:
Computer Configuration > Administrative Templates > Windows Components > Windows Defender SmartScreen > Explorer
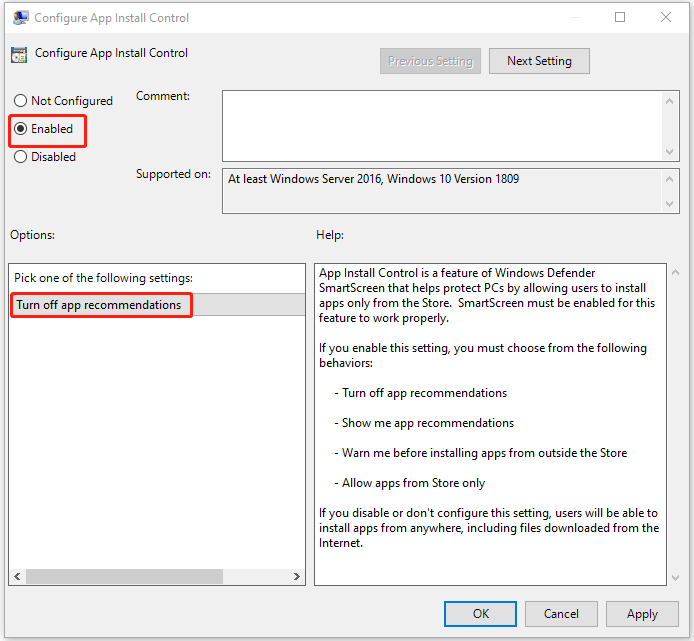
Step 3: Double-click the Configure App Install Control policy. Select Enabled and then choose the Turn off app recommendations option. Then, click Apply > OK.

Final Words
How to fix the app you’re trying to install isn’t a Microsoft-verified app? How to change your app recommendation settings in Windows? You can find answers in the above content. I hope that this post can be useful to you.
