Task Scheduler allows the system to perform automated tasks. However, you might receive some error messages like the selected task no longer exists. Do you know how to fix this error on Windows 10/11? In this guide from MiniTool Website, you can get some solutions.
The Selected Task No Longer Exists Windows 10/11
If you received the selected task no longer exists on your computer, it indicates that the selected task is corrupted. To address this issue, you can try either deleting all of the tasks or locating the corrupt one and deleting it.
MiniTool ShadowMaker TrialClick to Download100%Clean & Safe
How to Fix the Selected Task No Longer Exists Windows 11/10?
Fix 1: Create a New User Account
If you only have a task and receive the selected task no longer exists once, you can create a new user account to get rid of all of the tasks. However, if you have several tasks, you can go to the second solution to determine which task is the culprit.
Step 1. Press Win + I to open Windows Settings.
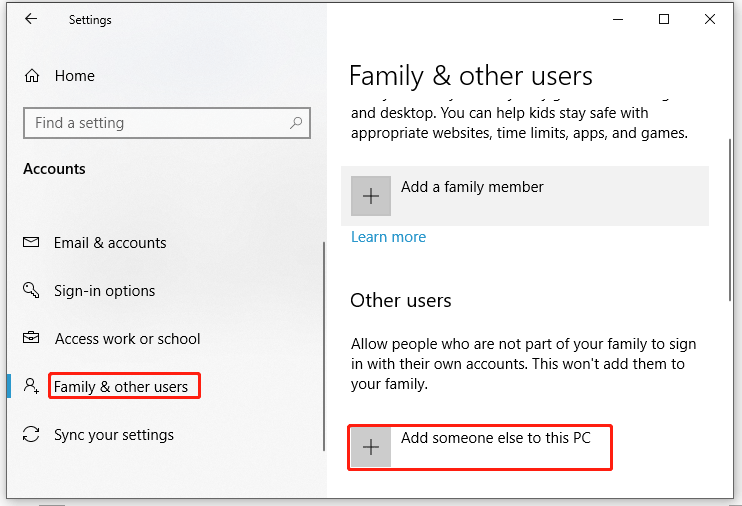
Step 2. Go to Accounts > Family & other users > Add someone else to this PC.

Step 3. If you want to link a Microsoft account to your email, you can input your email. You can also create a local account, to do so: click on I don’t have this person sign in information > select Add a User without a Microsoft Account > input your information.
Fix 2: Delete the Corrupted Task in File Explorer
The number of broken tasks determines that how many times you receive the selected task no longer exists. Deleting the corrupted task folder might be a solution for you. To do so:
Step 1. Type task scheduler in the search bar and hit Enter.
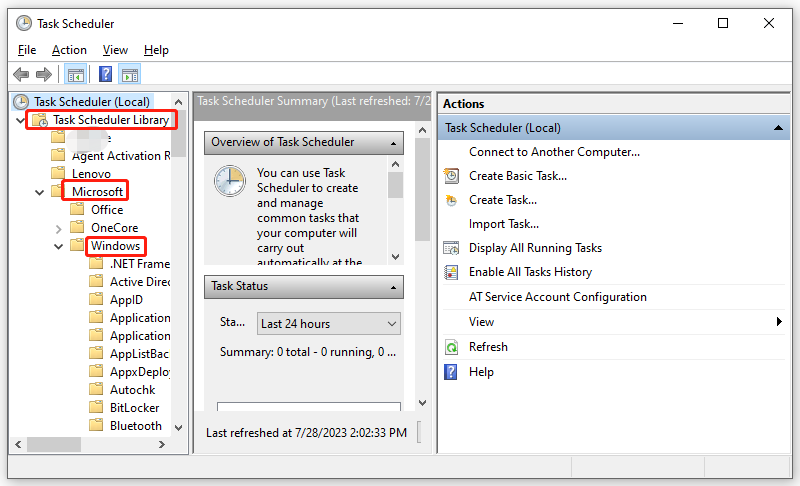
Step 2. Navigate to this path: Task Scheduler Library > Microsoft > Windows. Click on each folder under the Windows folder. If you receive the selected task no longer exists after clicking on a certain file, it means that the folder contains files that are not in sync with Task Scheduler.

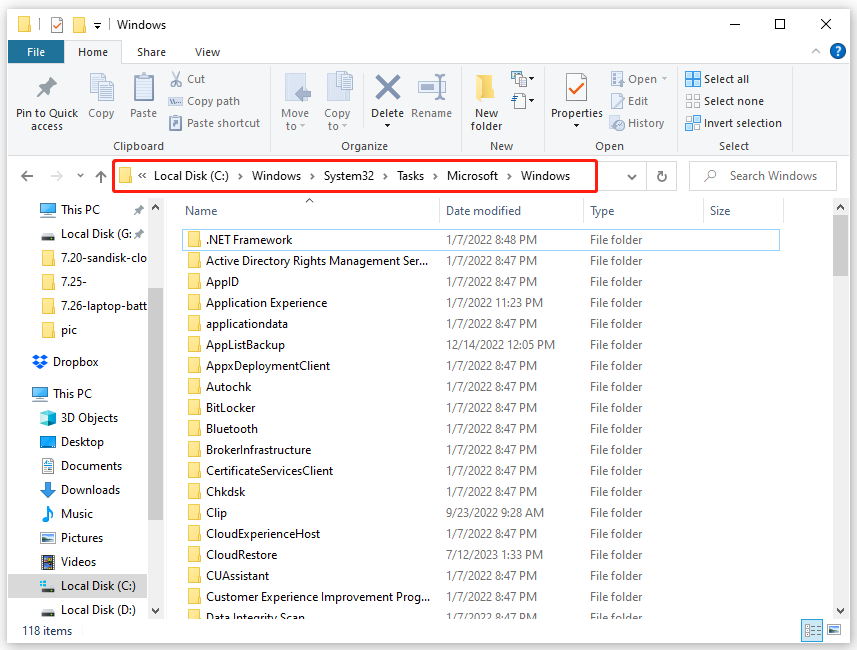
Step 3. Press Win + E to launch File Explorer and go to the path below:
C: \Windows\System32\Tasks\Microsoft\Windows

Find the corresponding folder that you receive the error and delete it.
Step 4. Repeat the process until you have deleted all the files with no synced schedules. The number of iterations should tally with the times you click on OK when you receive the selected task no longer exists in Task Scheduler.
Fix 3: Delete the Corrupted Task in Registry Editor
With the help of Registry Editor, you can also delete corrupted tasks. Here’s how to do it:
Tip: Before making any changes to Registry Editor, it’s better to back up the registry database in advance. When there is something wrong with the registry, you can easily restore it with the backup.
Step 1. Go to the following path in File Explorer.
C: \Windows\System32\Tasks\Microsoft\Windows
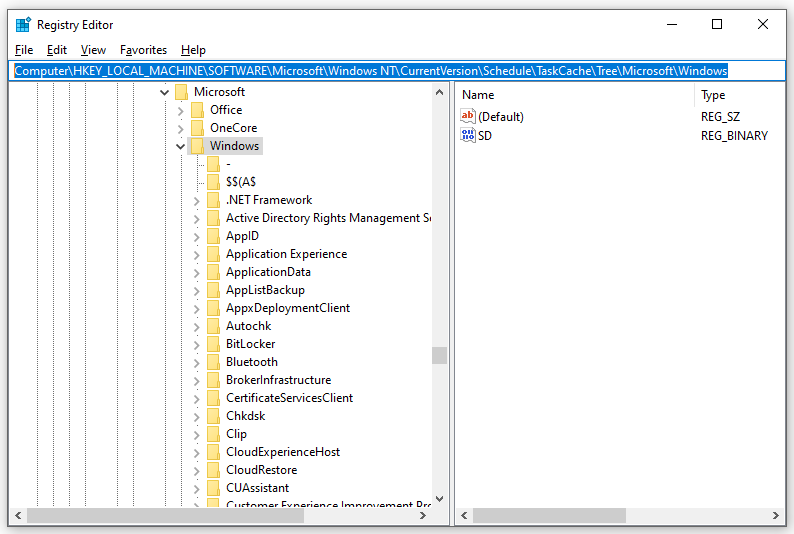
Step 2. Press Win + R to open the Run dialog, type regedit and hit Enter. Navigate to the following path:
Computer\HKEY_LOCAL_MACHINE\SOFTWARE\Microsoft\Windows NT\CurrentVersion\Schedule\TaskCache\Tree\Microsoft\Windows

Step 3. Compare the folders in Registry Editor and File Explorer. Delete any tasks from the explorer folders that don’t have the corresponding ones in the registry.
Step 4. Restart your computer to see if the selected task no longer exists is gone.