Sometimes, you may encounter various issues when updating Windows, such a stuck in the infinitive updating loop, a taskbar missing, computer crashes, etc. On most occasions, you can uninstall the update to handle those triggered issues. The following content focuses on how to uninstall Windows updates using PowerShell.
How to Use PowerShell to Uninstall Windows Updates
Firstly, you need to run Windows PowerShell as administrator on Windows by right-clicking on the Windows icon and choosing Windows PowerShell (Admin) from the WinX menu.
Then, type wmic qfe list brief /format:table and hit Enter to execute this command. You can get several pieces of information by running this command, including update descriptions, the KB number of installed updates, the user account and data of the installed updates.
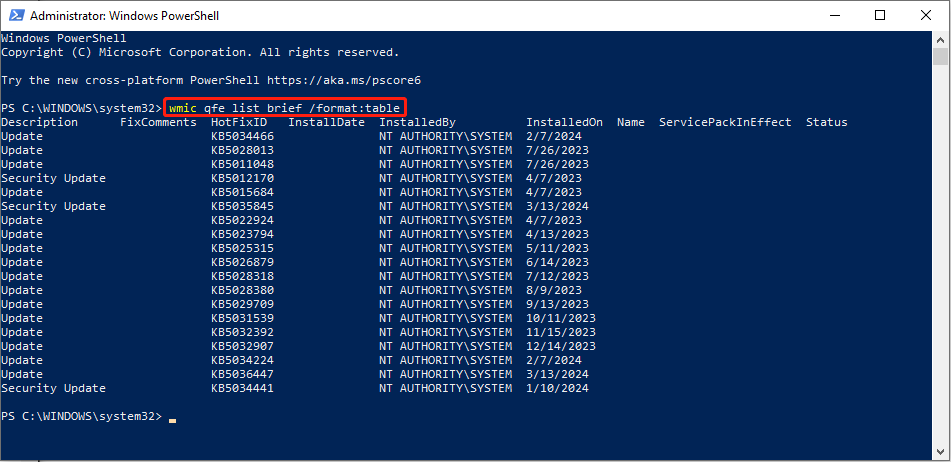
Looking through the displayed information, choose the update you want to uninstall then type the following command line and hit Enter.
wusa /uninstall /kb:ID (You should change the ID to the number of the chosen update)
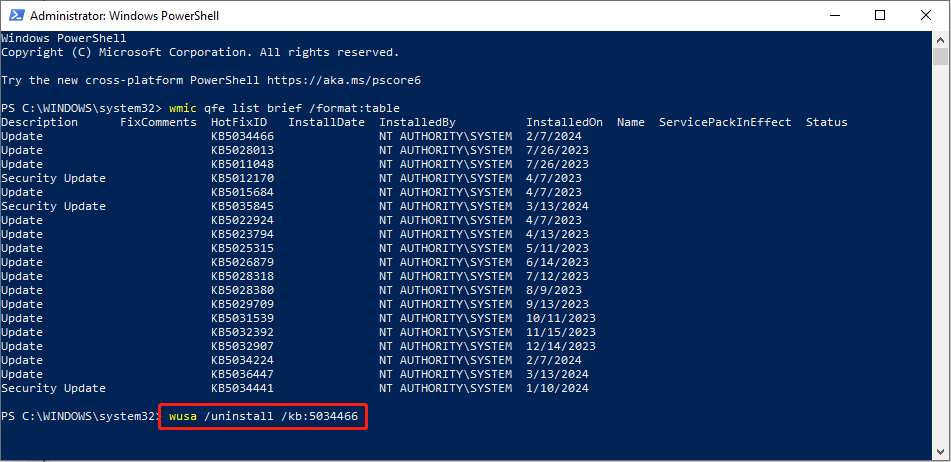
You will receive a Windows Update Standalone Installer window, which requires you to confirm whether to uninstall the update. Wait until the process is completed, you need to restart the computer to complete the operation. Hence, click Restart Now.
However, some updates can’t be uninstalled; thus, you will receive this error message: Servicing Stack update is required by your machine and cannot be uninstalled.
This error message doesn’t mean the wusa /uninstall command line does not work but tells you the chosen update is essentially required by the computer. Servicing stack updates enhance reliability during the latest update process to reduce underlying issues.
Another Option: Uninstall Windows Updates in Windows Settings
If you are not familiar with the Command Prompt, it is probably difficult for you to uninstall Windows updates from command lines. Then, try the methods below to uninstall Windows updates in Windows 11/10.
Step 1: Press Win + I to open Windows Settings.
Step 2: For Windows 10 users, navigate to Update & Security > View update history > Uninstall updates. Then, you can browse the list to choose the update that needs to be uninstalled.
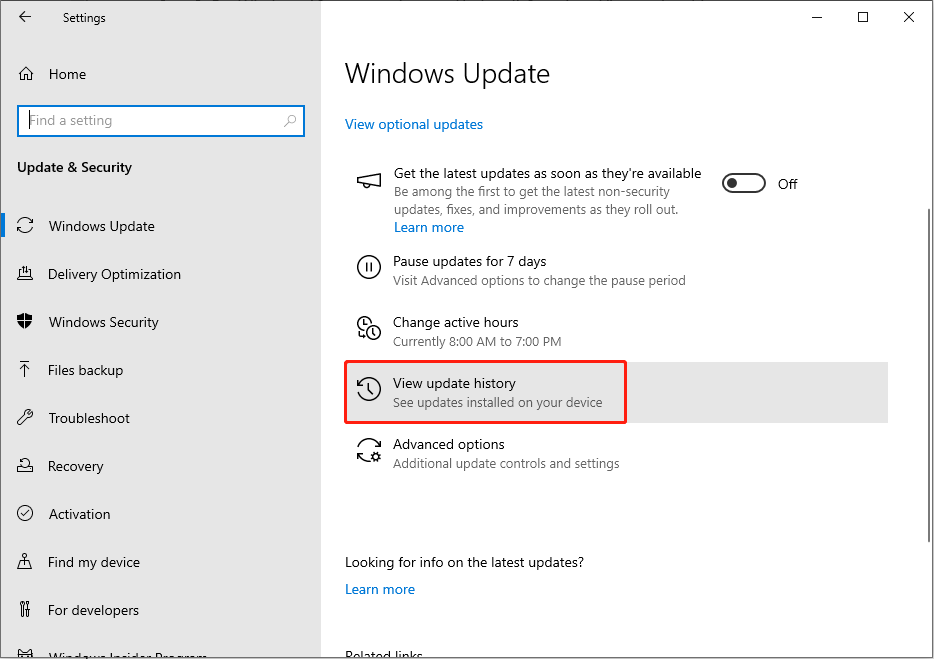
For Windows 11 users, head to Windows Update > Update history > Uninstall updates. Then, you will go to the Control Panel to uninstall an update.
How to Recover Lost Files After Windows Updates
Some people discover that their files are lost after they update Windows. This is also a problem that comes with Windows updates. Don’t worry, this part introduces you to useful and free data recovery software, MiniTool Power Data Recovery, to restore lost files.
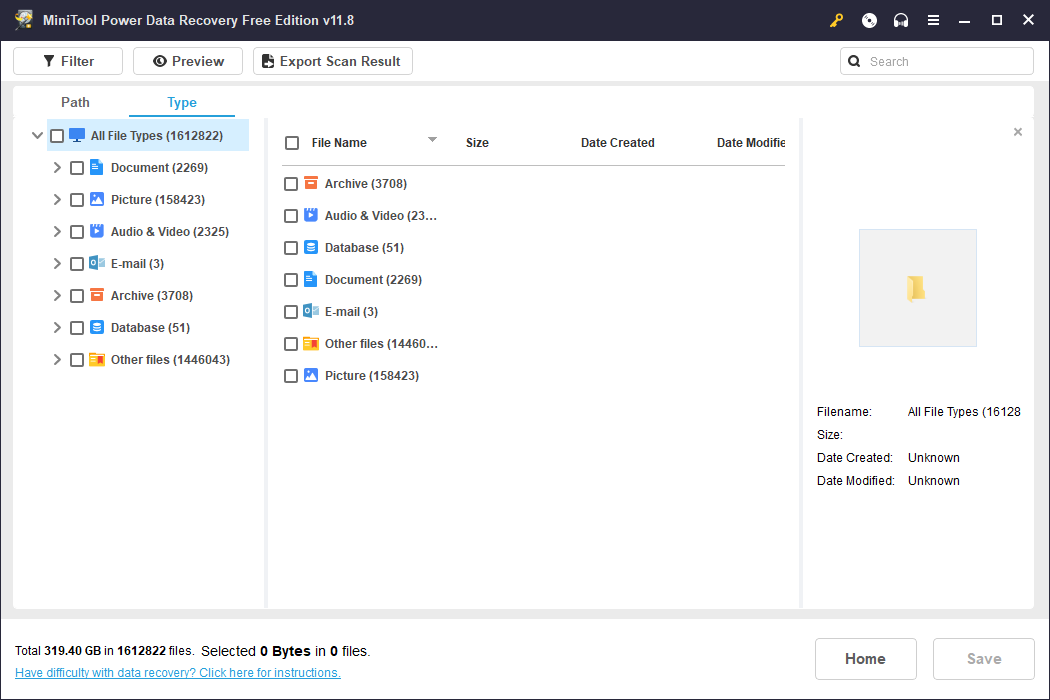
MiniTool Power Data Recovery is able to recover pictures, documents, videos, audio, databases, and other types of files. Furthermore, this file recovery software fits all Windows operating systems. You can run it without worrying about any compatibility issues. You can get MiniTool Power Data Recovery Free to scan the computer to find your files. This free edition only provides 1GB of free file recovery capacity. To get unlimited data recovery capacity, you can update to a premium edition.
MiniTool Power Data Recovery FreeClick to Download100%Clean & Safe
Bottom Line
After reading this post, you should know how to uninstall Windows updates using PowerShell. Compared with other methods, using PowerShell is easier. But for users who don’t use command lines frequently, this method might be a little difficult. You can choose one method that suits you.
