VirtualBox is one of the free hypervisors. However, when you use it on Mac, you may receive the “kernel driver not installed (rc=-1908)” error message. This post provided by MiniTool offers some solutions to the “VirtualBox kernel driver not installed” issue.
There are many free virtualization tools on the market and VirtualBox is one of them. However, you may meet some issues when using it such as pc can’t run Windows 11 on VirtualBox, VirtualBox no 64 bit, VirtualBox failed to attach USB, etc. Today, we talk about another issue on Mac – VirtualBox kernel driver not installed (rc=-1908).
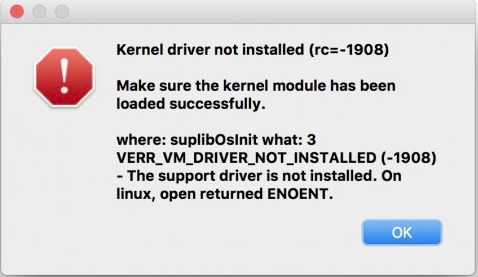
The error message here has nothing to do with the OS you’re trying to install on the virtual machine, but rather when you first install VirtualBox on your Mac. Then, let’s see how to get rid of the kernel driver not installed (rc=-1908) Mac error.
Solution 1: Allow Oracle Certificate
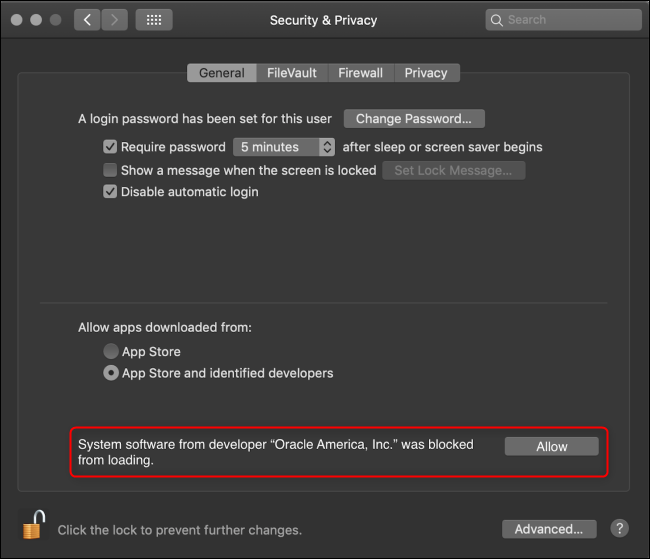
To fix the “VirtualBox kernel driver not installed” issue, the first method is through the System Preferences menu on your computer. Here is how to allow Oracle certificate through System Preferences.
Step 1: Click the Apple icon located on the top menu bar to open the System Preferences application. Then, select System Preferences.
Step 2: Next, click the Security and Privacy option. Then, you can see the System Software from developer “Oracle America, Inc.” was blocked from Loading message. You just need to click the Allow button.
Solution 2: Allow VirtualBox Kernel Extensions
Then, you can try to allow VirtualBox kernel extensions via Terminal to fix the “VirtualBox kernel driver not installed” issue. Follow the steps below:
Step 1: Click the Apple icon and choose Restart to restart your Mac.
Step 2: Press the Command and R keys together until you see the Apple logo on the screen.
Step 3: Click the Utilities drop-down menu and then choose Terminal.
Step 4: Type the following command and then press the Enter key:
spctl kext-consent add VB5E2TV963
Step 5: After that, restart your device again. Open Terminal again, and enter the following command:
sudo shutdown -r now
Solution 3: Disable Secure Boot on your Mac
If the above methods are not working, you can try to disable secure boot on your Mac to fix the “VirtualBox kernel driver not installed” issue. Follow the guide below:
Step 1: Go ahead and boot into the Recovery Mode.
Step 2: Then, click Utilities located on the top menu bar.
Step 3: From the drop-down menu, choose Startup Security Utility. On the Secure Boot prompt that appears, choose No Security.
Step 4: Restart your Mac.
Final Words
These are common fixes for “VirtualBox kernel driver not installed”. If you are bothered by this issue, try these troubleshooting tips and you can easily fix it.
About The Author

Position: Columnist
Having been an editor at MiniTool since graduating college as an English major, Daisy specializes in writing about data backups, disk cloning, and file syncing as well as general computer knowledge and issues. In her free time, Daisy enjoys running and going with friends to the amusement park.