You may install an extra RAM chip on your PC or replace the small RAM with a large one. What should you do to ensure optimal performance of RAM? MiniTool gives you a full guide, showing what to do after installing new RAM.
RAM, short for random-access memory, is an important part of a computer, typically used to store data of the Windows OS, programs, etc. so that the CPU can use them quickly. Generally speaking, the more RAM your PC uses, the faster the machine runs.
Sometimes you may consider installing a new RAM to your computer or replacing the small RAM with a big one when the PC runs slowly or you want to experience optimal gaming experience. For this thing, you can follow these posts:
- How to Upgrade or Replace The RAM On Your Computer
- How to Add RAM to a Laptop? See the Simple Guide Now!
Then, you may wonder if you need to do anything after that and what to do after installing new RAM.
Do You Need to Do Anything After Installing New RAM
RAM matters a lot for the overall performance of your PC. After installing or upgrading RAM, you need to take some measures to make sure that you get the most out of it and that it is running optimally. Sometimes you don’t install the RAM incorrectly, causing some issues. In this case, you also need to check the RAM and ensure it is recognized and works properly.
Next, let’s explore what to do after upgrading RAM.
What to Do After Installing New RAM
Verify the RAM Installation
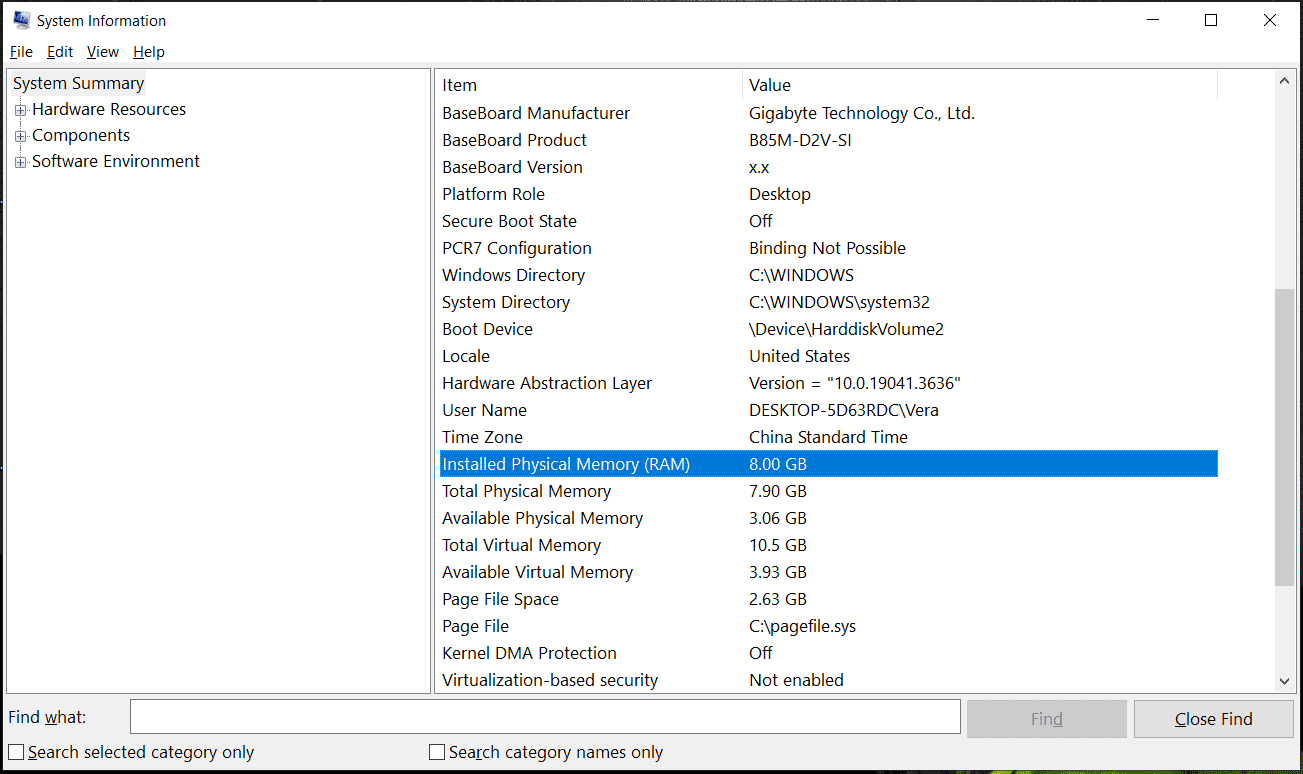
It is crucial to verify if your RAM has been installed correctly. To do this:
Step 1: Press Win + R to open the Run window.
Step 2: Type msinfo32 and click OK.
Step 3: Check the installed physical memory and see if the RAM amount is correct.

Test the New RAM
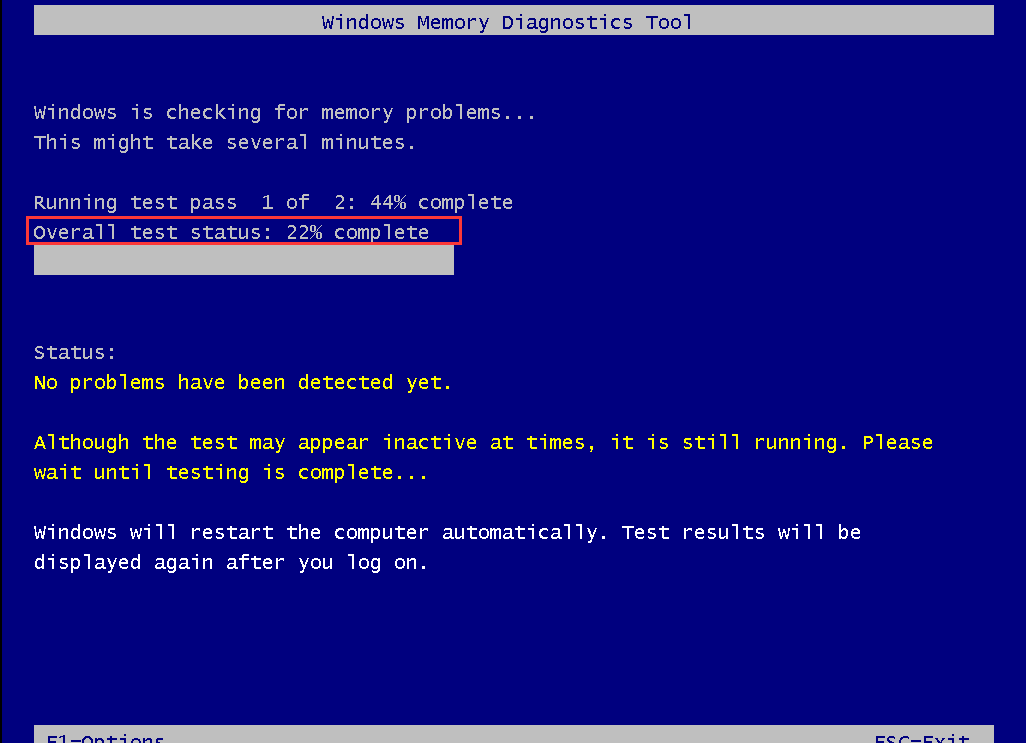
What to do after installing more RAM? You should also test the new RAM to make sure it works properly and doesn’t cause any crashes or errors. For this purpose, you can run a program like Windows Memory Diagnostic.
Just type mdsched into the search box and run this tool, tap on the first option to check for problems at once, and then this tool starts performing a RAM test.

Update Windows
It is important to make sure the Windows operating system is up-to-date, which can ensure compatibility with the new RAM. To update Windows 11/10, go to Settings > Update & Security (only in Windows 10) > Windows Update, check for available updates, and then start downloading & installing them on your PC.
MiniTool ShadowMaker TrialClick to Download100%Clean & Safe
Optimize the RAM Usage
What to do after installing new RAM? Besides the above ways, you should also take action to make the best of the system’s memory.
You can go to Task Manager to check what processes are using the most memory and disable them to free up some RAM. Or uninstall any unnecessary background apps, services, and startup items. Or run a professional PC optimizer like MiniTool System Booster to speed up your RAM.
MiniTool System Booster TrialClick to Download100%Clean & Safe
For more details, refer to this guide – How to Speed up Your RAM on Windows 11/10? 8 Tips Are Here.
Bottom Line
What to do when installing new RAM? When reading here, you have a clear understanding. Follow the given guide, and take action. Then, you can enjoy your new RAM on the PC.