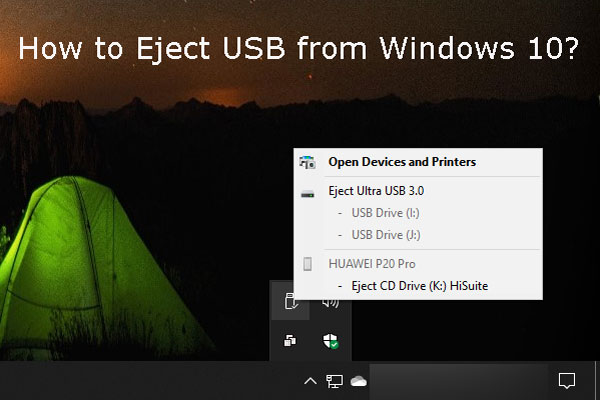
To control the interaction between the system and external storage devices, Windows offers two policies for you – Quick removal and Better performance. In this post on MiniTool Website, we will show you what Windows 10 Quick removal is and how to enable this feature in three ways.
Usually, if you need to unplug your USB flash drive, you need to use the eject option or the safely remove option. Some of you find it troublesome to use the two options when trying to remove your USB flash drive from computer every time.
What Is Quick Removal?
Windows provides you with two types of hard drive removal policies – Quick removal and Better performance. In the earlier version of Windows, the default policy was Better performance. Since the release of Windows 10 version 1809, the default policy has changed to Quick removal.
The reason why you need to choose the eject option or safely remove option is that the write caching is on. Although write caching is capable of speeding up the USB disk writes, with this process enabled, your USB device still caches some part of the data to complete at a later time even if you stop the data transfer. Luckily, Windows 10 quick removal can disable write caching for USB drives so you will not need to use the eject option.
In other words, Windows 10 Quick removal allows you to remove hard drive safely and quickly by keeping Windows from continuously trying to write to the flash drive plugged into the system. At the same time, the limitation of Windows 10 Quick removal is pretty evident. If you enable Quick remove, Windows cannot cache disk write operations hence degrading system performance.
If you disconnect or remove the device without following the safe removal instructions, you are very likely to encounter data loss. Therefore, to secure your data, you had better back up your data in advance with the free backup software – MiniTool ShadowMaker.
MiniTool ShadowMaker TrialClick to Download100%Clean & Safe
How to Enable Quick Removal on Computer?
After having a basic understanding of Quick removal, now, let me show you how to enable this hard drive removal policy on your computer. You can enable it via File Explorer, Disk Management or Device Manager.
# Way 1: via File Explorer
Step 1. Press Win + E altogether to open File Explorer.
Step 2. Go to This PC > find your USB flash drive > right-click on it to choose Properties.
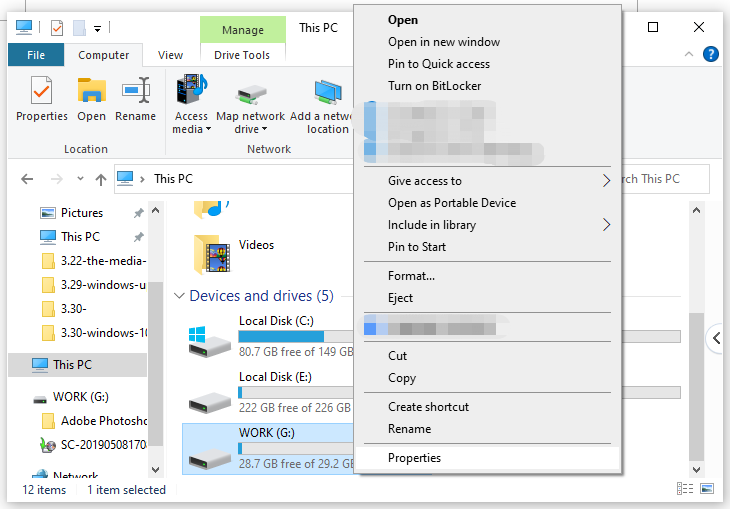
Step 3. Under the Hardware tab, choose your target drive and hit Properties.
Step 4. In General, click on Change settings.
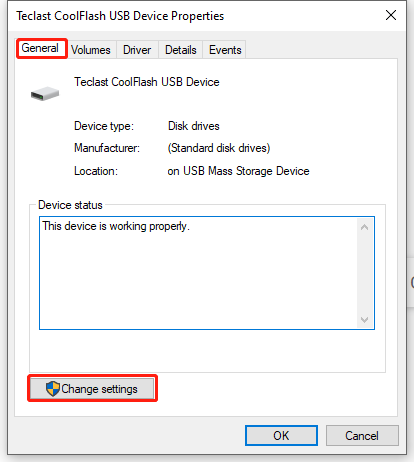
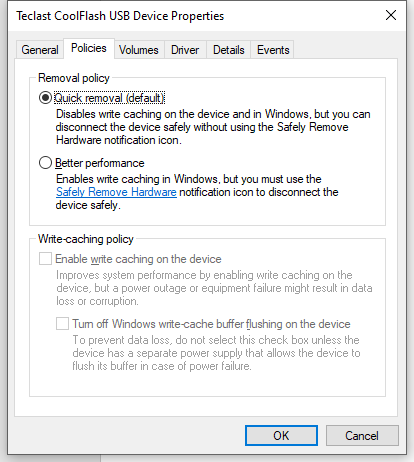
Step 5. Under the Policies tab, tick Quick removal (default) and hit OK to save the changes.
# Way 2: via Disk Management
Step 1. Right-click on the Start icon to choose Disk Management in the context menu.
Step 2. Find your USB flash disk and right-click on it to choose Properties.
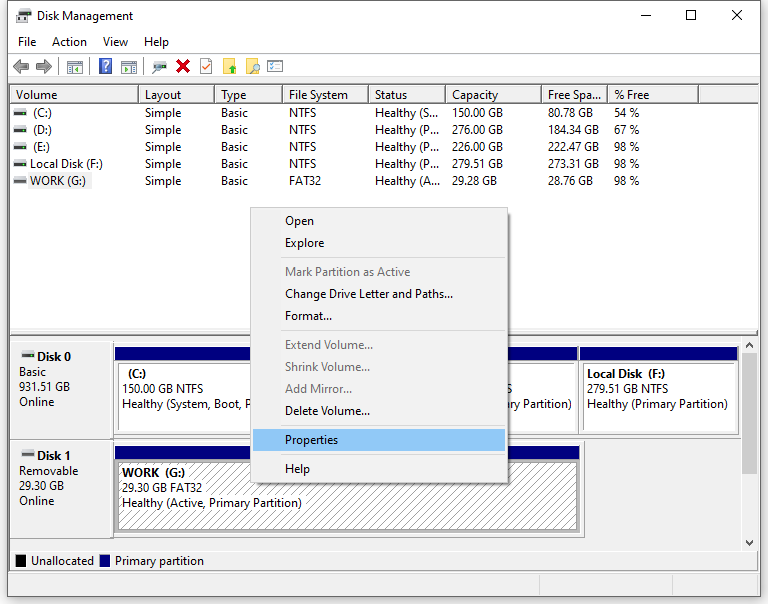
Step 3. In Hardware, choose your target drive and hit Properties.
Step 4. Under the Policies tab, tick Quick removal (default) and hit OK.
# Way 3: via Device Manager
Step 1. Press Win + S to evoke the search bar.
Step 2. Type device manager and hit Enter.
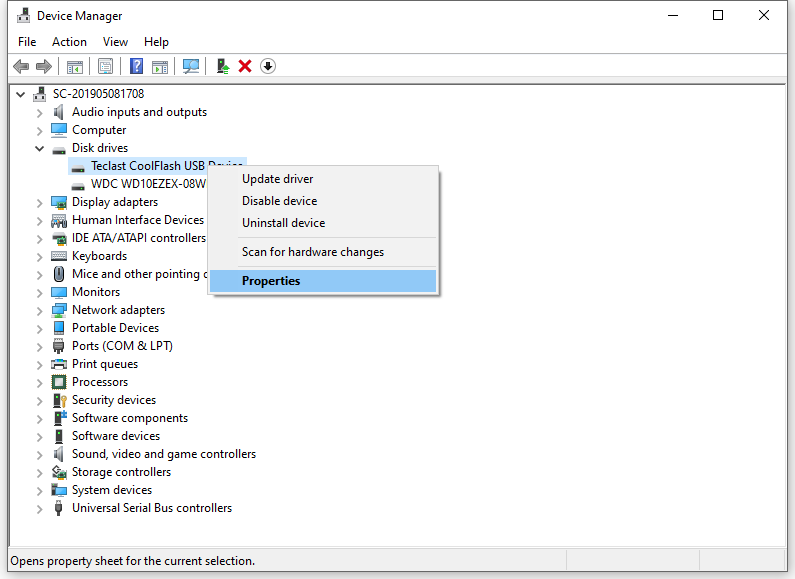
Step 3. In Device Manager, expand Disk drives to find your hard disk and right-click on it to choose Properties.
Step 4. Under the Policies tab, tick Quick removal and hit OK to save the changes.
Wrapping Things up
In summary, Windows 10 Quick removal manages storage operations in a manner that keeps the device ready to remove at any time. Meanwhile, it is a good option to create a backup for your important files with MiniTool ShadowMaker in case some data is missing by accident.
