Some Windows users report that they encounter the “Windows Update may have automatically replaced AMD” issue when booting their PCs. This error is caused by the conflict between the AMD driver and the UWP (Universal Windows Platform) AMD graphics driver installed by Windows.
Tip: Since Windows updates may cause some issues or bugs, you had better back up your Windows in advance. When you encounter some issues after updating, you can restore your PC to the previous edition. To do that, MiniTool ShadowMaker, a professional PC backup program can satisfy your needs. It supports Windows 11, 10, 8,7, etc.
MiniTool ShadowMaker TrialClick to Download100%Clean & Safe
Then, we show you how to fix the “Windows Update may have automatically replaced your AMD graphics driver” issue.
Fix 1: Rollback the AMD Graphics Driver
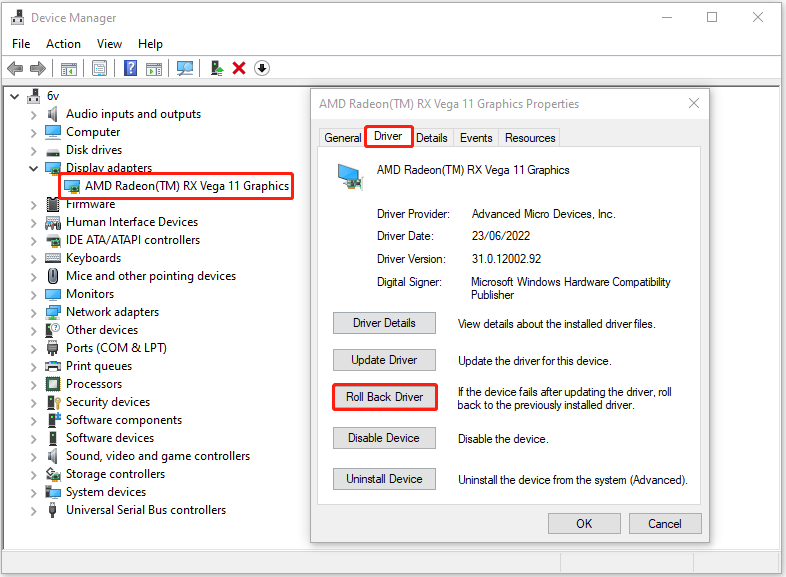
Since the “Windows Update may have automatically replaced AMD” issue can be caused by the wrong graphics driver, you can roll back your AMD graphics driver to fix the issue. Here is how to do that:
Step 1: Search for Device Manager in the search bar and open it.
Step 2: Right-click the AMD driver and choose Properties.
Step 3: Click the Roll Back Driver option under the Driver tab and follow the on-screen instructions to switch to the previously installed driver.
Restart your computer and check to see if the issue has been fixed.
Fix 2: Perform a System Restore
You can also perform a system restore to fix the issue. You need to notice that only if you have created a system restore point, you can try this method. Follow the guide below to do that.
Step 1: In the start menu, search for create a recovery drive and open it. This will lead you to the system protection tab in the system properties.
Step 2: Then, click system restore. Now select the restore point to which you want to restore your system.
Step 3: Click the Scan for affected programs button.
Step 4: Then, click Next to continue with system restore. Once done, click Finish, and then close the window.
Fix 3: Prevent Automatic Updates for AMD Driver
The third solution for you is to prevent the automatic updates for AMD driver. Here is how to do that:
Step 1: Press the Windows + R keys together to open the Run dialogue box. Then, type gpedit.msc and press the Enter key to open Local Group Policy.
Step 2: Go to the following path:
Computer Configuration > Administrative Templates > Windows Components > Windows Update
Step 3: On the right panel, find the Do not include drivers with Windows Updates item.
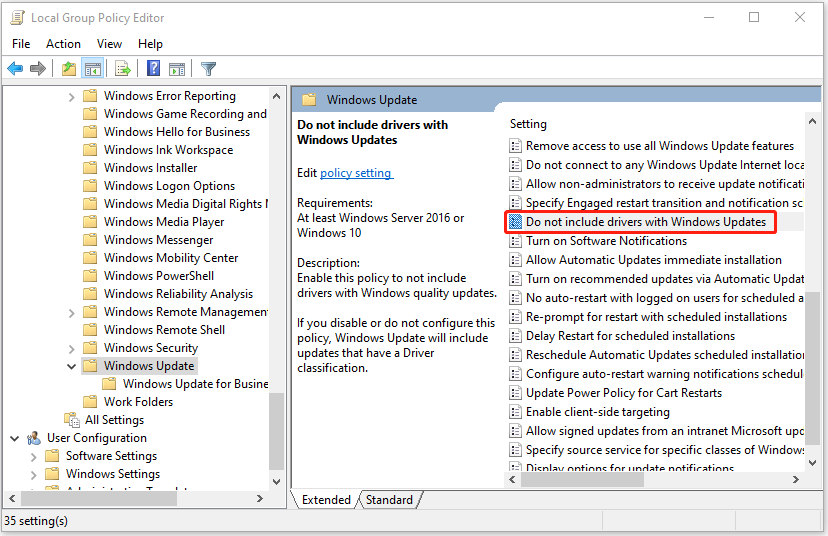
Step 4: Double-click it to select the Enabled option. Then, click Apply > OK.
Fix 4: Via Registry Editor
If the above solutions are not working, you can try to fix it via Group Policy.
Step 1: Press the Windows + R keys together to open the Run dialogue box. Then, type regedit and press the Enter key to open Registry Editor.
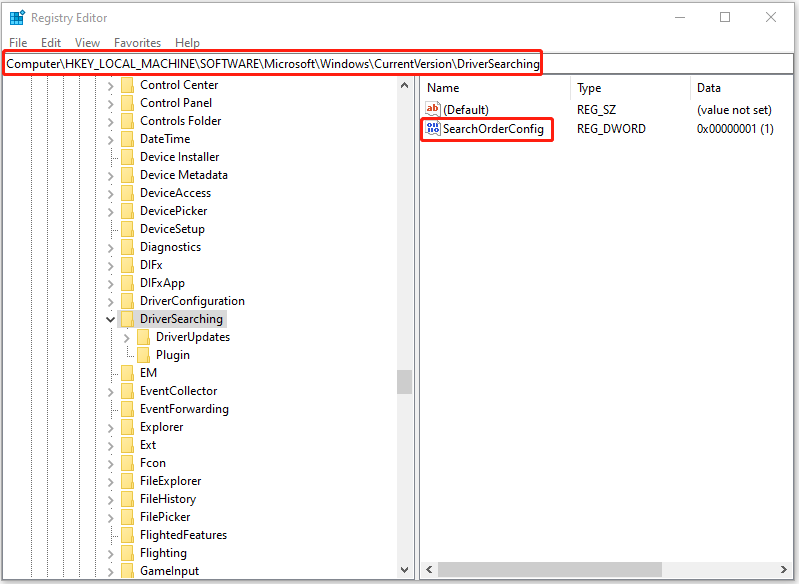
Step 2: Go to the following path:
HKEY_LOCAL_MACHINE\SOFTWARE\Microsoft\Windows\CurrentVersion\DriverSearching
Step 3: Double-click the SearchOrderConfig key. Change the value from 1 to 0 and click OK.
Final Words
To sum up, to fix the “Windows Update may have automatically replaced AMD” issue, this post has shown 4 solutions. If you come across the same error, try these solutions. If you have any better solution to fix it, you can share it in the comment zone.
About The Author

Position: Columnist
Having been an editor at MiniTool since graduating college as an English major, Daisy specializes in writing about data backups, disk cloning, and file syncing as well as general computer knowledge and issues. In her free time, Daisy enjoys running and going with friends to the amusement park.