XPPen is a professional and reliable supplier that produces pen display monitors, stylus pens, graphics tablets, and more digital graphical products. With XPPen products, you can easily finish many things – comics and illustration, animation and gaming, graphic design, & image and video editing.
To use XPPen, you need to connect your tablet or drawing display to your computer using a cable. Then, a corresponding XP-Pen driver is required to let this product work properly. But sometimes the driver is outdated, leading to XPPen not working as expected. So, go to update or download & install the driver.
Next, let’s see how to do this thing in two ways to let your device restore to the normal state.
Option 1: XP-Pen Driver Download & Install
How to install XP-Pen drivers? To manually download a XP-Pen driver and install it for your PC, follow these steps:
Step 1: Open a web browser and access this official website – https://www.xp-pen.com/download.
Step 2: Search for the corresponding driver according to the model of the product you purchased.
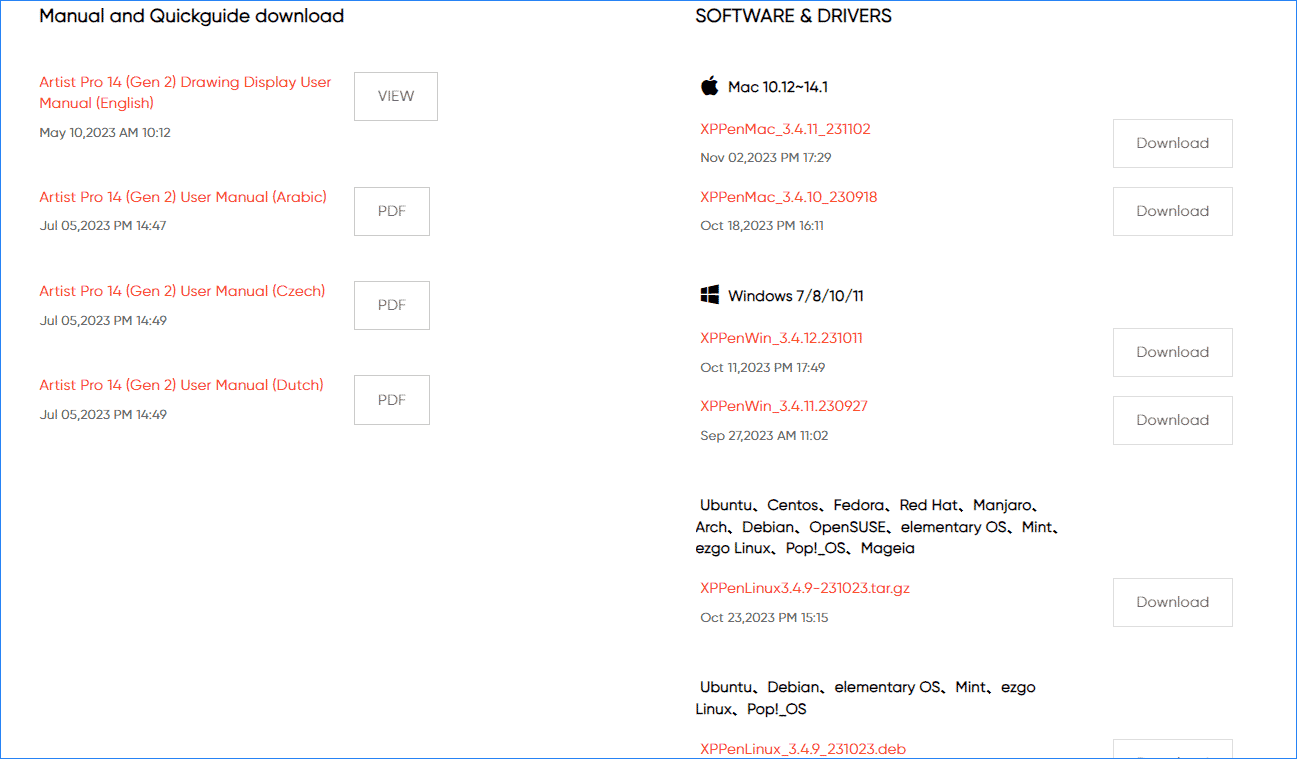
Step 3: From the SOFTWARE & DRIVERS section, download the setup file of the XP-Pen driver for your operating system. In the screenshot, you can see the manufacturer offers all kinds of XP-Pen drivers for different platforms, including macOS, Windows 1/8/10/11, and some Linux systems. Here, we download the driver for a Windows PC.
Step 4: After getting the XP-Pen driver download file, double-click on the .exe file and follow the instructions on the screen to finish the installation. Next, restart your PC and the XP-Pen tablet/display should function properly.
Option 2: Update XP-Pen Driver via Device Manager
In addition, you can perform a driver update via Device Manager in Windows 11/10. See how to do this:
Step 1: Press Win + X to choose Device Manager.
Step 2: Locate the XP-Pen device from Human Interface Devices, right-click on the device and choose Update Driver.
Step 3: Tap on the first section to let Windows automatically search for the available driver and install it.
How to Fix XP-Pen Not Working Windows 11/10
From the above parts, you know how to download XP-Pen driver & install it or update the XP-Pen tablet driver for a Windows PC so that you can solve the XP-Pen not working issue caused by outdated drivers. If the device stops working due to other reasons like hardware issues, improper configuration, Windows Ink Workspace, etc., how to fix it? See some common fixes.
Disable Sleep Mode
Sometimes your XP-Pen stops working when trying to use the device straight from Sleep Mode. So, try to disable Sleep Mode:
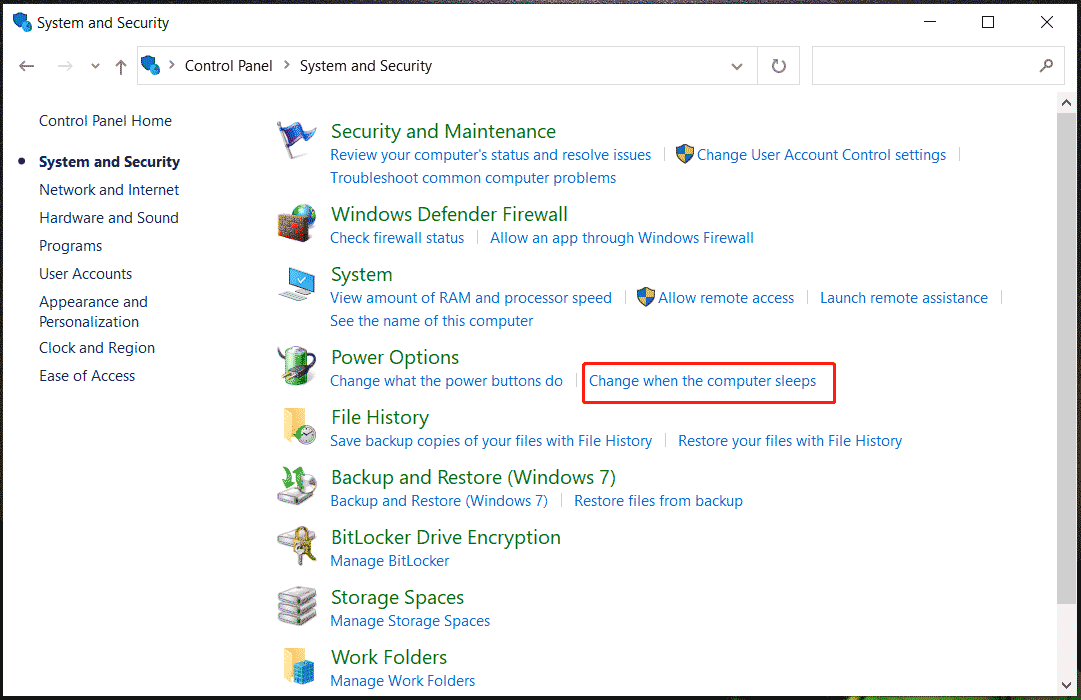
Step 1: Go to Control Panel > System and Security.
Step 2: Tap on Change when the computer sleeps from the Power Options section.
Step 3: Select Never for Put the computer to sleep under both On battery and Plugged in.
Disable Windows Ink Workspace
Windows Ink Workspace can help to improve the user experience when using digital drawing devices but sometimes it can cause lags and glitches. If XP-Pen is not working, you can try to disable this feature. This guide – What is Windows Ink Workspace and How to Disable It can help you.
MiniTool ShadowMaker TrialClick to Download100%Clean & Safe
Troubleshoot the Device
Make sure you correctly connect the XP-Pen tablet or display to the PC. You can reconnect it.
Besides, make sure the chargeable stylus is sufficiently charged.
Verdict
Now you know how to fix XP-Pen not working in Windows 11/10 via some fixes, especially how to install XP-Pen drivers for your PC if the issue is triggered by the outdated drivers. If you have any idea about the XP-Pen tablet driver download/update, contact us via the support team.
About The Author

Position: Columnist
Vera is an editor of the MiniTool Team since 2016 who has more than 7 years’ writing experiences in the field of technical articles. Her articles mainly focus on disk & partition management, PC data recovery, video conversion, as well as PC backup & restore, helping users to solve some errors and issues when using their computers. In her spare times, she likes shopping, playing games and reading some articles.