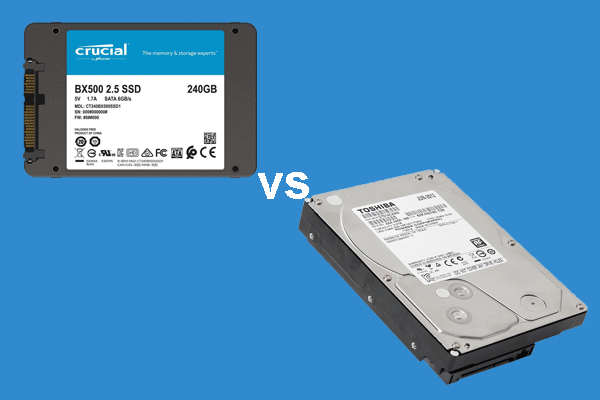
Sometimes, you may need to add a hard drive to your computer to get more space or faster speed. This post from MiniTool offers you a complete guide on how to install a hard drive (SATA and M.2) to a laptop or desktop PC.
A hard drive is the hardware component that stores all of your digital content, including documents, pictures, music, videos, programs, operating systems, and so on. Hard drives can be external or internal. Internal hard drives are usually classified into HDDs (Hard Disk Drive) and SSDs (Solid State Drive).
You may need to install a new hard drive on your PC for the following reasons:
- You are building your PC by yourself.
- You need to replace the old hard drive for larger storage or faster speed.
- You add a second hard drive to your PC to expand the storage.
In these cases, you need to know how to install a hard drive. In this post, I will show you how to add a hard drive to a PC from scratch.
How to Pick a Compatible Hard Drive for Your PC
Before installing a hard drive to a PC, you need to pick a compatible hard drive for your PC. Otherwise, the hard drive installation may fail. To choose a compatible hard drive, the key point is the form factor, which includes the hard drive port and size.
Only when the hard drive is compatible with your PC, can you then consider other factors like performance, price, brands, etc.
#1. Interface
Hard drives have various interfaces like IDE, SATA, M.2, etc. Nowadays, SATA and M.2 interfaces are the mainstream. When you pick a hard drive, you should make sure its interface is supported by your computer. Otherwise, the hard drive won’t install or work.
How to check what hard drive interface is supported by your computer? You can try the following 3 ways.
- Check the manual of the PC or the motherboard to see what hard drive ports it supports.
- If you don’t have the manual but know the specific model of the PC or motherboard (you can check the PC model and the motherboard model), you can search for the product page of the model online to see what hard drive ports it supports.
- For computer experts, you can also disassemble the computer and look directly at the hard drive sockets on the motherboard to know what hard drive it supports.
Here, I will show you pictures of the SATA and M.2 sockets to help you identify them easily.
SATA Socket
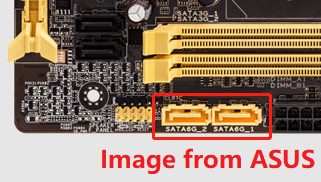
The SATA socket on the desktop motherboard looks like “L”. In addition, most motherboards will have the word “SATA” printed near the SATA socket. You can identify it easily.
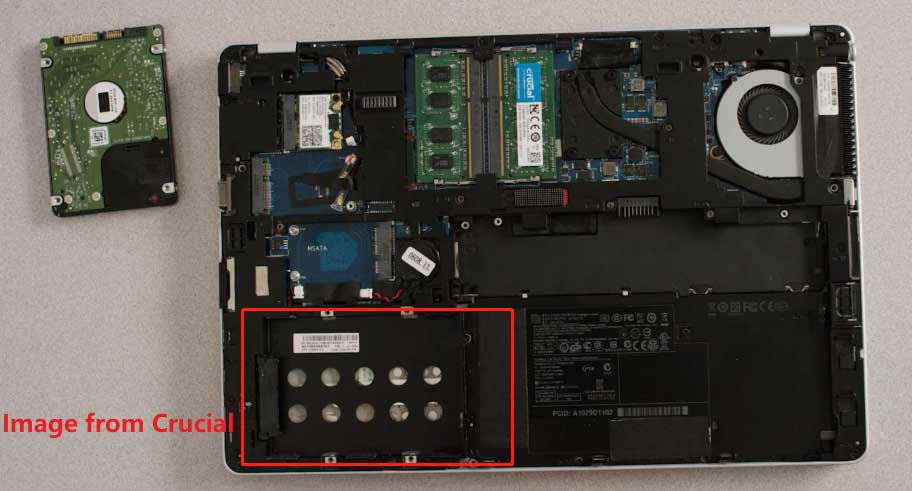
On the other hand, the SATA socket on the laptops is different from that on the desktop motherboards because its SATA socket and power socket are adjacent. You can insert the SATA hard drive into a laptop directly, without cables. The SATA hard drive interface is shown in the following picture:
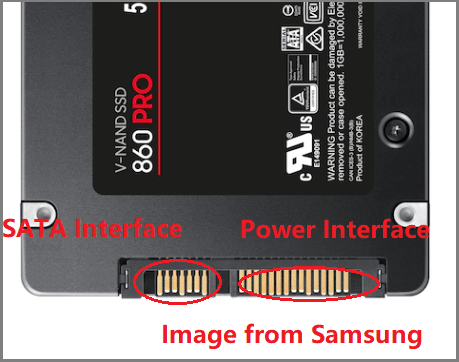
In addition, to accommodate the SATA hard drive, the hard drive bay will be a little large. You can identify it easily.
M.2 Socket
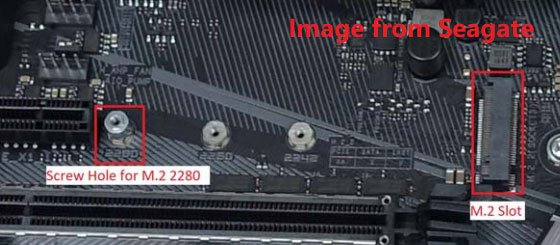
Whether on a laptop or a desktop computer, the M.2 slot looks the same. Most M.2 slots are M key and some are B+M key. To know more about them, you can read this post.
#2. Size
In most cases, an M.2 hard drive is an M.2 SSD. Its common size should be 2230, 2242, 2260, or 2280. Among them, 2280 is the most common one and it means 22 mm in width and 80 mm in length.
A SATA hard drive could be either a SATA HDD or a SATA SSD. All SATA SSDs are 2.5-inch. As for SATA HDDs, they could be either 2.5-inch or 3.5-inch. In most cases, 3.5-inch HDDs could be usually faster than 2.5-inch HDDs.
In addition, 2.5-inch SATA hard drives can be installed on both laptops and desktop PCs while 3.5-inch SATA hard drives can only be installed on desktop PCs.
How to Install a New Hard Drive in a Laptop
In this part, I will show you how to install a hard drive (SATA and M.2) to your laptop. If you plan to replace the old hard drive with the new one, you may need to clone the hard drive or clone Windows 10 to SSD/HDD first because laptops usually have only one hard drive slot.
To do the disk cloning or OS migration, I suggest you use MiniTool Partition Wizard. The process is as follows:
MiniTool Partition Wizard DemoClick to Download100%Clean & Safe
- Connect the new hard drive to your computer via a USB to SATA or M.2 adapter.
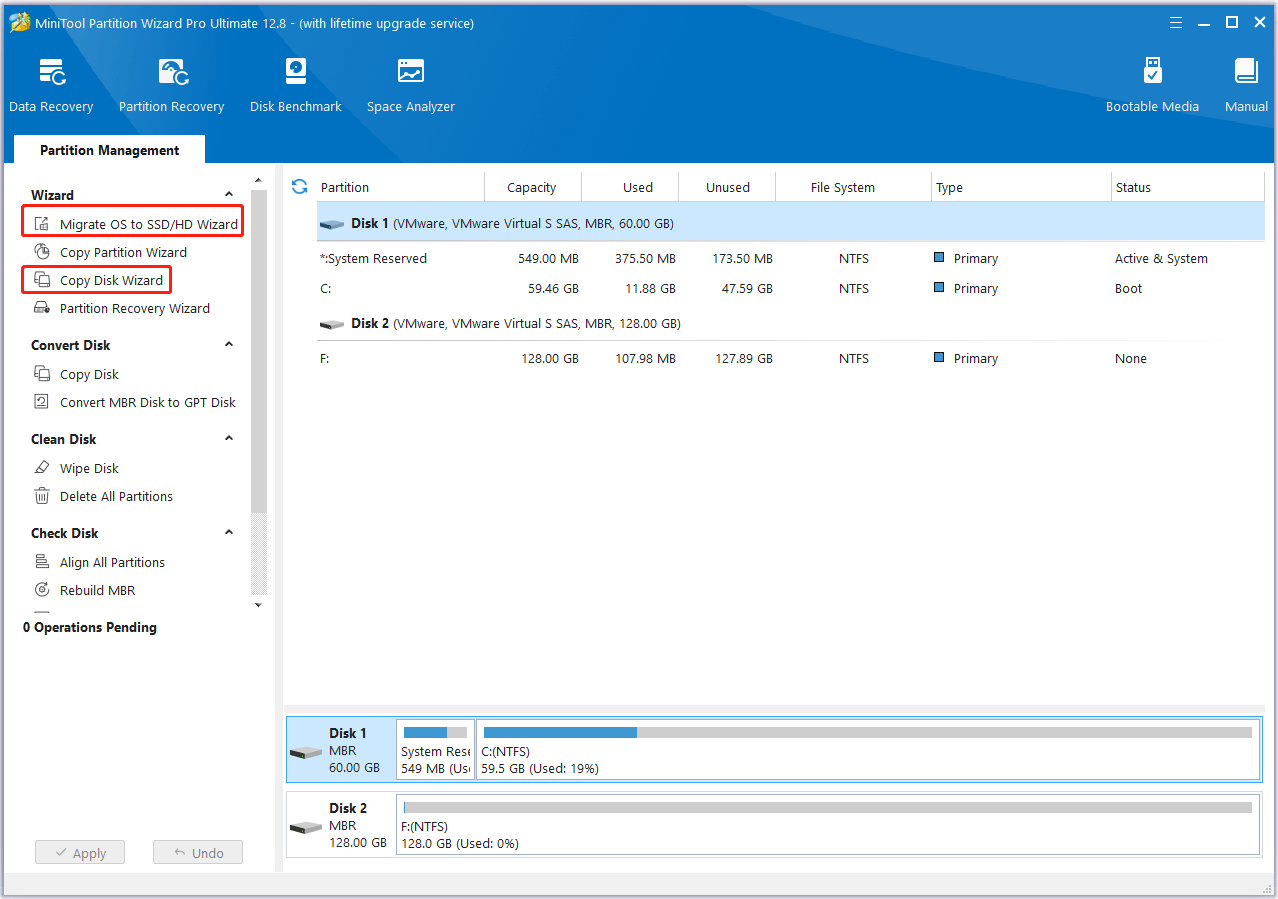
- Launch MiniTool Partition Wizard on your computer and click the Migrate OS to SSD/HD Wizard or Copy Disk Wizard feature in the left panel. Then, follow the wizard to migrate the OS to clone the disk to the new hard drive.
How to Install a SATA Hard Drive to a Laptop
How to add SSD to PC? Laptop users usually ask this question. This guide shows how to install a 2.5-inch SATA SSD or HDD to a laptop.
Step 1: Disconnect your laptop from its charger and then turn off your laptop. Shut your laptop’s lid, and then flip it over so that the bottom of the laptop is facing up.
Step 2: Use a screwdriver to remove all screws on the bottom panel. Then, use a plastic pry tool to carefully go around the edges of where the bottom panel is attached to the keyboard and carefully pry it loose. If there are ribbons or cables attached to the motherboard from the bottom panel, remember their locations and then carefully remove them.
Step 3: After removing the bottom of the laptop, remove the battery if possible. Then, locate the SATA hard drive bay. If the hard drive bay is shielded by a special panel, you need to remove the panel using the screwdriver.
Step 4: If there exists an old hard drive, remove screws on it using the screwdriver, disconnect the hard drive cable if necessary, and then remove the hard drive cage from the SATA hard drive. If there is no old hard drive, remove the hard drive cage directly.
Step 5: Fasten the new SATA hard drive into the hard drive cage. Then, place the hard drive into the hard drive bay and fasten it. Connect the hard drive cables, place back the hard drive panel and battery, connect cables between the laptop bottom and the motherboard, and place back the bottom panel and fasten it.
How to Install an M.2 SSD to a Laptop
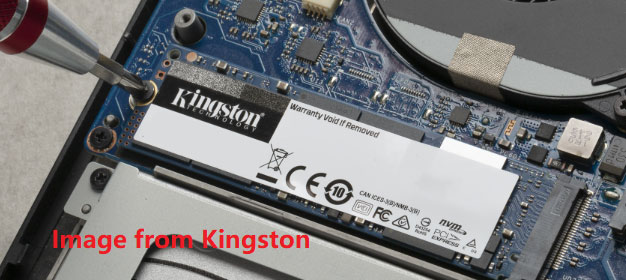
When it comes to how to add SSD to PC, M.2 SSDs cannot be ignored. Similarly, you need to remove the laptop bottom and then locate the M.2 hard drive bay. Then, you need to:
- Remove the panel or the heatsink on the M.2 hard drive bay if present.
- Remove the screw on the opposite end of the M.2 slot.
- Insert the M.2 SSD into the M.2 slot at a 30-degree angle.
- Press down on the other end of the SSD and screw it to the motherboard.
- Then, place back the M.2 SSD panel or heatsink, and everything you removed before.
How to Install a New Hard Drive to a Desktop
When it comes to how to add a hard drive to a PC, desktop PCs should not be ignored. In this part, I will show you how to install a SATA and M.2 hard drive to a desktop PC.
How to Install a SATA Hard Drive to a Desktop
How to add a drive to your computer? In this part, I will show you how to install a 2.5 or 3.5-inch SATA hard drive to a desktop PC. Here is the guide:
Step 1: Shut off and unplug your computer. Remove the side cover of the chassis. It may be fastened by screws.
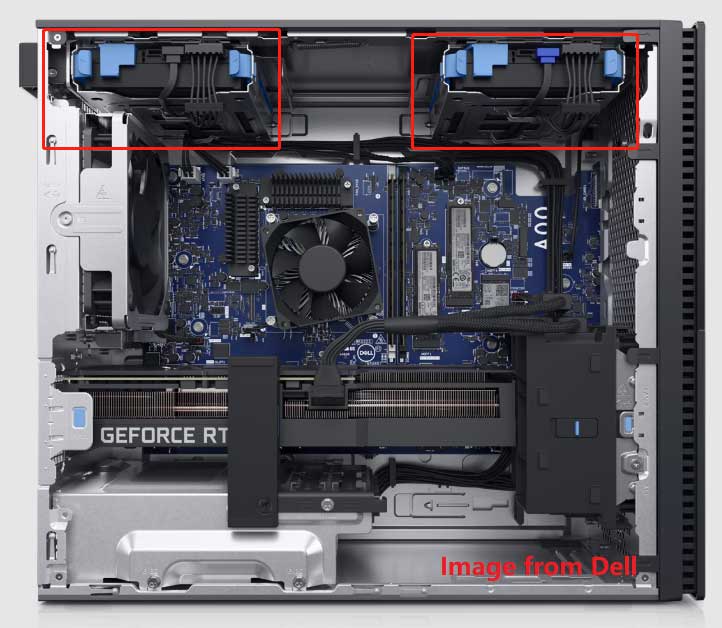
Step 2: After removing the panel, you can see the inside parts of the PC chassis. Then, you can locate the SATA hard drive bays or cages easily. They are usually located in the four corners of the chassis.
Step 3: If there exists an old SATA hard drive, you need to remove it first. To do that, you can refer to the following steps:
- Disconnect all cables from the SATA hard drive. If some cables prevent you from removing the hard drive, disconnect them.
- If the SATA hard drive is in a drive bay, remove the screws and then slide the hard drive out of the drive bay.
- If the SATA hard drive is in a metal or plastic drive cage, remove the cage first that may be fastened by screws, or pins and clips. Then, remove the screws that fasten the hard drive on the cage and pull the old hard drive out.
Step 4: Place the new SATA hard drive into the hard drive bay or cage and then fasten it using screws. If your computer uses the hard drive cage, place back it and fasten it. Note that if you are installing a 2.5-inch SATA hard drive, you may need to fasten the drive to the 2.5 to 3.5 hard drive adapter first and then install it into the drive bay or cage.
Step 5: Connect one end of the SATA cable to the drive, and the other end to an available SATA port on your motherboard. If you are connecting your primary hard drive, the SATA port on the motherboard should be SATA0 or SATA1. Then, connect the SATA power cable to the drive and the PSU.
Step 6: If you disconnected other cables before inside the PC chassis, reconnect them. Then, place back the side panel of the chassis and fasten it. Connect all cables of the PC.
How to Install an M.2 SSD to a Desktop
This is the last part about how to add a drive to your computer physically. However, the process of installing an M.2 SSD on a desktop is almost the same as that of installing an M.2 SSD on a laptop. The only difference is the way you disassemble the computer.
What to Do After Installing a Hard Drive?
After installing a hard drive, you should make sure it is detected by your PC. If not, you can read this post to get solutions: How to Fix Hard Drive Not Showing Up Without Data Loss.
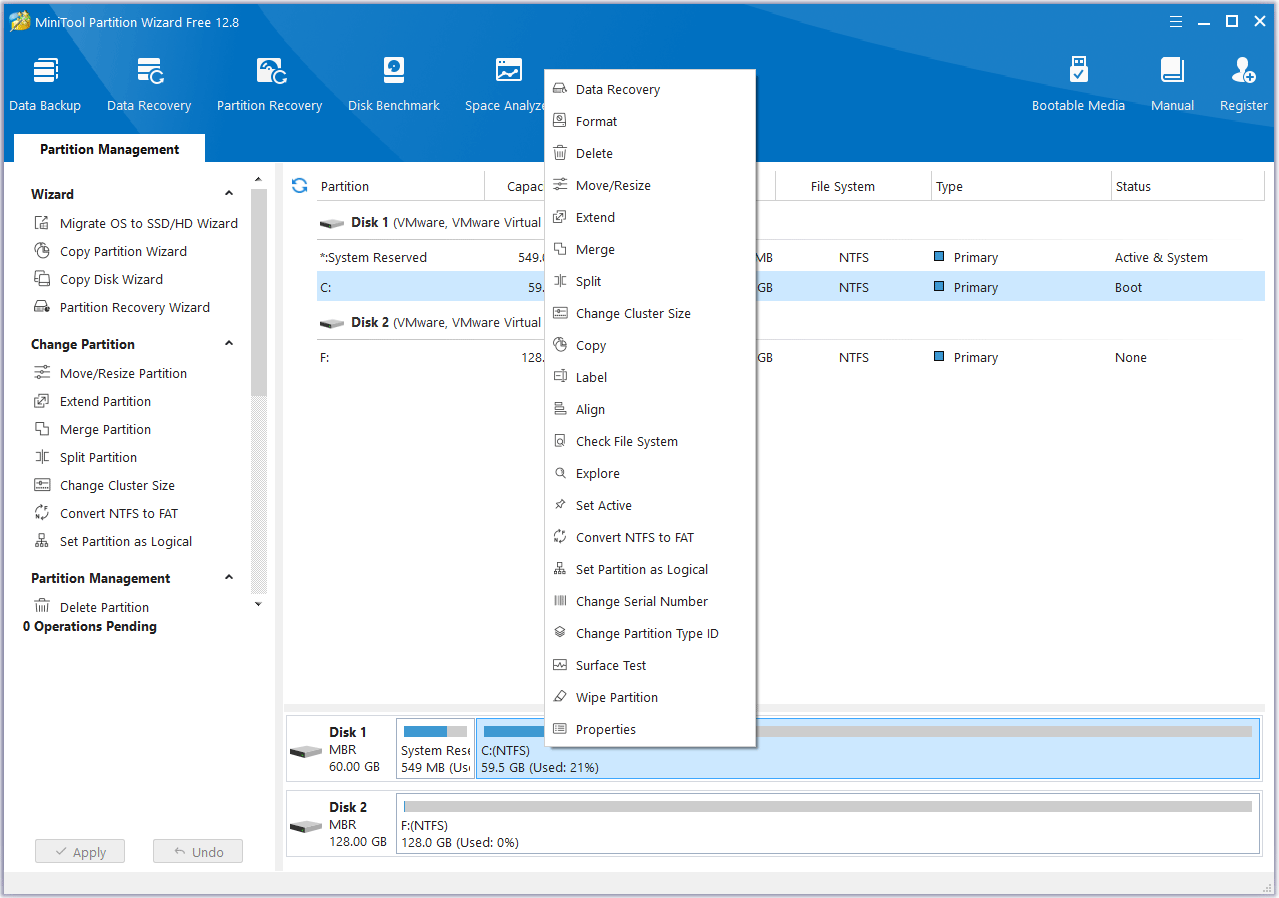
Then, you may need to repartition the hard drive for better use. For example, you may want to create new partitions or format, delete, move, resize, split, or merge the existing partitions. Then, you can try MiniTool Partition Wizard. It can help you do these jobs for free.
Besides, this software can also help you convert MBR to GPT, recover hard drive data, etc. It’s worth trying.
MiniTool Partition Wizard FreeClick to Download100%Clean & Safe
Bottom Line
This post shows you how to install a hard drive to a laptop or desktop. When you do that, you may need to clone the disk or repartition the hard drive. Then, you can try MiniTool Partition Wizard.
If you encounter issues when using this software, contact us via [email protected]. We will get back to you as soon as possible.
