If you are a PC gamer, you must have herd of Origin. Origin is a digital distribution platform developed by Electronic Arts. You can purchase and play lots of popular video games on the platform.
The software client of the platform can be used for personal computers and mobile platforms. And many PC gamers have installed the Origin client on their PC and play games on it. However, with more and more games downloaded and installed on their hard drive, they are gradually running out of disk space.

Then, spontaneously, they come up with such a question: how to move Origin games to another drive? Of course, you can’t just simply copy and paste the game to another drive. But, is there a simple way to move Origin games to another drive?
Well, to move the games that they downloaded through Origin to another drive on the computer is not a difficult thing. If you don’t know how to move origin games when you’re out of storage space, here are two solutions for you. You may try the following solutions according to your situation.
How to Move Origin Games to Another Drive
The Origin client allows you to change game library location. You can create a new game library folder on another drive and then move Origin games to the new location. If you don’t know how to move Origin games with the Origin client, you can follow the steps below:
Way 1. Move Origin Games with the Origin Client
You can follow the steps below to move Origin games to another drive without the need to re-install or re-download all you game files.
Step 1. Launch Origin client on your desktop and then click the Origin button on the top toolbar.
Step 2. Under Origin, select Application Settings from the list of options.
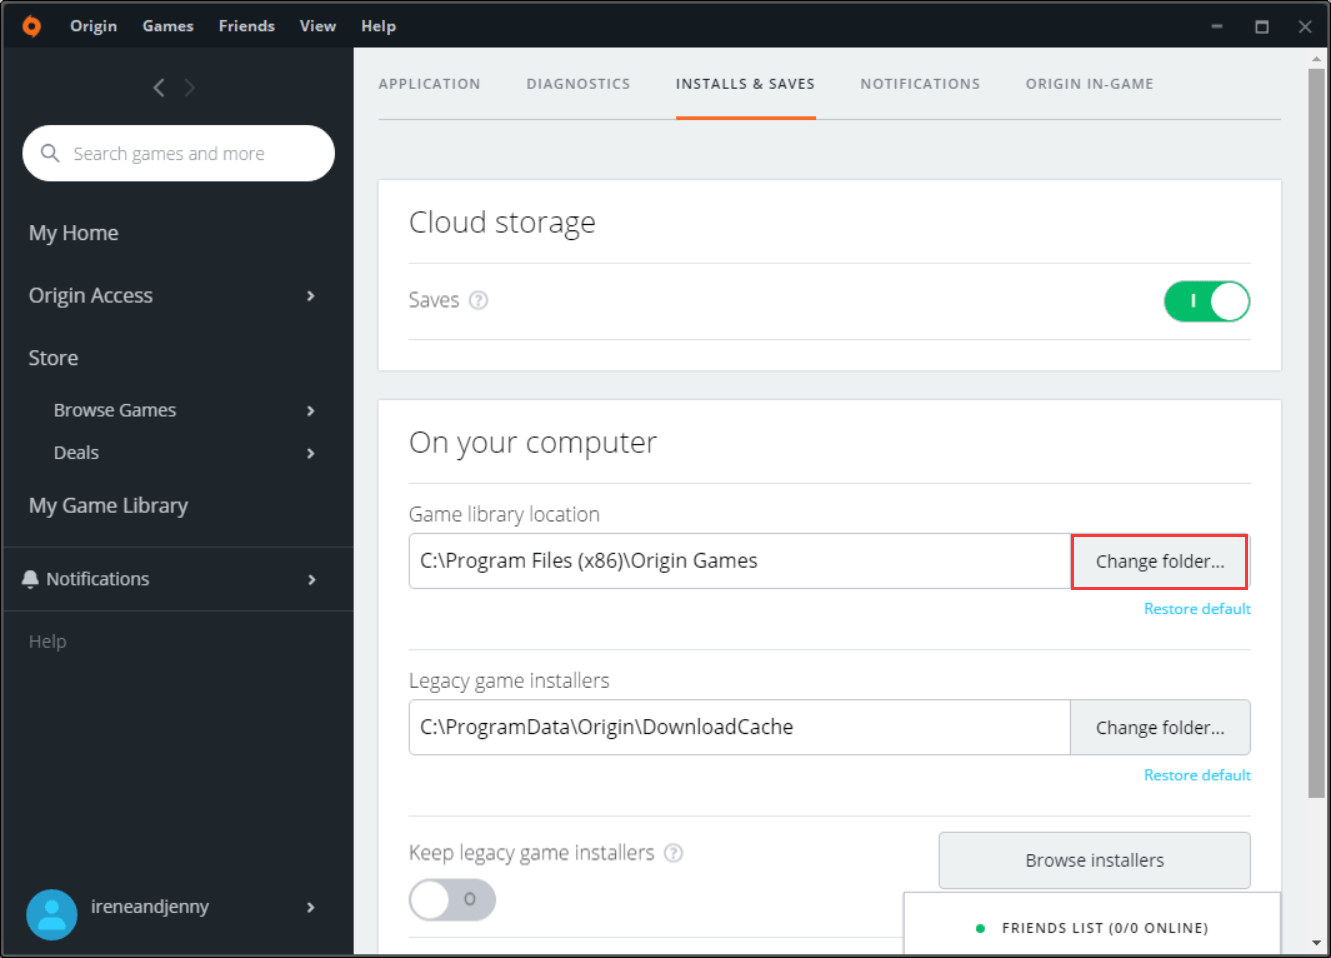
Step 3. Click on the Installs & Saves option. Under Game Library Location, you can click on the Change folder option to select a new location.
Step 4. Navigate to the hard drive or solid-state drive to which you want to move your Origin games.
Step 5. Right-click the empty space on the drive, select New and then Folder. Name the new folder as Origin Games and hit Enter.
Step 6. Close the Origin client completely.
Step 7. Navigate to the previously selected Origin game installation folder. The default location could be C:\Program Files (x86)\Origin Games. Right click on the folder of the game that you want to move, and then select Cut from the menu.
Step 8. Navigate to the newly selected Origin game library folder. Right-click on the empty space inside the folder and then select Paste. Wait for a few seconds and then the game will be copied to the new location.
Step 9. Once the copying process finishes, click the Origin client and then choose My Game Library. Click on the game that you want to move to the newly created game installation folder. Then click on the Download button.
The process will be completed very quickly. After moving Origin games to the new game library folder, you can also download and install more Origin games to the new location.
After knowing how to move Origin games to another drive, you can have a try. Of course, this is not the only way to move Origin games to another drive.
Here I will show you another method to move Origin games to another drive, which is also fast and simple. In this method, you’ll need to utilize a piece of third-party software to move the Origin games from one game library folder to another.
Way 2. Move Origin Games with Steam Mover
The third-party software Steam Mover can also help you move both Steam and Origin games (you may be interested in this post: 3 Methods to Help You Move Steam Games to Another Drive).
Steam Mover was originally designed to help gamers move their downloaded games from the Steam client to release some free space. Luckily, it can also be used to move Origin games to another drive. You can follow the steps below to move Origin games with Steam Mover.
Here are detailed steps.
Step 1. Follow Steps 1- 5 in the Way 1 to create a new Origin game library folder on another drive first.
Step 2. Download Steam Mover from the Internet and run the software on your computer. You don’t need to install anything. Just run it.
Step 3. On the left, select the folder where all your Origin games are stored. On the right, select the newly created game library folder where you’d like to move the game to.
Step 4. Select the game you’d like to move and click the blue arrow in the bottom left corner. Then a new command prompt window will open, which shows you the progress of the copy.
When it is finished, the game should be moved to the new location successfully. At last, you can now click the Origin client, and play your games with ease.
If you don’t know Origin how to move games to another drive, just try the above two methods.
Extend the Partition Where Origin Games Are Installed
Some users find that moving origin games to another drive is quite time-wasting. If you move Origin games to another drive just because of not enough disk space, actually, here is another way for you: extend the partition where Origin games are installed.
After having enough disk space to install Origin games on that partition, there is no need to move Origin games to another drive.
Well, how to extend the partition where Origin games are installed? You’ll need to utilize a free partition manager – MiniTool Partition Wizard Free Edition.
MiniTool Partition Wizard Free Edition is a reputable and reliable partition manager for Windows users. It can help you format partition, move/resize partition, extend partition, copy partition, migrate OS to SSD/HD, convert MBR disk to GPT disk, convert FAT32 to NTFS, measure disk performance, analyze disk space and so on.
If you need to extend partition with MiniTool Partition Wizard Free Edition, you can follow the steps below:
Here are the detailed steps:
Step 1. Download MiniTool Partition Wizard Free Edition by clicking the following button. Install it on your PC and launch it to get the main interface.
MiniTool Partition Wizard FreeClick to Download100%Clean & Safe
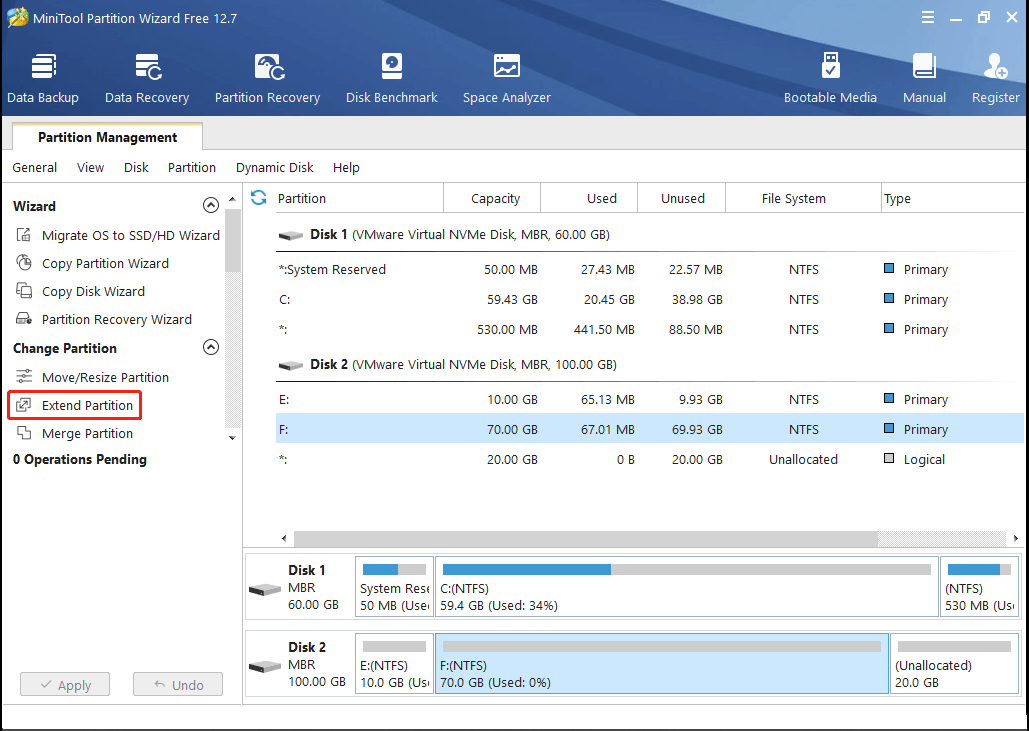
Step 2. On the main interface of MiniTool Partition Wizard, you can choose the partition where the Origin games are installed and then click Extend Partition from the left action panel.
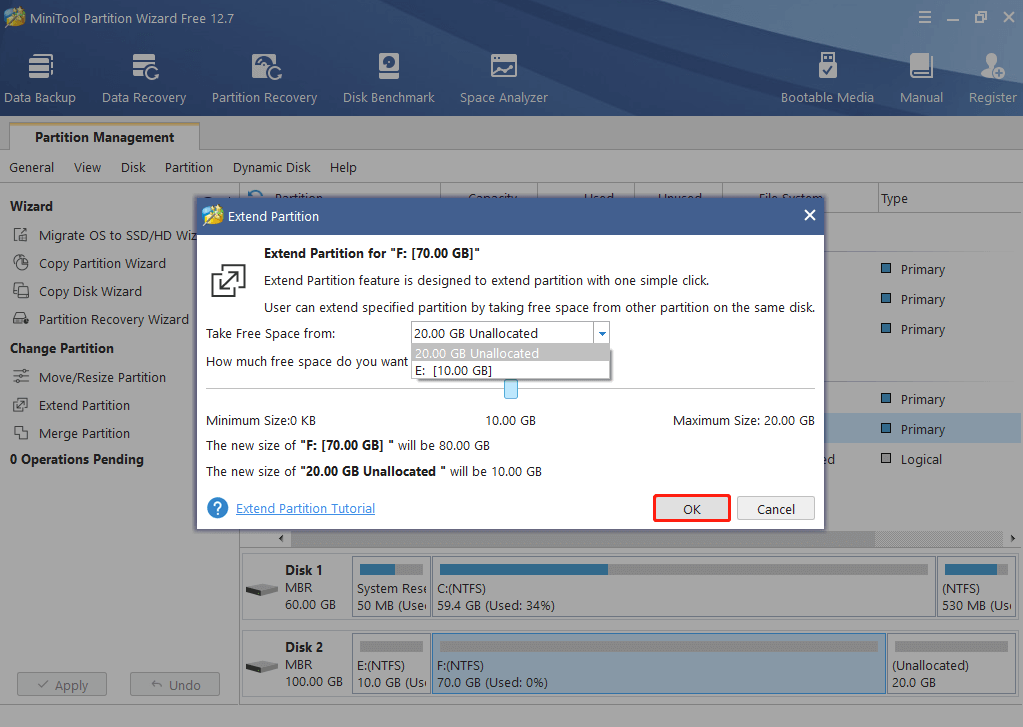
Step 3. Then click the drop-down menu and select a partition or unallocated space to take some free space from it. Then click OK to continue.
Step 4. At last, click Apply to allow the pending operations. After extending the partition, you can install more Origin games on the drive with ease.
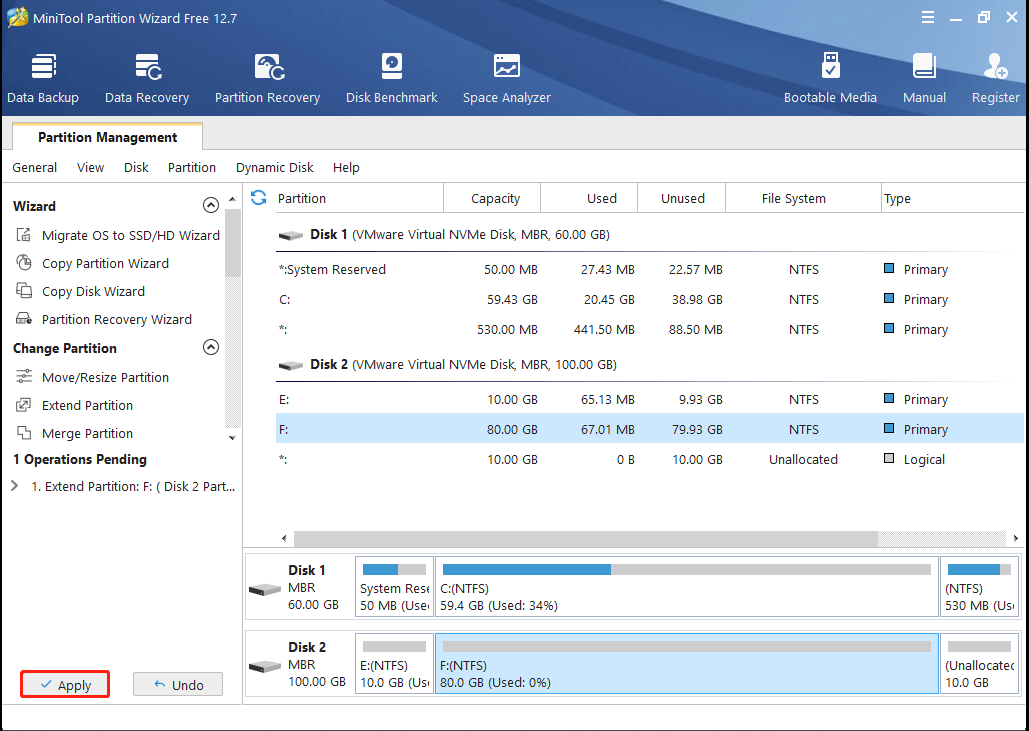
You see, it is very simple to extend partition with MiniTool Partition Wizard Free Edition. Do you want to extend the partition where Origin games are installed? Get MiniTool Partition Wizard and have a try now!
MiniTool Partition Wizard FreeClick to Download100%Clean & Safe
Bottom Line
After reading this post, now you should know how to move Origin games to another drive. Which method do you like to use to move Origin games? Have you successfully moved Origin games to another drive with the above steps? We are glad to have you share it with us.
If you have any question about how to move origin games to another hard drive or if you have other better solutions, you can leave a message in the following comment zone and we will reply as soon as possible. If you need any help when using MiniTool software, you may contact us via [email protected].
How to Move Origin Games to Another Drive FAQ
- Launch Origin client and then click the Origin button.
- Select Application Settings.
- Click on the Installs & Saves option. Then click on the Change folder option.
- Choose the destination drive to move Origin games and create a new folder on it and name it as Origin Games.
- Open the default Origin game folder C:\Program Files (x86)\Origin Games.
- Right click on the folder of the game that you want to move, and then cut and paste it to the newly created Origin game library folder.
- Launch Origin client and then choose My Game Library.
- Click on the games you moved and then click the Download button. (The game will not actually be downloaded.) When it is finished, the game has been removed to another drive completely.
