What causes the partition not showing up in Windows 11/10 issue? How to fix the error? Here, MiniTool offers you solutions to partition not showing up on Windows 10/11 in different cases. Use corresponding fixes according to your situation.
Reasons for Partition Not Showing up in Windows 11
As multiple factors can result in the “hard disk partition not showing up” issue, you may experience it like many other users too. Some possible reasons for the Windows 11 disk partition not showing up error are summarized as follows.
- The hard drive is old or incompatible with your PC.
- There is physical damage to the disk.
- There are bad sectors or corrupted files on the hard drive.
- The system is infected by viruses or malware.
- The partition is hidden.
- The partition is deleted/lost.
- The hard drive is not showing up or detected.
What can you do to fix the “Windows 11 disk partition not showing up” issue? Well, this post offers you solutions to it in 3 cases.
Case 1: Partition Not Showing up in Windows 11/10
Fix 1: Run Hardware and Devices Troubleshooter
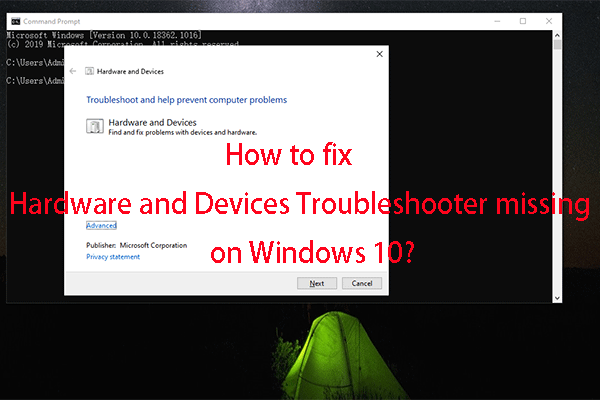
Hardware and Devices Troubleshooter is a tool on Windows that helps you fix hardware-related issues. After the hard disk partition not showing up issue occurs, you can run it to solve the issue. As the Troubleshooter is not available in Windows 10/11 Settings, you need to open it from other sources like Command Prompt and Run window.
Follow the steps below to run the Troubleshooter.
Step 1: Type cmd in the search box and then click Run as administrator under the Command Prompt App.

Step 2: In the prompted window, type msdt.exe -id DeviceDiagnostic and press the Enter key. This will open the Hardware and Devices troubleshooter. Alternatively, you can open it by typing msdt.exe -id DeviceDiagnostic in the Run window and hitting Enter.


Step 3: Run the troubleshooter by clicking the Next button in the elevated window. Finish the operation by following the on-screen instructions and then check if the Windows 11 disk partition not showing up issue is solved.

Fix 2: Unhide the Partition
If the partition is hidden, you won’t see it in File Explorer. Then the hard disk partition not showing up issue happens to you. To fix the issue, you should unhide it.
#1. Use MiniTool Partition Wizard
This software helps you hide and unhide partitions within a few clicks. You just need to download and install MiniTool Partition Wizard on your computer and then follow the given steps to unhide your partition.
MiniTool Partition Wizard FreeClick to Download100%Clean & Safe
Step 1: Double-click on its icon to launch this software.
Step 2: Right-click on the target partition and then click Unhide Partition in the pop-up menu.

Step 3: In the next window, click OK to save changes.
Step 4: Click Apply > Yes to execute the operation.

Top 7 SSD Optimizers for Windows to Get Optimal SSD Performance
Fix 3: Check Hard Drive for Bad Sectors
As mentioned earlier, bad sectors on the hard drive will lead to partition not showing up in Windows 11. Therefore, you’d better check that after the issue occurs. You can check hard drive for errors via either the CHKDSK command or third-party software.
If you encounter the CHKDSK not working issue, try MiniTool Partition Wizard instead. It enables you to find bad sectors and file system errors on your hard drive or partition. Here we show you how to find bad sectors through the program.
1. Run the software on your PC.
2. Right-click on the target hard drive and click Surface Test.

3. In the prompted window, click Start Now to begin the process.

4. After the scanning process ends, find if there are any red blocks in the scanning area. If you find them, it indicates that there are bad sectors on the hard drive. Then refer to this guide to get rid of them.
Fix 4: Perform Partition Recovery
The partition not showing up on Windows 10/11 issue may occur if you delete it by accident. Actually, multiple reasons can result in partition loss such as power surges, virus infection, hardware issues, Windows updates, etc. No matter what reason causes partition missing, you can recover it with the help of MiniTool Partition Wizard.
MiniTool Partition Wizard DemoClick to Download100%Clean & Safe
Step 1: After launching the software, click Partition Recovery and then click Next in the prompted window to continue.

Step 2: In the prompted window, choose the disk where the lost partition locates for recovery and click Next.

Step 3: Pick a scanning range from the given options: Full Disk, Unallocated Space, and Specified Range. Here, we choose Unallocated Space. Then click Next.
If you don’t remember the specified range of the lost partition, it is recommended to scan the full disk.

Step 4: Select a scanning method based on your demands and click Next. You can either choose Quick Scan or Full Scan.

Step 5: Then the scanning process will start automatically. You can view the progress in the elevated window.
Step 6: After the scanning process ends, check all needed partitions (including existing partitions and deleted/lost partitions) from the list and click Finish.
As the existing partitions will be checked by default, you just need to check the lost/deleted partition by yourself. If Partition Recovery Wizard can’t find your lost partition, use the Data Recovery module to recover the data on the missing partition.

Step 7: Finally assign a letter for the recovered partitions.
NTFS Recovery: Top 6 NTFS Undelete Tools Help You
Fix 5: Reformat Partition to a Recognizable File System
If there are issues with the file system of your partition, you will receive the disk partition not recognized error. Some common file system issues are summarized as follows.
- Your partition contains an unsupported file system by Windows.
- The file system of the partition is corrupted.
- The file system becomes RAW.
How to fix these issues? Well, a good way is to format the partition to a Windows-support file system like NTFS, FAT32, and exFAT. However, formatting the partition will erase data. Hence, you should make a copy of your partition before that. Then start the operation with the steps below.
1. This post explains the best file systems for Windows/Mac/Linux.
2. Learn what formatting a hard drive does from this post.
Step 1: Right-click on the Windows icon, and then click Disk Management.
Step 2: Right-click on the target partition and tap Format.

Step 3: Choose a file system for the partition and click OK.
For the security of data, you’d better check the Perform a quick format option. Click Quick format vs full format to learn the difference between them.
Step 4: Click OK in the prompted window to confirm the operation.
You might be interested in this: Fixed: Disk Management Format Option Greyed out | SSD Wont Format
Case 2: GPT Disk Partition Not Recognized
The GPT disk partition not recognized issue often happens to a GPT system disk. You may receive the issue when you reboot your PC but it can’t recognize and boot from the drive. What triggers the error? Here are some possible causes.
- You failed to configure the GPT disk as the boot drive, so Windows can’t detect it as a boot disk in BIOS and fails to boot from it.
- You didn’t enable UEFI boot mode successfully in BIOS.
- The motherboard of your PC doesn’t support UEFI boot mode.
How to solve the disk partition not recognized issue with the GPT disk? Here are 3 methods for you.
Method 1: Set the GPT Disk as the Boot Drive
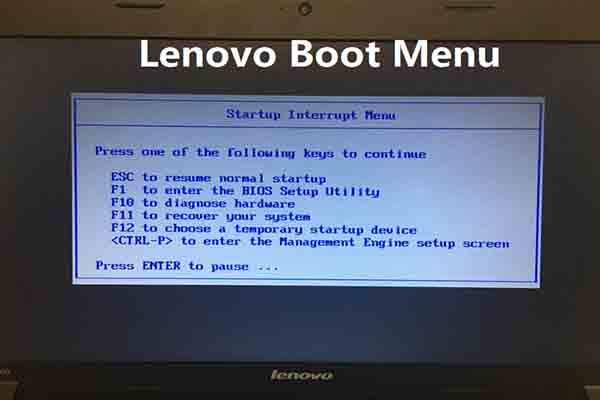
Step 1: Enter the BIOS setup screen of your computer. To do that, restart your computer and then keep pressing its BIOS key like F2, F8, or Del when the PC boots up.
Step 2: Navigate to the Boot tab by using the arrow keys.
Step 3: Set the target GPT disk as the first boot option.
Step 4: Press F10 and Enter keys to save and exit the change.
Step 5: After that, your computer will automatically boot from the selected GPT disk. Then your GPT partitions will show up on your PC.
Method 2: Enable UEFI Boot Mode
If the current boot mode of your PC is Legacy BIOS, the GPT system partition can’t be recognized by the device. In this case, you should switch the boot mode to UEFI mode. The prerequisite is that the PC supports both UEFI and Legacy BIOS boot modes.
Step 1: Likewise, enter the BIOS setup screen and move to the Boot tab.
Step 2: Find the UEFI/BIOS Boot Mode. If it displays “Legacy”, choose the “UEFI” option by using the down arrow.
Step 3: Save the changes you have made and exit BIOS.
Step 4: Restart your computer again.
10 Best Free PC Cleaners to Clean up and Speed up Your Computer
Method 3: Convert GPT to MBR
Your computer may only support Legacy boot mode due to hardware limitations. As a result, the GPT partition not showing up on Windows 10 issue occurs. If so, a good fix is to convert the GPT disk to MBR and then set it as the boot drive.
How to convert GPT to MBR without data loss? Well, MiniTool Partition Wizard comes into use. It helps you complete the conversion easily. Reversely, it allows you to convert MBR to GPT.
Note: To convert a data disk to MBR/GPT disk, simply use the MiniTool Partition Wizard Free Edition. If you are going to convert the system disk to a GPT disk, get the Pro or higher editions.
Step 1: After installing the program on your computer, run it to access its main interface.
MiniTool Partition Wizard FreeClick to Download100%Clean & Safe
Step 2: Right-click on the target disk and click on the Convert GPT Disk to MBR Disk option.
Step 3: Tap Apply > Yes to execute the operation.

Step 4: Then set the disk as the boot drive in BIOS with the steps in Method 1.
Case 3: The Selected Partition Was Created by Windows and Might Contain Data
According to user reports, partitions sometimes can’t be recognized by Windows after a reboot. They also find that only the Delete Volume is available in Disk Management when they want to solve the issue in it. Besides, you may be prompted with an error message as shown below.
Some partitions suddenly become unavailable in Windows Explorer although they contain data.
“The selected partition was not created by Windows and might contain data recognized by other operating systems. Do you want to delete this partition?”
Why this issue takes place? It is likely that the current hard drive is an MBR with 2TB+ storage. Hence, the partition over 2TB limit can’t be recognized in Disk Management. Another reason is that a GPT disk over 2TB has been converted to MBR. An available solution to this issue is to convert MBR to GPT.
For doing that, follow these steps.
MiniTool Partition Wizard DemoClick to Download100%Clean & Safe
1. Launch MiniTool Partition Wizard.
2. Highlight the target disk and click Convert MBR Disk to GPT Disk in the action panel.

3. Click Apply > Yes to carry out the operation.
Make a Comment
Partition not showing up in Windows 11/10? This post shows you possible reasons and troubleshooting methods in 3 cases. If you encounter the error in other cases, tell us in the comment area. We will try our best to help you. For any questions about MiniTool Partition Wizard, contact us via [email protected].

