An Overview of Vcomp110.dll
The vcomp110.dll is a redistributable component of Microsoft Visual C++. Recently, many people complain about the vcomp110 dll is missing error because they cannot start their application properly due to it. Besides, they receive error messages. The following are some frequently encountered error messages.
- Vcomp110.dll is missing.
- Vcomp110.dll was not found.
- Vcomp110.dll could not be located.
- Cannot find vcomp110.dll.
- This application failed to start because vcomp100.dll was not found. Re-installing the application may fix this problem.
What causes the vcomp110.dll is missing Windows 10 issue? According to user reports, this error usually occurs in cases that vcomp110.dll is removed or corrupted. The vcomp110 dll is missing error may imply a registry issue, a virus or malware, or a hardware failure.
Now, it’s time to troubleshoot the vcomp110.dll missing issue. Here are some available methods for you.
Solution 1: Download/Reinstall Visual C++ Redistributable Package
You are recommended to download the Visual C++ Redistributable for Visual Studio 2012 and run it after receiving the vcomp110.dll missing error. This operation will replace/restore the vcomp110.dll with the latest copy provided by Microsoft.
If it fails, try installing Visual C++ Redistributable from the program’s installation folder to fix the vcomp110.dll missing error. Under some circumstances, the video game or application contains a specific DLL file version that works better than the one offered by Microsoft.
What file or folder you should look for? The target actually is the game or program that causes the vcomp110.dll missing error. After finding the file, replace the missing or corrupt vcomp110.dll file with it.
Solution 2: Reinstall the Application that Requires Vcomp110.dll
Some users claimed that reinstalling the application that requires vcomp110.dll can fix the issue. For that, you should uninstall the application first and then install it again.
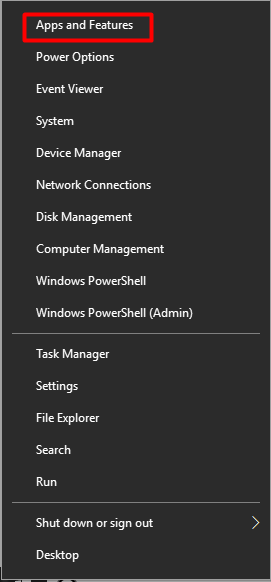
Step 1: Right click the Windows icon on the desktop to open the Start menu, and then click Apps and Features option to continue.
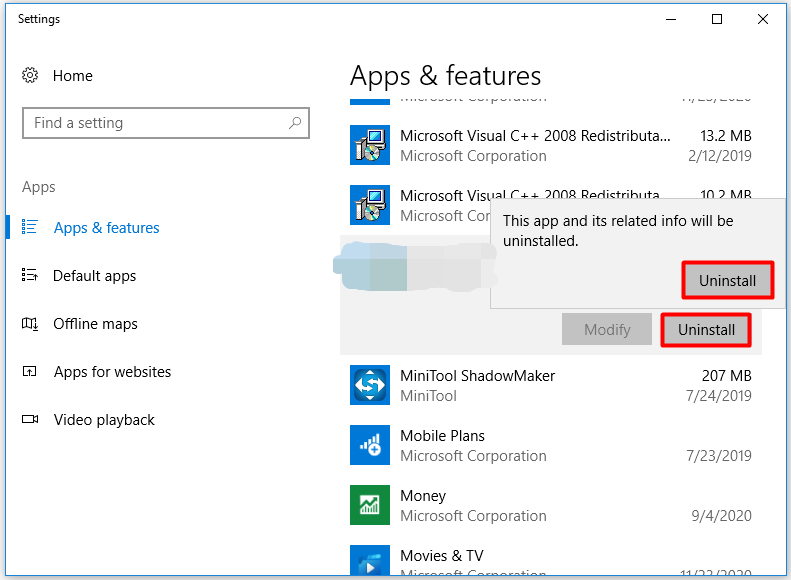
Step 2: Move to the right side of the window and scroll down the content to find the application having vcomp110.dll missing issue. Click on it and then click the Uninstall button. Then this app and its related info will be uninstalled, click on Uninstall after confirming the operation.
Step 3: Wait for the finish of uninstallation process. Then reinstall the program from its official website.
You can also see: How to Uninstall Programs on Windows 10? Here Are Methods
Solution 3: Recover the Vcomp110.dll File
The vcomp110 dll is missing error can also occur after you delete it by accident. In this case, just restore it from the Recycle Bin.
Step 1: Double click the Recycle Bin icon on your desktop to open it.
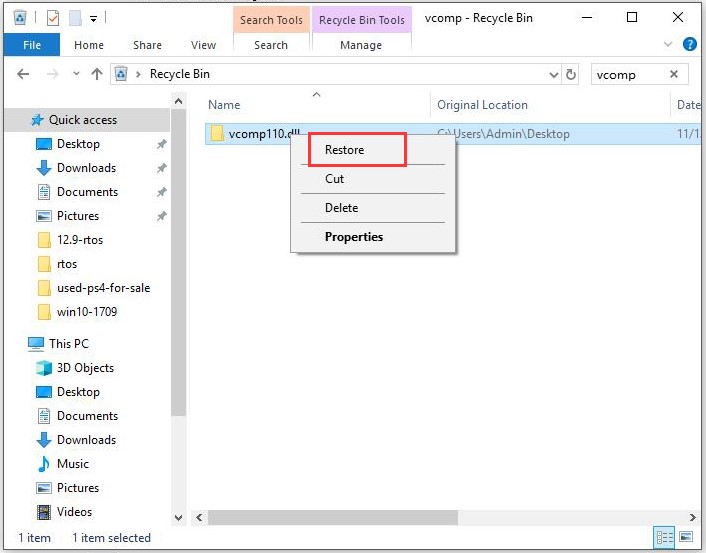
Step 2: Find the vcomp110.dll from the Recycle Bin. The fastest way to find it is to type vcomp in the search area of Recycle. If it is deleted indeed, it will appear. Then right click on it and choose the Restore option.
If you have emptied the Recycle Bin, you can recover the missing vcomp110.dll file with a professional data recovery program. MiniTool Partition Wizard is such a tool. Its Data Recovery feature allows you to recover the data easily.
Solution 4: Install Available Windows Updates
Plenty of service packs and patches update or take the place of some of Microsoft distributed DLL files on the computer. The vcomp110.dll file might be included in one of those updates. Hence, try installing any available Windows updates to fix the vcomp110.dll error.
Check if the current system is the latest version and then install the newer version with the steps below.
Step 1: Open the Settings window by pressing Windows and I keys. Then click Update & Security icon in the main interface.
Step 2: You can see the Update status of the system in the right side of the next window. If you see “Updates are available”, then the current system is not the latest version. You need to go to the official website of Microsoft and then download and install the newest Windows version.
Solution 5: Check the Memory and Hard Drive for Errors
Hardware failure can also result in vcomp110.dll missing error. Hence, it is necessary to perform a hardware check. Among various hardware, memory and hard drive are often the sources of the fault. Now, check them by using the following steps.
Steps for Checking Memory
The Windows embedded utility – Windows Memory Diagnostic, is a free program that can help you check memory for errors. You can do that with the given steps.
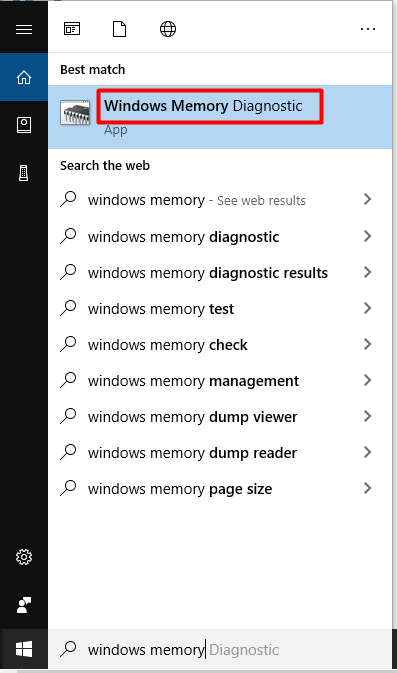
Step 1: Open Windows Memory Diagnostic from the search box.
- Type mdsched or windows memory diagnostic in the search box.
- Click on Windows Memory Diagnostic under the Best match.
Step 2: If you are prompted a window to confirm the operation, click Restart now and check for problems (recommended) option.
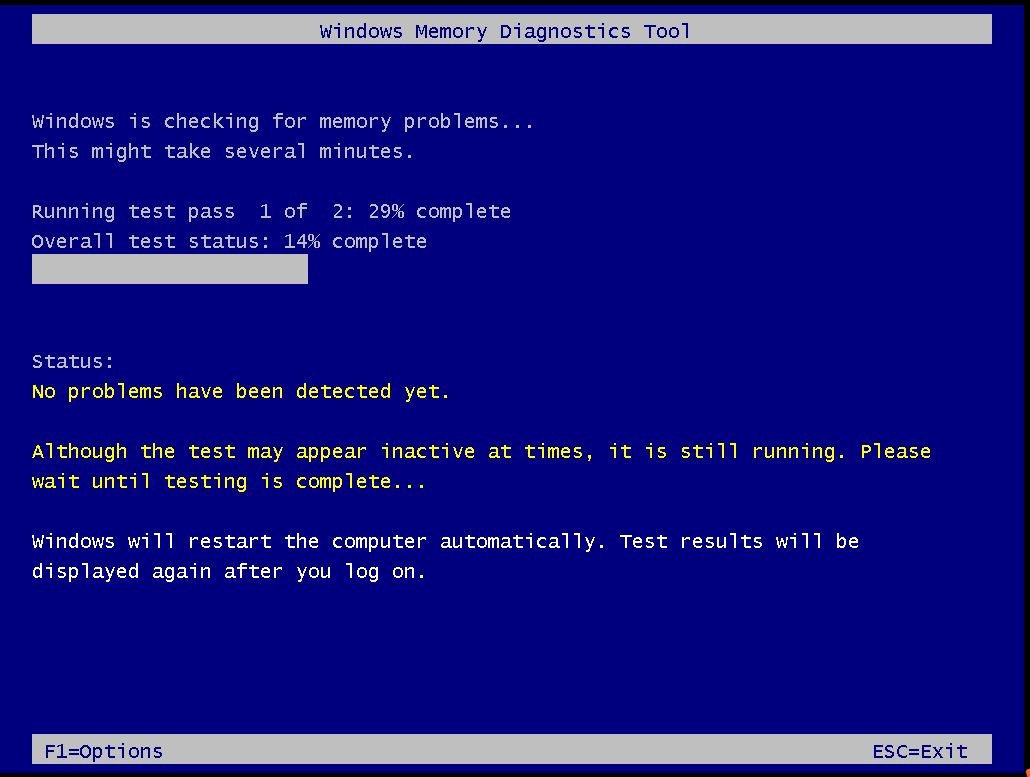
Step 3: After that, your computer will restart automatically. When it reboots, you will see the Windows Memory Diagnostics Tool. In this window, you can view the test process and status. As it claims, the result will be displayed after you log on.
If there’s something wrong with your memory, try replacing or upgrading it by following this post.
Steps for Checking Hard Drive
If you want to check hard drive for errors, MiniTool Partition Wizard is a great choice. As a multifunctional partition manager, it enables you to wipe disk, check disk space usage, migrate OS, copy disk, recover missing data, convert MBR to GPT, etc.
You can detect bad sectors and file system errors on your hard drive with MiniTool Partition Wizard. Here are specific steps.
MiniTool Partition Wizard FreeClick to Download100%Clean & Safe
The tutorial for finding bad sectors.
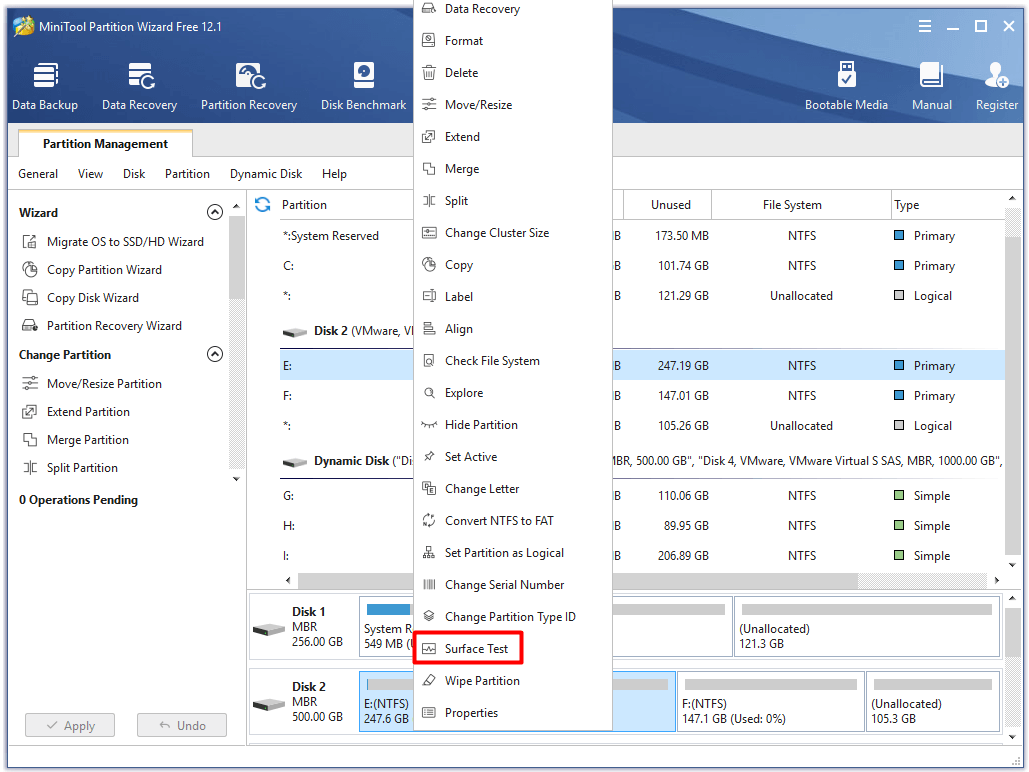
Step 1: Run the MiniTool Partition Wizard to enter its main interface. Right click on the drive to test and choose Surface Test option from the pop-up menu.
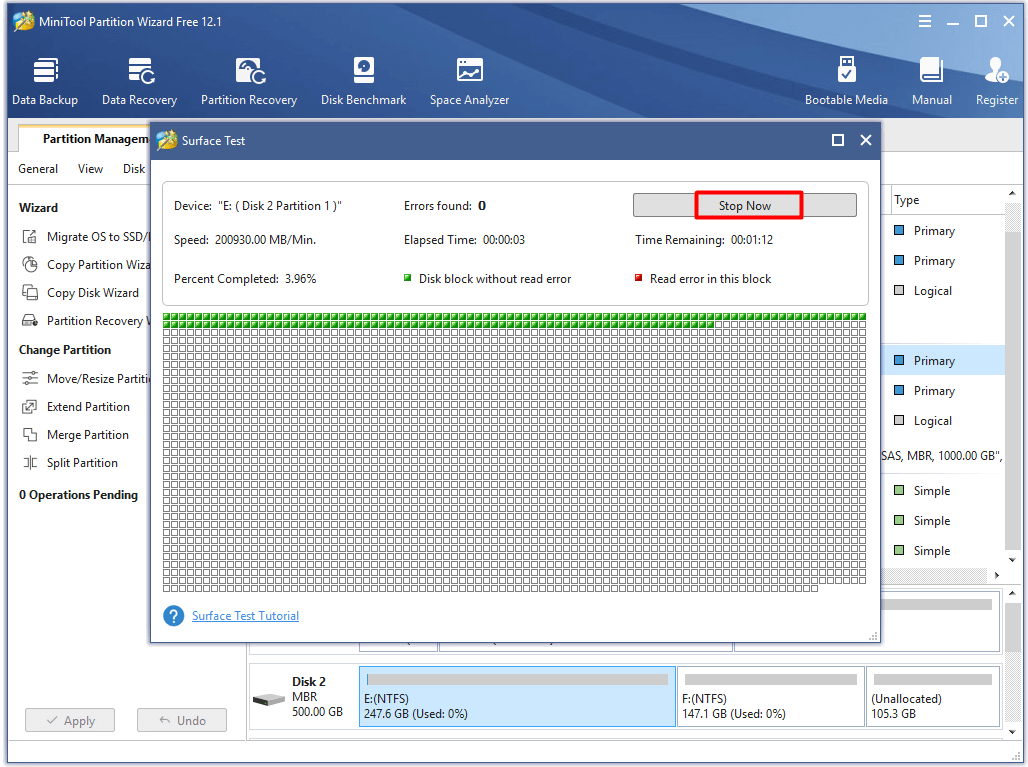
Step 2: Click the Start Now button in the elevated window. Then the program will run immediately as you can see in the picture below. If there are any blocks in the scan area marked red, it indicates that there are bad sectors on your hard drive. Then you need to execute further steps.
Step 3: Run Command Prompt as administrator, and then type chkdsk f: /r and hit Enter to shield the bad sectors.
The tutorial for finding and fixing file system errors.
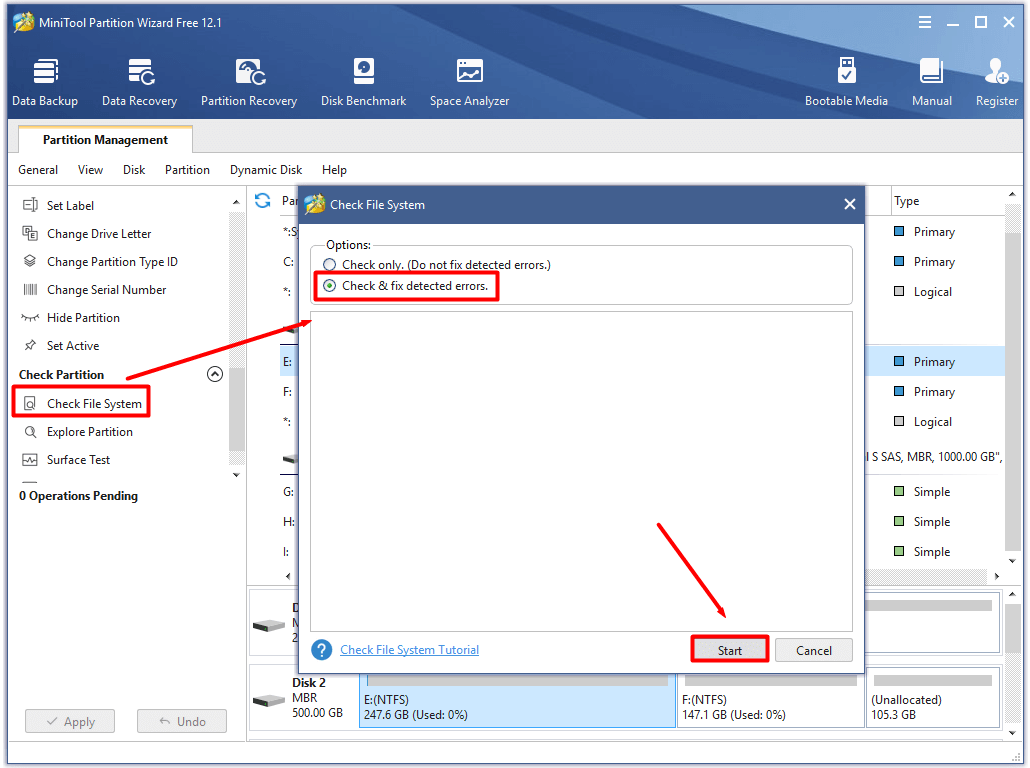
Step 1: After choosing the target drive, find and click on Check File System option in the left action panel.
Step 2: Select the Check & fix detected errors option in the next window and click Start. Then the program will fix any detected file system errors on the chosen hard drive.
Solution 6: Scan Your Computer for Virus/Malware
It is also likely that the virus or malicious software on the computer damages the DLL file and causes vcomp110.dll missing error. Therefore, you are suggested to run your anti-virus software after receiving the discussed error.
Solution 7: Repair Install System
Performing a repair install has been proven to be useful for resolving the vcomp110.dll is missing error. If you don’t have installation media, you need to get one.
Step 1: Connect your USB to the computer, and then go here and click Download tool now to get the Windows setup.
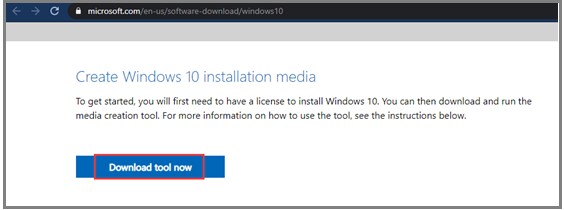
-image from microsoft.com
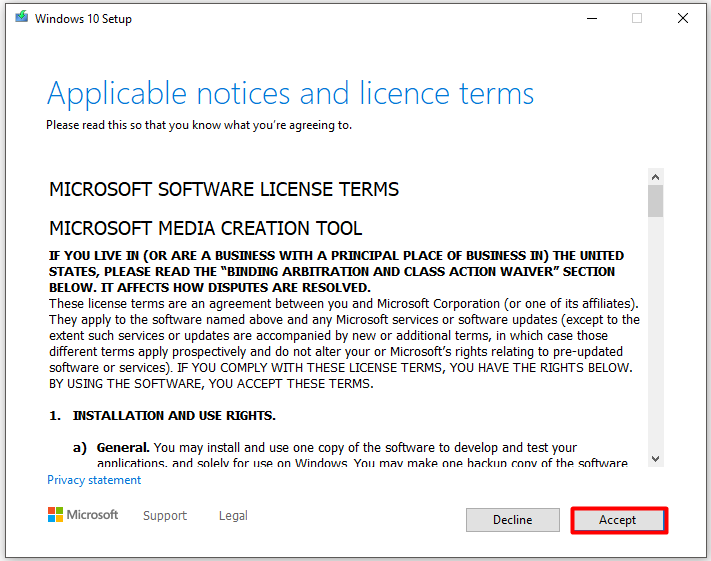
Step 2: Then open the downloaded file. Click Accept in the prompted window.
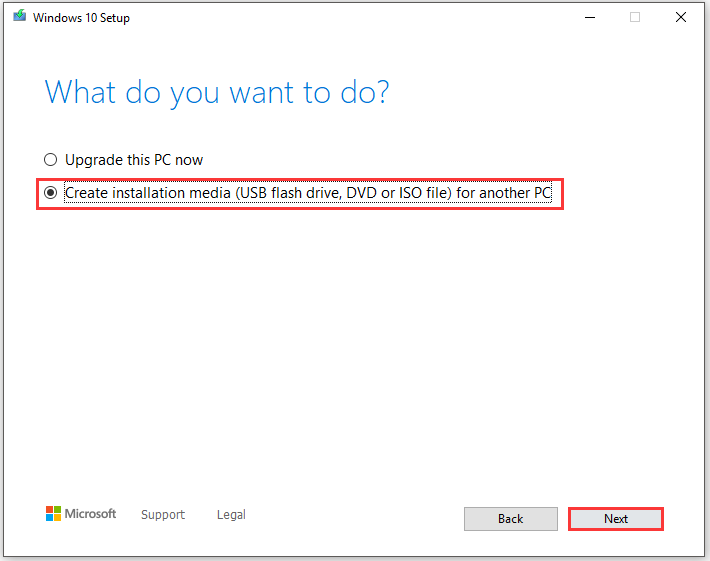
Step 3: Then follow the on-screen instruction to finish the process. Choose Create installation media for another PC > Next > configure language, edition, and architecture > Next > ISO file > Next > USB > Next. Wait for the finish of the process.
Step 4: Mount the ISO file with virtual clone drive.
Step 5: Double click the setup.exe from the Windows virtually loaded drive.
Step 6: Choose Download and install updates > Next > Accept. Then follow the pop-up instruction to go on.
Finally, click Keep Windows settings, personal files, and apps and the Next button in the Choose what to keep window. Then the Windows will reboot for several times during the system image is being refreshed without data loss. The vcomp110 dll is missing error can be fixed after this process finishes.
Solution 8: Clean Install Windows 10
A clean install of Windows system can help you fix the vcomp110.dll missing as well. As a clean installation means that everything on the hard drive will be erased, you need to make a backup before that.
The Copy Disk feature of MiniTool Partition Wizard enables to you back up all the data on the hard drive within a few clicks. Here’s how to do.
Step 1: After installing MiniTool Partition Wizard on the computer, double click it to launch it.
Step 2: Choose the system disk and click Copy Disk in left pane. After choosing the target disk for the copied content in the elevated window, click Next.
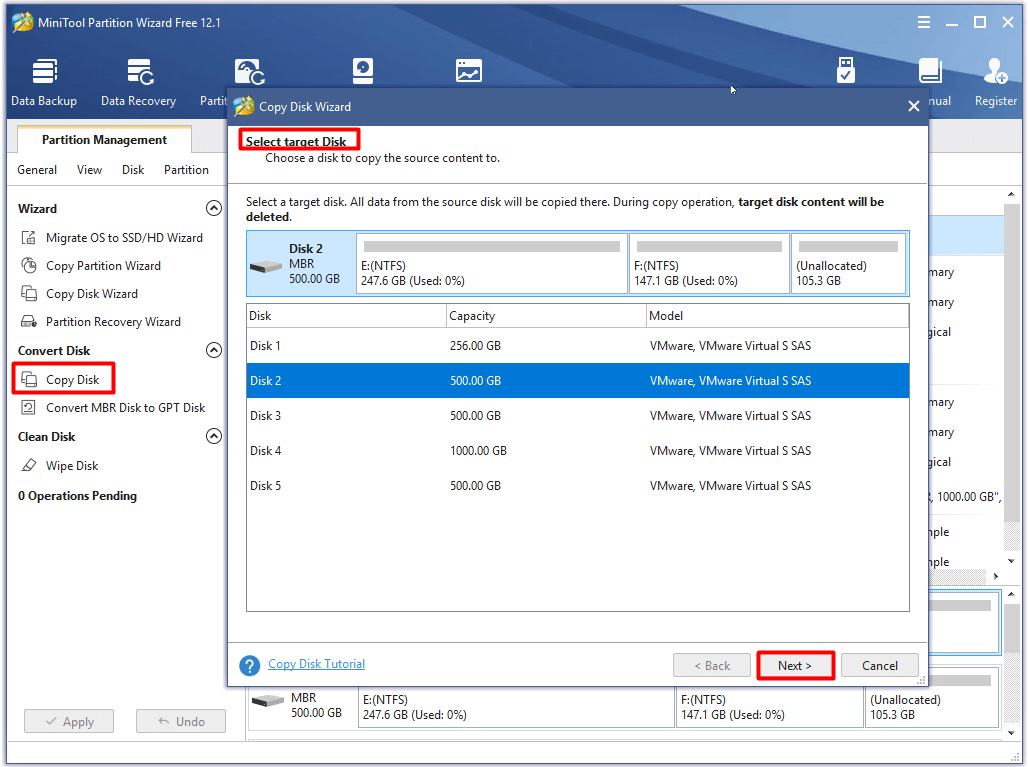
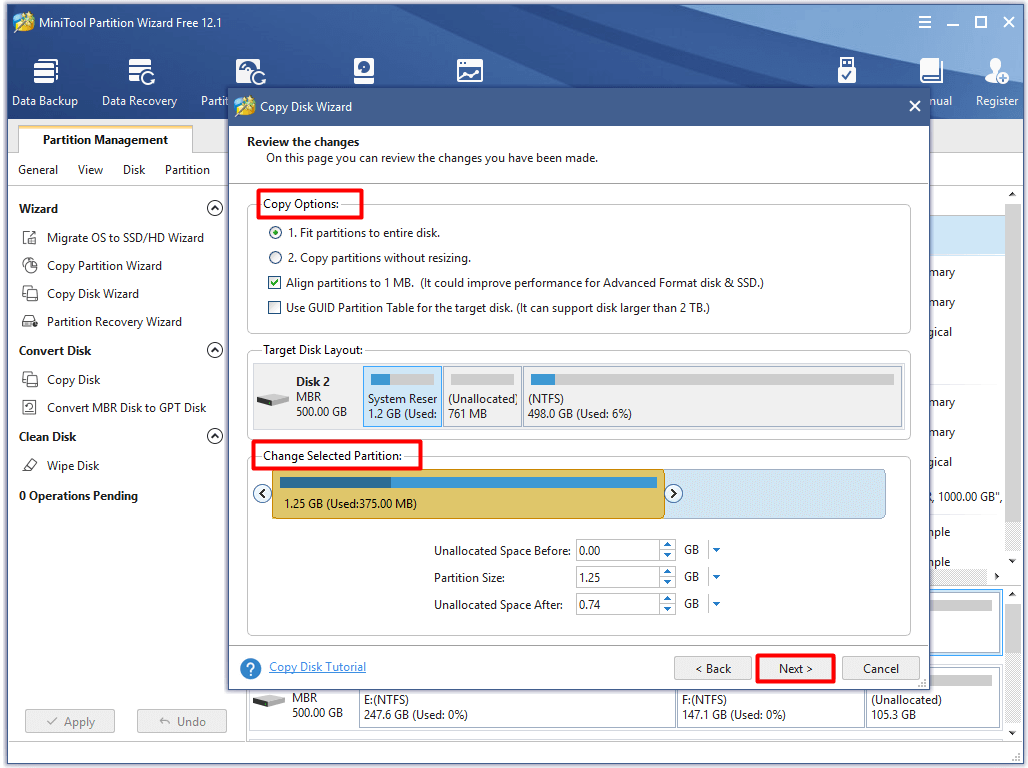
Step 3: In this window, you can choose Copy Options and change selected partition based on your demand. Then, click Next.
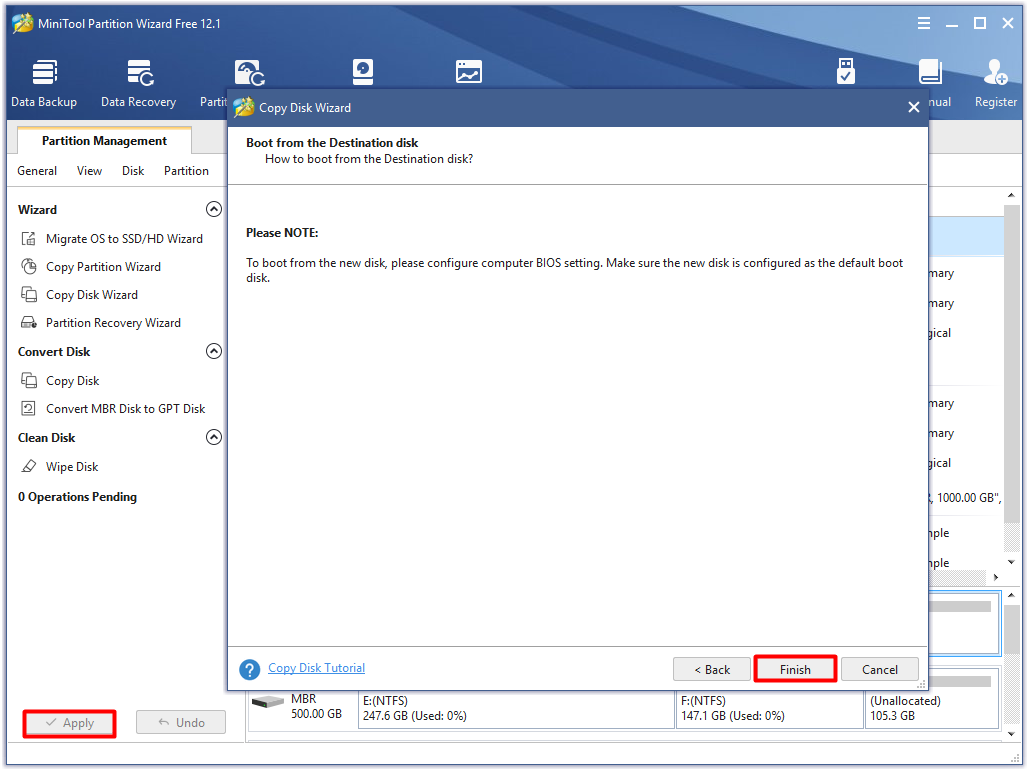
Step 4: Click the Finish and Apply buttons to execute the operation.
Step 5: After that, you can reinstall Windows 10 .
Wrap up
Top 8 solutions to the error – vcomp110.dll is missing Windows 10 have been illustrated to you now. It’s time for you to make a choice. You can share your thoughts on this error with us in the comment area below. Please send us an email via [email protected] for any questions about MiniTool software.
Vcomp110.dll FAQ
- Download/reinstall Visual C++ redistributable package
- Reinstall application that needs vcomp110.dll file
- Restore the vcomp110.dll file
- Install Windows latest version
- Check memory and hard drive for errors
- Perform a virus/malware scan
- Repair install Windows
- Perform a clean install
If you encounter the error – missing DLL files in Windows 10/8/7, try fixing it with the following methods.
- Restart the computer
- Recover the deleted files with file recovery software
- Reinstall the application
- Update drivers
- Run a virus/malware scan
You can restore DLL file with the steps below.
- Open Run window by pressing Windows and R keys.
- Type cmd in the window and hit OK to open the Command Prompt.
- In the prompted window, type sfc /scannow and press the Enter key.
- Wait until the finish of the scan process. After that, restart the computer. Then the DLL file will be restored.