A network drive is a folder or drive that can be used by any other networked computer connected to a particular LAN. It can help you share files to multiple computers at one time and back up data anytime anywhere.
Some users want to back up their network drive to a local or external drive since they can’t view the data when there are some issues with the Internet. Besides, Network drives are easily infected by malware and viruses.
However, some users want to back up their Windows 11/10 to the network drive since this can store files without taking up space on their computer’s local disk.
Whether you want to back up network drive to a local/external drive or back up Windows 11/10 to network drive, you can find the methods in the below part.
How to Back up a Network Drive to a Local/External Drive?
This part is about backing up network drive to the local drive or external drive. If you want to back up it to the external drive, you should insert the external drive into your PC before the following operations.
Step 1: Press the Windows + E keys together to open File Explorer.
Step 2: Go to the Network entry and expand it. Double-click the network drive you want to back up to enter it.
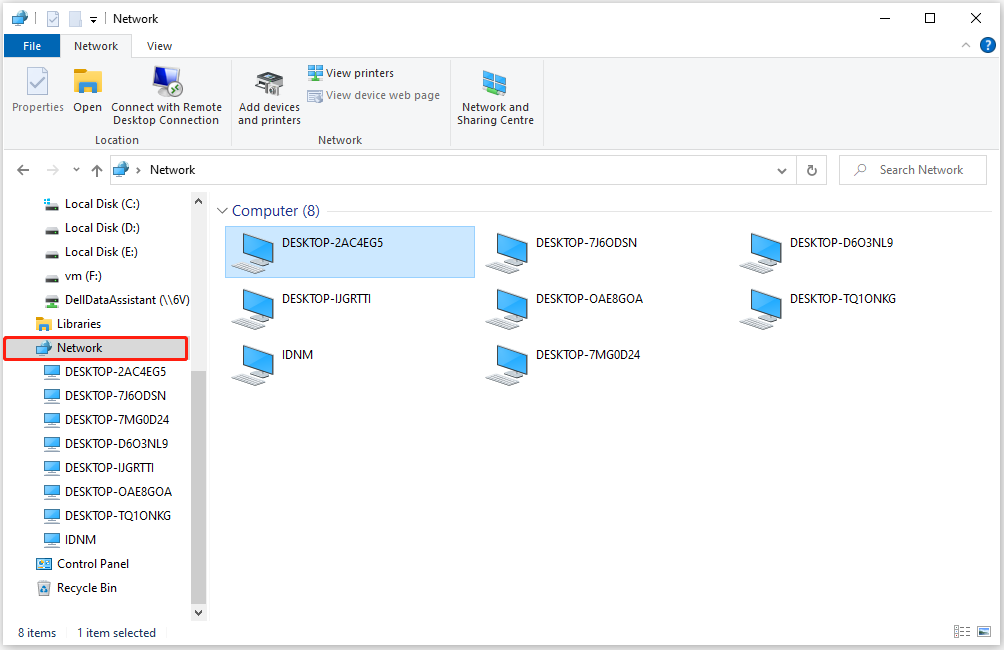
Step 3: Then, select the files you want to back up and right-click them to choose Copy.
Step 4: Go to the local drive or external drive. Create a new folder. Then, paste the copied files to here. Then, you have successfully backed up the network drive to the local or external drive.
How to Back up Windows 10/11 to a Network Drive?
This part is about backing up Windows 11/10 to the network drive. There are 3 ways available:
Way 1: MiniTool ShadowMaker
To do this task, you can try MiniTool ShdowMaker.
MiniTool ShadowMaker is a professional backup program that can be used to back up the operating system, disk, partition, file, and folder. It supports almost all storage devices that can be recognized by Windows, such as HDD, SSD, USB external disks, Hardware RAID, NAS, Home File Server, and so on.
Now, download it to back up your Windows 11/10 to the network drive.
MiniTool ShadowMaker TrialClick to Download100%Clean & Safe
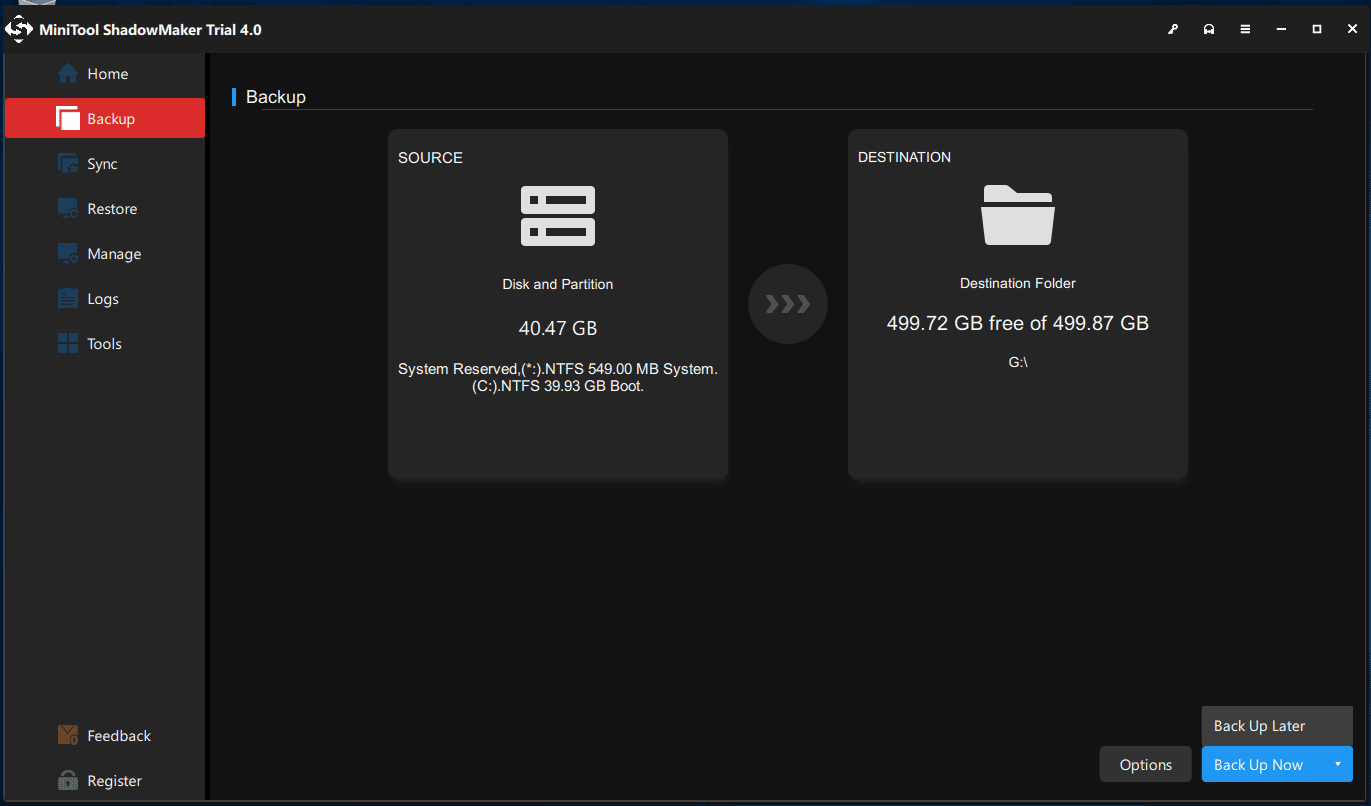
Step 1: Run MiniTool ShadowMaker. Go to the Backup tab and the Windows 11 or 10 system has been selected by default in the SOURCE part.
Step 2: Go to the DESTINATION part and click the Shared tab. Then, click the Add button.
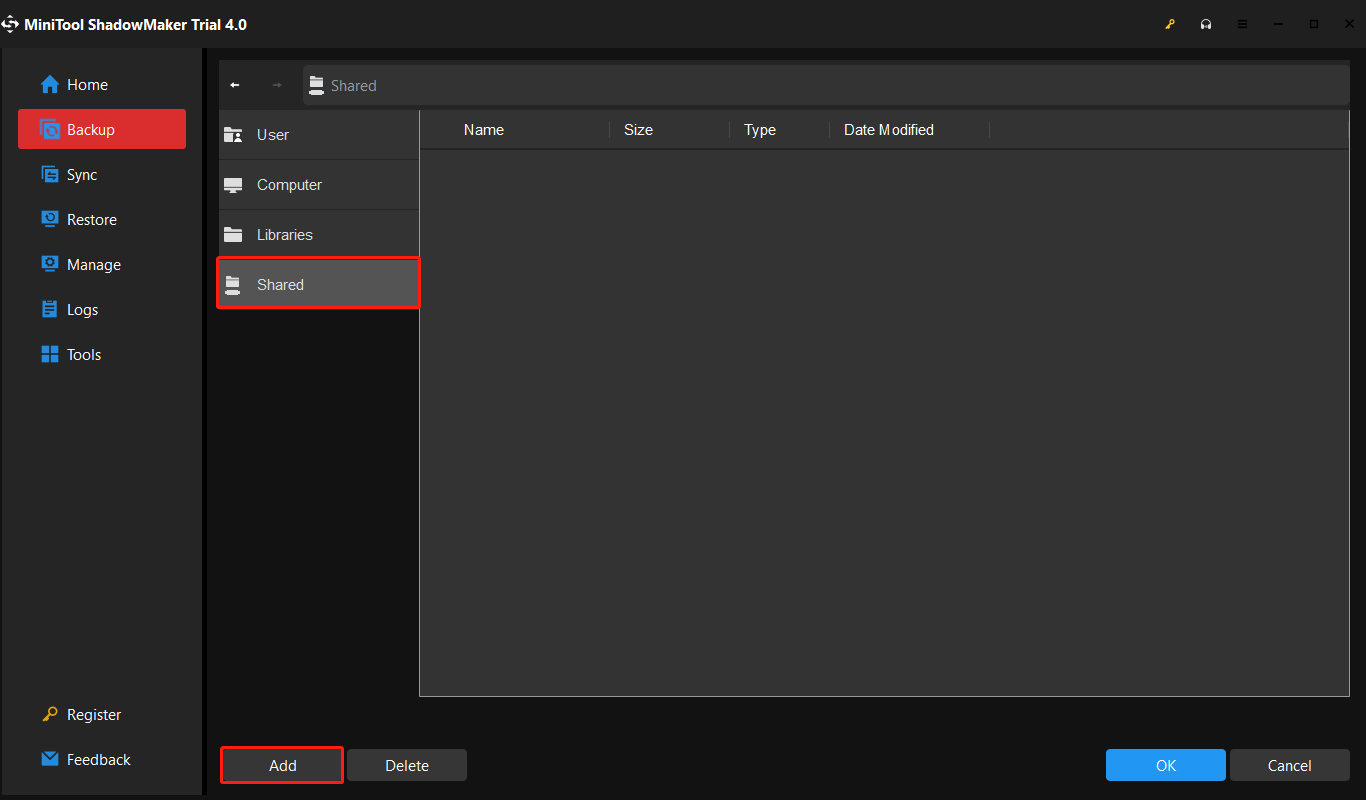
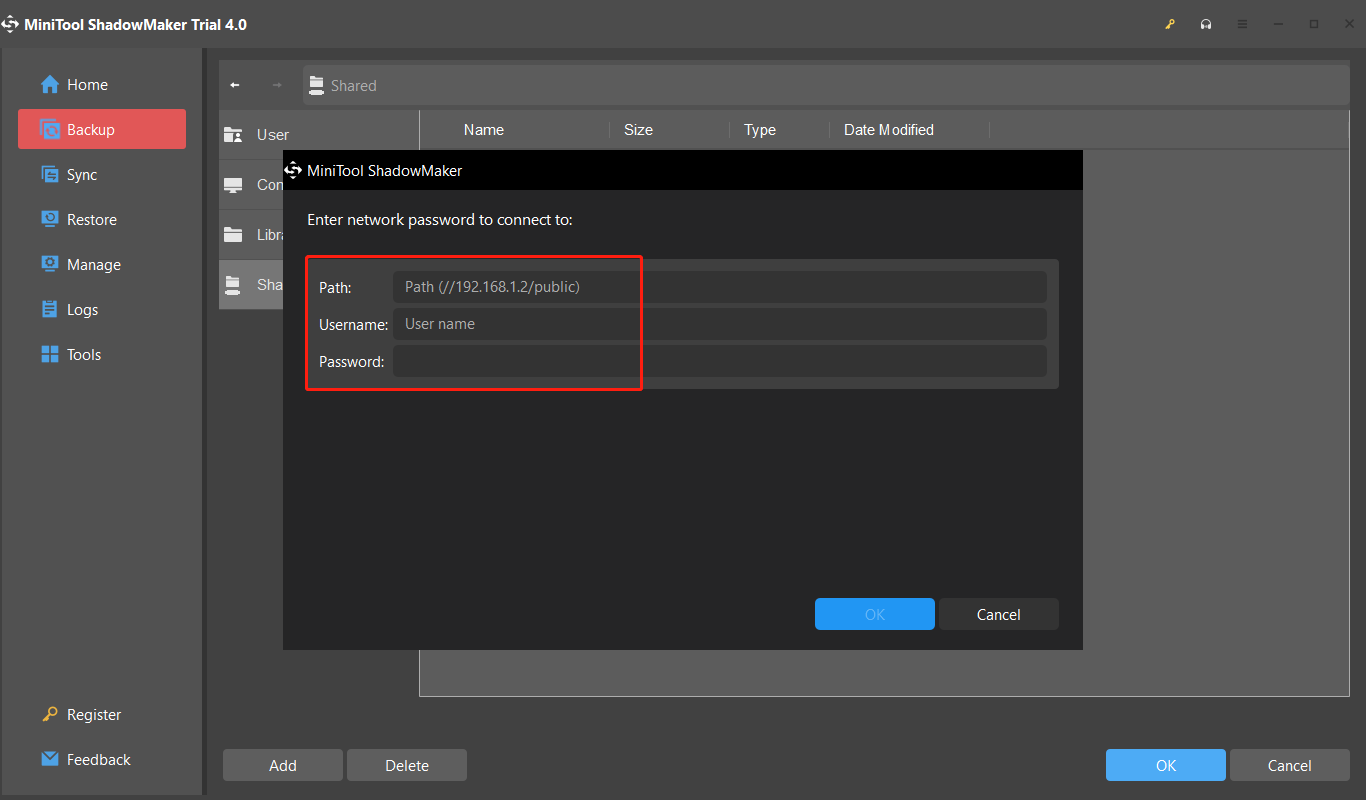
Step 3: Enter your network drive’s path and username and password. Then, click OK.
Step 4: Then, click Back Up Now to perform the backup task immediately. You can also click Back Up Later and you can check it in the Manage tab.
Way 2: File History
To back up Windows 11/10 to the network drive, you can also try File History. It’s a Windows built-in tool.
Step 1: Press the Windows + I keys at the same time to open the Settings application. Then go to the Update & Security section and click it.
Step 2: Click the Backup section and click More options.
Step 3: In the Backup options window, you should click See advanced settings. Then click Select drive.
Step 4: In the Select a File History drive part, choose Add network location.
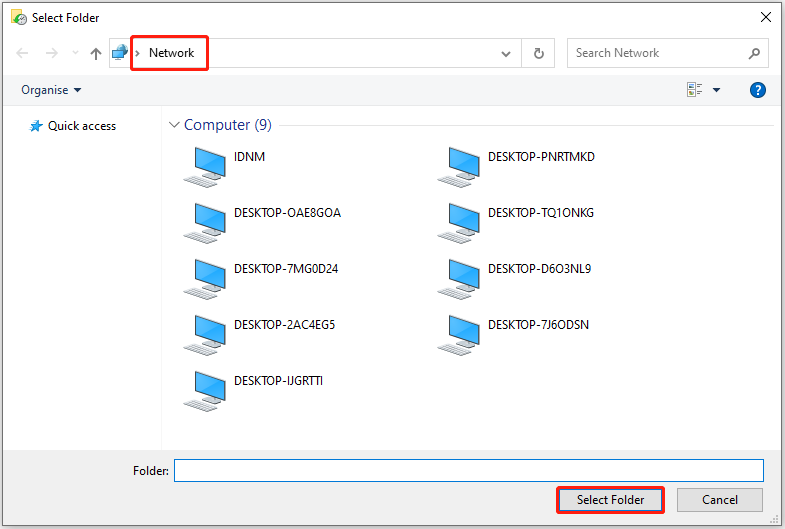
Step 5: Enter the network address. You can also provide the network drive’s name as well and click Select Folder.
Step 6: Select the backup folder, select the backup path, and click OK and Enable. Then, click Back up now.
Note: File History backs up your documents, music, photos, videos, and other files in the Libraries folder. While MiniTool ShadowMaker can back up the system, disk, partition, the whole hard drive, as well as the operating system.
Way 3: Backup and Restore (Windows 7)
The last method for you to back up Windows 11/10 to the network drive is via Backup and Restore (Windows 7).
Step 1: Type Control Panel in the Search box to open it.
Step 2: Go to System and Security > Backup and Restore (Windows 7).
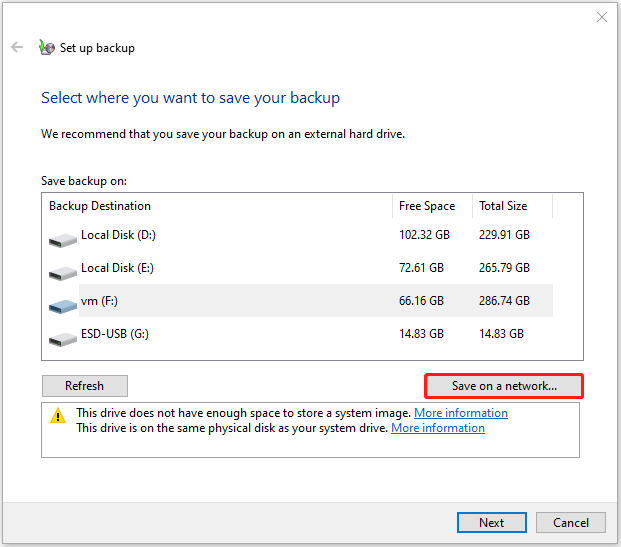
Step 3: Click Set up backup and click Save on a network….
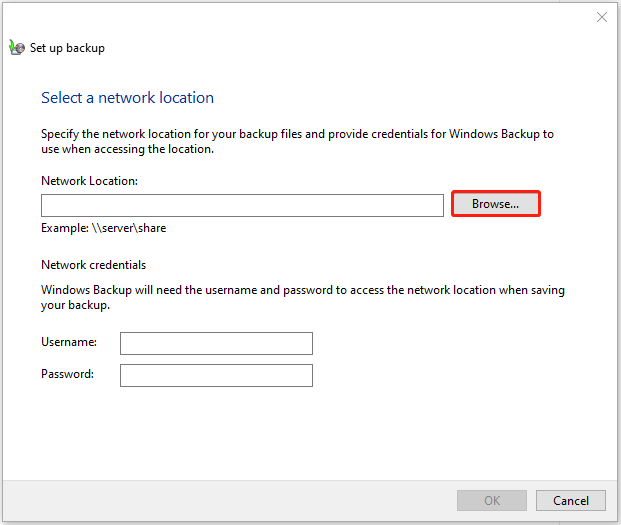
Step 4: Click Browse to add the network drive or type the network path you want to store the backup. Then, enter your username and password and click OK to confirm this operation.
Step 5: Choose whether or not you want Windows to handle everything. Then, click Save settings and Run backup.
Note: MiniTool ShadowMaker not only allows you to change the backup schedule but also supports changing the backup types – full, incremental, and differential backup. However, Backup and Restore (Windows 7) only supports incremental backup.
Final Words
How to back up the network drive on Windows 11/10? How to back up Windows 10/11 to a network drive? The post gives corresponding solutions. I hope that this post can be helpful to you. If you have any problem with the MiniTool program, feel free to contact us via at [email protected] and we will reply to you as soon as possible.
