Preventing data loss due to accidental operations through backup is crucial. Are you looking for ways to backup Windows Server 2016 to external hard drive? This post from MiniTool offers 2 tools for you.
It is crucial to back up Windows Server 2016 to protect your important data. The most convenient and reliable backup method is using an external hard drive. The following are the benefits of backing up Windows Server 2016 to external hard drive.
1. First, it keeps your data safe from hard drive failure. Once the hard drive is damaged, all data on the disk may be lost. But the backup data on the external hard drive is safe.
2. Secondly, it can save time when installing Windows Server 2016 on a new computer or different computer that has dissimilar hardware. You can use this external hard drive to perform a universal restore without installing a completely new system and applications.
3. Third, files on a computer can easily be infected, destroyed, or stolen, so it is safer to keep them on an external hard drive.
Now, let’s see how to back up Windows Server 2016 to external hard drive.
How to Back up Windows Server 2016 to External Hard Drive
Before starting the backup process, there are some things you need to notice:
- Make sure you have connected the external hard drive to Windows Server 2016.
- Ensure the external hard drive can be recognized by the PC.
- Make sure the external hard drive has enough capacity to store the Windows Server 2016’s data.
Way 1: Via Windows Server Backup
First, you can back up Windows Server 2016 to external hard drive via Windows Server Backup. It is a built-in backup and recovery tool on the Windows Server operating system. It provides a way to create and manage backups of important data such as system state, files and folders, and entire volumes or hard drives. Backups can be stored on local drives or network shares and can be used to recover data in the event of data loss or system failure.
Step 1: Install Windows Server Backup
1. Open Server Manager and click Add roles and features. Then, click Next.
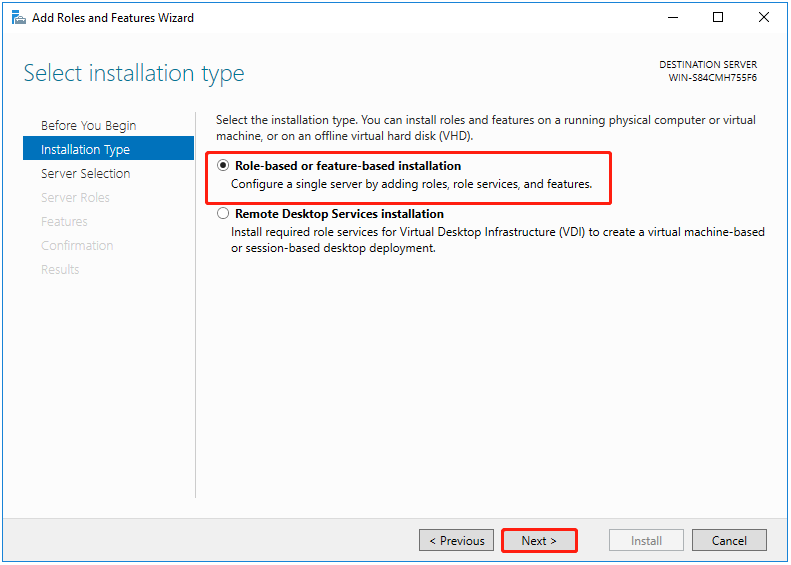
2. Now, choose the installation type – Role-based or Feature-based installations or Remote Desktop Services Installation and click Next.
3. Select the destination server and click Next.
4. Under the Select server roles page, directly click Next to continue.
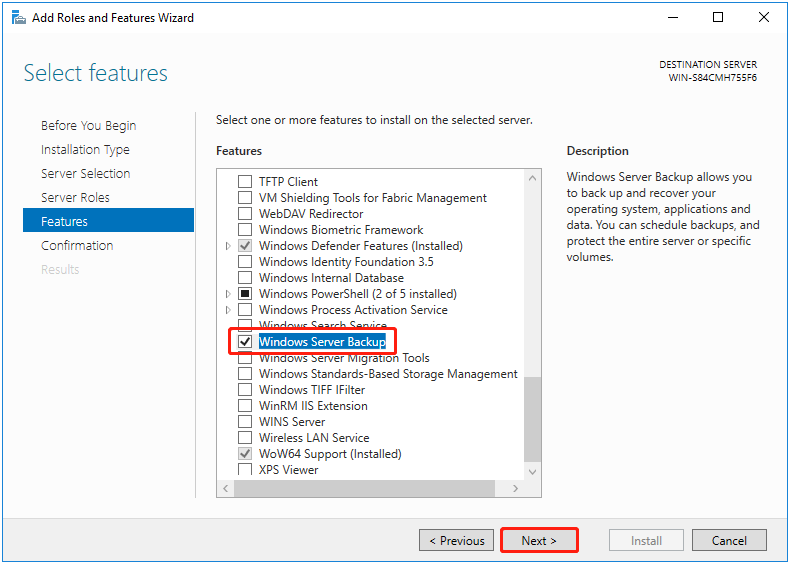
5. Under the Features section, check the Windows Server Backup feature and click Next.
6. It will ask you to confirm the operation and you need to click Install.
Step 2: Start to Back up Windows Server 2016 to External Hard Drive
1. Type Windows Server Backup in the Search box and open it.
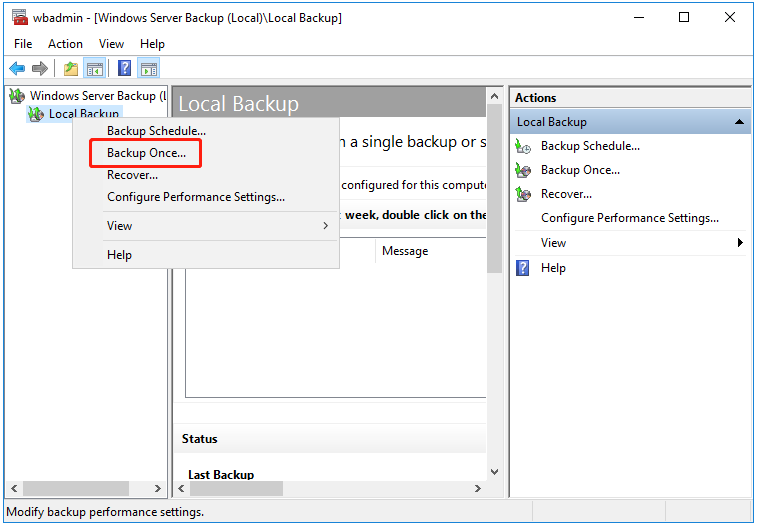
2. Right-click Local Backup and then select Backup Once….
3. Under Backup Options, select Different options, and click Next.
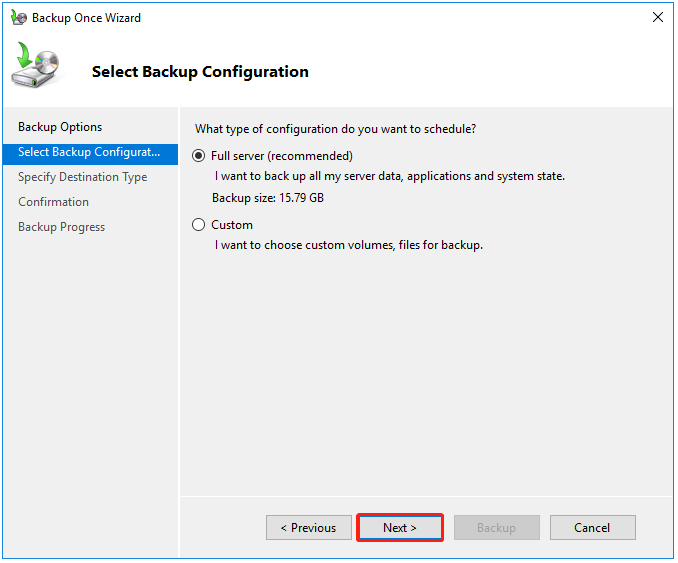
4. Select Full server (recommended) or Custom.
- The full server backup will back up all your server data, applications, and system state.
- If you want to back up specific Windows Server 2016 files, you can choose the Custom option and click Next. Then, you can choose Add Items and choose the files that you want to back up. Click Next to continue.
5. Under Specify Destination Type, choose Local drives or Remote shared folders, and click Next. Here, you need to choose the first option.
6. Then, you need to click the drop-down menu to choose the external hard drive as the backup destination. Click Next.
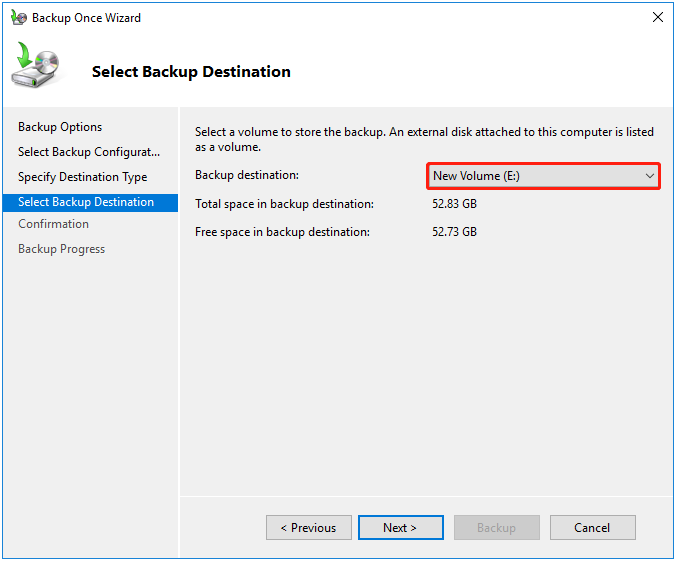
7. Now, you can click Backup to start the backup task. Once the backup is done, you will see the status message: Successful.
Way 2: Via MiniTool ShadowMaker
When using Windows Server Backup, you may encounter different errors such as Windows Server Backup Stuck at “Reading Data; Please Wait…”, Windows Server Backup not doing incremental backup, Windows Server backup service missing and so on. Thus, you can also use the Server backup software – MiniTool ShadowMaker to back up Server 2016 to external hard drive.
It provides an all-in-one backup and recovery solution, which is compatible with Windows Server 2022/2019/2016/2012/2012 R2, Windows 11/10/8.1/8/7, etc. It allows you to back up files or back up systems to the external hard drive.
MiniTool ShadowMaker has more advanced features than Windows Server Backup Sync, Media Builder, Disk Clone, Universal Restore, Backup Compression, etc. Now, don’t hesitate and click the following button to download MiniTool ShadowMaker and install it on your PC to start the backup task.
MiniTool ShadowMaker TrialClick to Download100%Clean & Safe
1. Launch MiniTool ShadowMaker and click Keep Trial to continue.
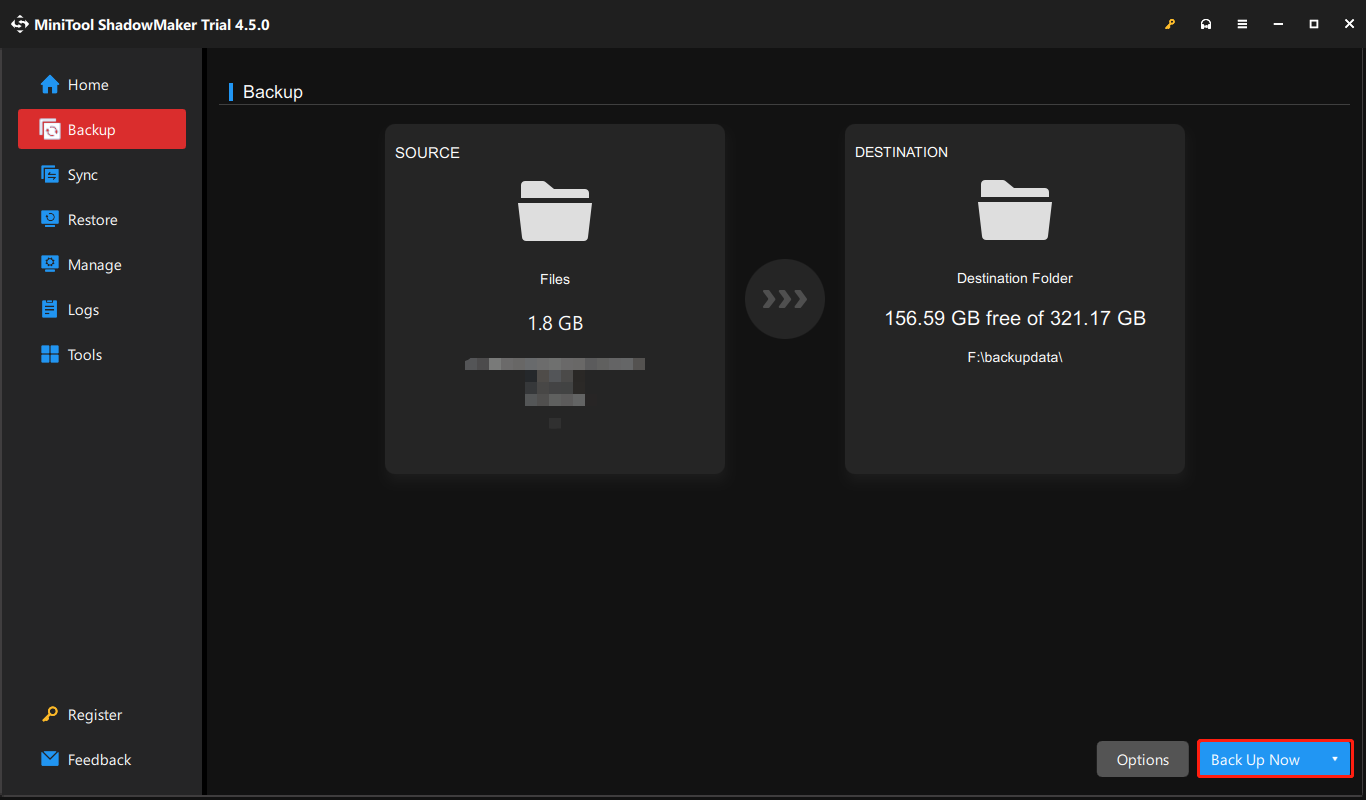
2. On the Backup interface, you see system partitions are selected as the backup source. To back up your files, click SOURCE > Folders and Files, then check all the items you want to back up and click OK.
3. Click DESTINATION to choose the external hard drive as the destination.
4. Finally, click the Back Up Now button to execute the backup task.
Bottom Line
To sum up, this post has shown how to back up Windows Server 2016 to external hard drive with Windows Server Backup and MiniTool ShadowMaker. If you have any problem with MiniTool ShadowMaker, you can contact us via [email protected] and we will reply to you as soon as possible.
