What Is Samsung 860 EVO SSD?
As is well known, Samsung enjoys high popularity in electronics industry and develops various storage devices, including solid-state drives, portable SSDs, memory cards and so on. The SSD contains several different series such as the 470 series, 750 series, 830 series, 850 series, 860 series, 950 series, 960 series, and 970 series.
In addition, the Samsung 850 EVO and Samsung 860 EVO are chosen by most people due to its high performance, useful features and affordable prices. In particular, the Samsung 860 EVO SSD is more popular, which uses the latest V-NAND and a robust algorithm-based controller, so that it comes in a wide range of compatible form factors and capacities.
What’s more, the Samsung 860 EVO SSD enjoys fast read and write speed. Its sequential read and write speed can respectively reach up to 550MB/s and 520MB/S. It also comes with large capacity, which is able to reach up to 4TB.
So, with good performance and large capacity, most people would like to install Samsung 860 EVO SSD in their laptop or desktop computer so as to improve computer performance. However, they don’t know how to install Samsung 860 EVO SSD in laptop or desktop computer and wonder the Samsung SSD 860 installation guide on Windows 10.
So, in the following part, we will show you how to install Samsung 860 EVO desktop or on laptop without reinstalling the operating system. In general, it includes 3 main steps.
How to Install Samsung 860 EVO Without Reinstalling OS (3 Steps) Step 1: Initialize Samsung 860 EVO SSD Step 2: Clone OS to Samsung 860 EVO SSD Step 3: Install Samsung 860 EVO SSD in Laptop or Desktop Compute
How to Install Samsung 860 EVO Without Reinstalling OS (3 Steps)
- Step 1: Initialize Samsung 860 EVO SSD
- Step 2: Clone OS to Samsung 860 EVO SSD
- Step 3: Install Samsung 860 EVO SSD in Laptop or Desktop Computer
How to Install Samsung 860 EVO Without Reinstalling OS (3 Steps)
There is no doubt that all data is stored on the hard drive. If you replaced hard drive with a new one, all data will be lost. So, if you want to install Samsung 860 EVO SSD without data loss or without reinstalling OS, just keep on your reading. We will show you the Samsung SSD 860 EVO installation Windows 10 with the step-by-step guide.
Step 1: Initialize Samsung 860 EVO SSD
In order to install Samsung 860 EVO SSD, you need to initialize it first. Thus, you can do that in Disk Management.
Now, here is the tutorial.
- Connect the Samsung 860 EVO SSD to your computer. You can connect the new Samsung 860 EVO SSD with the SATA cable and power line.
- Then start to initialize Samsung 860 EVO SSD.
- Press Windows key and R key together to open Run dialog.
- Type diskmgmt.msc in the box and click OK to open Disk Management. You can click here to know more ways to open Disk Management.
- Then the Initialize Disk window will pop up automatically. You can choose to initialize Samsung 860 EVO SSD to MBR or GPT. Then click OK to continue. Read the post MBR vs. GPT Guide: What’s The Difference and Which One Is Better to know more.

After initializing Samsung 860 EVO SSD, you can create new partitions on it.
Step 2: Clone OS to Samsung 860 EVO SSD
In order to install Samsung 860 EVO without reinstalling the operating system and without data loss, you can choose to clone OS and all files from the original hard drive to the new one. So, this section will show you how to clone OS to Samsung 860 EVO SSD.
In order to clone OS from HDD to SSD without data loss, you can utilize a user-friendly tool. Thus, the professional Windows backup software – MiniTool ShadowMaker is recommended. Its Clone Disk feature enables you to clone OS to Samsung 860 EVO SSD without data loss.
Besides the Disk Clone feature, MiniTool ShadowMaker is also able to back up files, folders, disks, partitions, and the operating system. It can also help to restore the operating system to an earlier date as long as the system image is created before.
So, with so many powerful and user-friendly features, you can try it to clone OS to new SSD before performing Samsung SSD 860 installation Windows 10.
Now, here is the tutorial.
1. Click the following button to get MiniTool ShadowMaker. Or you can choose to purchase an advanced edition.
MiniTool ShadowMaker TrialClick to Download100%Clean & Safe
2. Install it on your computer.
3. Click Keep Trial.
4. Click Connect in This Computer to enter its main interface.

5. After entering its main interface, go to the Tools page.
6. Then click Clone Disk to continue.

7. In the pop-up window, you need to choose the clone source. Click Source module to continue. Here, select the original hard drive as disk clone source and click Finish to continue.

8. Then click Destination module to select the target disk so as to save all files and the operating system. Here, you need to select the Samsung 860 EVO SSD as the target disk. Then click Finish.

9. Click OK.
10. After that, then the disk cloning process will begin. It will take some time and the total time depends on the number of files on your original hard disk. Please do not interrupt the process until it is finished.

When the disk cloning process is finished, you will receive a warning message which tells you that the source disk and the target disk have the same signature. Thus, you need to remove or disconnect either of them. In addition, if you want to boot the computer from the target disk, please change BIOS settings first.

When all steps are finished, you have successfully cloned OS to the Samsung 860 EVO SSD. And now, it is time to install Samsung 860 EVO SSD in laptop or in desktop computer.
MiniTool Partition Wizard FreeClick to Download100%Clean & Safe
Step 3: Install Samsung 860 EVO SSD in Laptop or Desktop Computer
Now that all data and the operating system have been migrated to the Samsung 860 EVO SSD, you can begin to install Samsung 860 EVO SSD in laptop or desktop computer. We will show you how to perform Samsung SSD 860 EVO installation Windows 10 respectively.
How to Install Samsung 860 EVO SSD in Laptop
First of all, we will walk you through how to install Samsung 860 EVO SSD in laptop.
Now, here is the tutorial.
- Shut down your laptop computer.
- To install Samsung 860 EVO SSD in laptop, you need to remove the original one first.
- Remove the battery and disconnect all external devices of the laptop computer.
- Then remove the HDD cover of the laptop.
- Remove the hard drive mount and pull out the original hard drive from the connectors carefully. To know more details of removing hard drive from laptop, you can read the post: 7 Steps: How to Remove Hard Drive from Laptop.
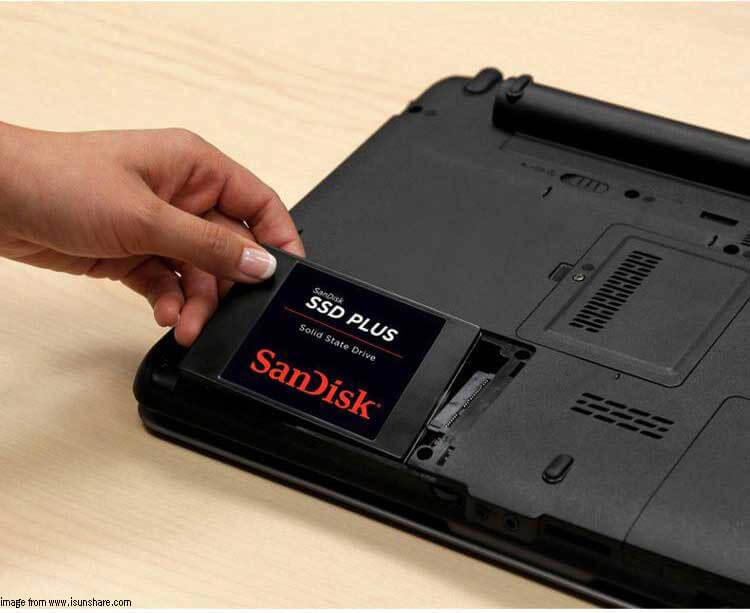
- After removing the original hard drive, insert Samsung 860 EVO SSD.
- Then screw the Samsung 860 EVO SSD so that secure it on the laptop.
- Next, recover the cover of the laptop and power on your computer.

After that, you can power on the laptop and check whether it can boot from the Samsung 860 EVO SSD. If not, you can read the post Top 5 Solutions to Fix SSD Won’t Boot Windows 10 – MiniTool and get the solutions and adjust your laptop to make it more suitable for the Samsung 860 EVO SSD.
The above steps show how to install Samsung 860 EVO in laptop. And in the next part, we will show you how to install Samsung in desktop computer.
How to Install Samsung 860 EVO in Desktop Computer
Installing Samsung 860 EVO SSD in desktop computer is more complicated than installing SSD in laptop. But getting the case off and accessing the drive is typically a lot easier than on most laptops.
To install Samsung 860 EVO SSD in desktop computer, you need to prepare a screwdriver and a SATA cable. If you are completely replacing the original drive, you can use the SATA cable that’s already in place. But if not, you need an adapter cable.
Here, we will show you how to install Samsung 860 EVO SSD in desktop computer.
1. Power down your computer and disconnect all cables.
2. Remove the front cover of the chassis through unscrewing the fasteners, and then nudge the cover to the side.
3. If you are using a conventional desktop computer, you will see the motherboard with the boxy power supply either at the top or at the bottom of the case. You will see the hard drive mounted towards the front of the case.
4. Remove all cables from the hard drive. Some cables have a little tab locking mechanism you’ll have to squeeze first.
5. Unscrew the hard drive and take it off from the hard drive bracket.
6. Then insert the Samsung 860 EVO SSD in the place of old one and slide it into the place on the case, then secure it.
7. Next, plug the cables into the new Samsung 860 EVO SSD, with one end into the hard drive and the other end into the slot built in the chassis.

8. After that, remount the cover of the chassis.
When all steps are finished, power on your desktop computer and check whether it can boot successfully. These are all steps of installing Samsung 860 EVO SSD in desktop computer.
Related article: How to Install a Second Hard Drive in Your Laptop and Desktop PC
Through these steps, you can install Samsung 860 EVO SSD in laptop or desktop computer without reinstalling the operating system and losing data.
Bottom Line
In conclusion, this post introduced what the Samsung 860 EVO SSD is and how to install Samsung 860 EVO without reinstalling OS.
If you want to perform Samsung SSD 860 EVO installation Windows 10 without data loss, this post is helpful and you can try these 3 steps.
If you have any problem with MiniTool ShadowMaker, please feel free to contact us via the email [email protected] and we will reply to you as soon as possible.
How to Install Samsung 860 EVO FAQ
- Unscrew and remove the sides of your computer’s case.
- Remove the original hard drive.
- Place the new SSD into its mount bracket and screw it.
- Connect the cables to the SSD and the other end to the SATA port.
- Recover the cover of the computer.
- Then power on the computer.
